
Easy Healthy Cheesecake Recipe: Indulge Without Guilt
Welcome to my kitchen! Today, I’m sharing my healthy cheesecake recipe, a dessert that’s always a hit at gatherings. I first tried making a lighter version of cheesecake a few years ago when I was looking for ways to enjoy my favorite desserts without the guilt. After experimenting with Greek yogurt and natural sweeteners, I created this incredible low calorie cheesecake that tastes just as indulgent as the traditional version.
This recipe is perfect for anyone who loves easy cheesecake recipes and wants something delicious, nutritious, and fun to bake. Whether you’re hosting a birthday party or just craving something sweet, this guilt-free dessert will become your new go-to. Let’s dive in and see why this healthy cheesecake is a must-try!
Table of Contents
Quick Recipe Facts
Prep Time: 15 minutes
Cook Time: 25 minutes
Total Time: 4 hours 40 minutes (including cooling and chilling)
Servings: 8-10 slices
Difficulty: Easy
Calories: ~250 per serving
This recipe is surprisingly quick and easy – perfect for busy afternoons when you want a homemade dessert without the fuss!
Ingredients
For this healthy cheesecake, you’ll need the following ingredients. You can swap cottage cheese for part of the cream cheese for an even lighter low calorie cheesecake version. Greek yogurt adds tanginess and protein, making your cheesecake both delicious and nutritious.
For the Crust:
- 1½ cups graham cracker crumbs (use gluten-free if needed)
- 3 tablespoons melted butter or coconut oil
- 2 tablespoons natural sweetener (honey or maple syrup)
For the Filling:
- 16 oz reduced-fat cream cheese, softened
- 1 cup plain Greek yogurt
- ½ cup cottage cheese (blended until smooth)
- ⅓ cup natural sweetener (honey, maple syrup, or erythritol)
- 3 large eggs, room temperature
- 2 teaspoons vanilla extract
- 1 tablespoon lemon juice
- 2 tablespoons all-purpose flour or almond flour
Optional Toppings:
- Fresh berries (strawberries, blueberries, raspberries)
- Sugar-free whipped cream
- Drizzle of honey
Instructions
Step 1: Prepare Your Oven and Pan
Preheat your oven to 325°F (162°C) — this helps your healthy cheesecake bake evenly without cracking. Grease a 9-inch springform pan and line the bottom with parchment paper for easy removal.
Step 2: Make the Crust
In a medium bowl, combine graham cracker crumbs, melted butter, and sweetener. Mix until the texture resembles wet sand. Press the mixture firmly into the bottom of your prepared pan. Bake at 325°F for 8-10 minutes until lightly golden. Remove and let cool while you prepare the filling.
Step 3: Blend the Cottage Cheese
If using cottage cheese, blend it in a food processor or high-powered blender until completely smooth with no lumps. This creates a creamy texture without extra calories.
Step 4: Mix the Filling
In a large mixing bowl, beat the softened cream cheese with an electric mixer on medium speed until fluffy and smooth, about 2 minutes. For a soft healthy cheesecake, don’t overbeat once you add the other ingredients! Add Greek yogurt and blended cottage cheese, mixing until just combined.
Step 5: Add Sweetener and Flavorings
Mix in your natural sweetener, vanilla extract, and lemon juice. The lemon brightens the flavor beautifully. Beat on low speed until smooth.
Step 6: Incorporate Eggs
Add eggs one at a time, mixing on low speed after each addition until just incorporated. Overmixing can cause cracks, so be gentle here. Fold in the flour with a rubber spatula until no streaks remain.
Step 7: Pour and Prepare for Baking
Pour the filling over the cooled crust and smooth the top with a spatula. Tap the pan gently on the counter a few times to release air bubbles. Place the springform pan inside a larger roasting pan and fill the outer pan with about 1 inch of hot water to create a water bath.
Step 8: Bake
Carefully transfer to the oven and bake for 50-60 minutes. The edges should be set while the center still jiggles slightly when you gently shake the pan. Don’t overbake – this is key for a creamy texture!
Step 9: Cool Gradually
Turn off the oven and crack the door open. Let the cheesecake cool in the oven for 1 hour. This gradual cooling prevents cracks. Then remove from the oven and water bath, and let it cool to room temperature on a wire rack.
Step 10: Chill
Once cooled, cover the cheesecake with plastic wrap and refrigerate for at least 4 hours or overnight. This allows the flavors to develop and the texture to set perfectly.
Step 11: Serve
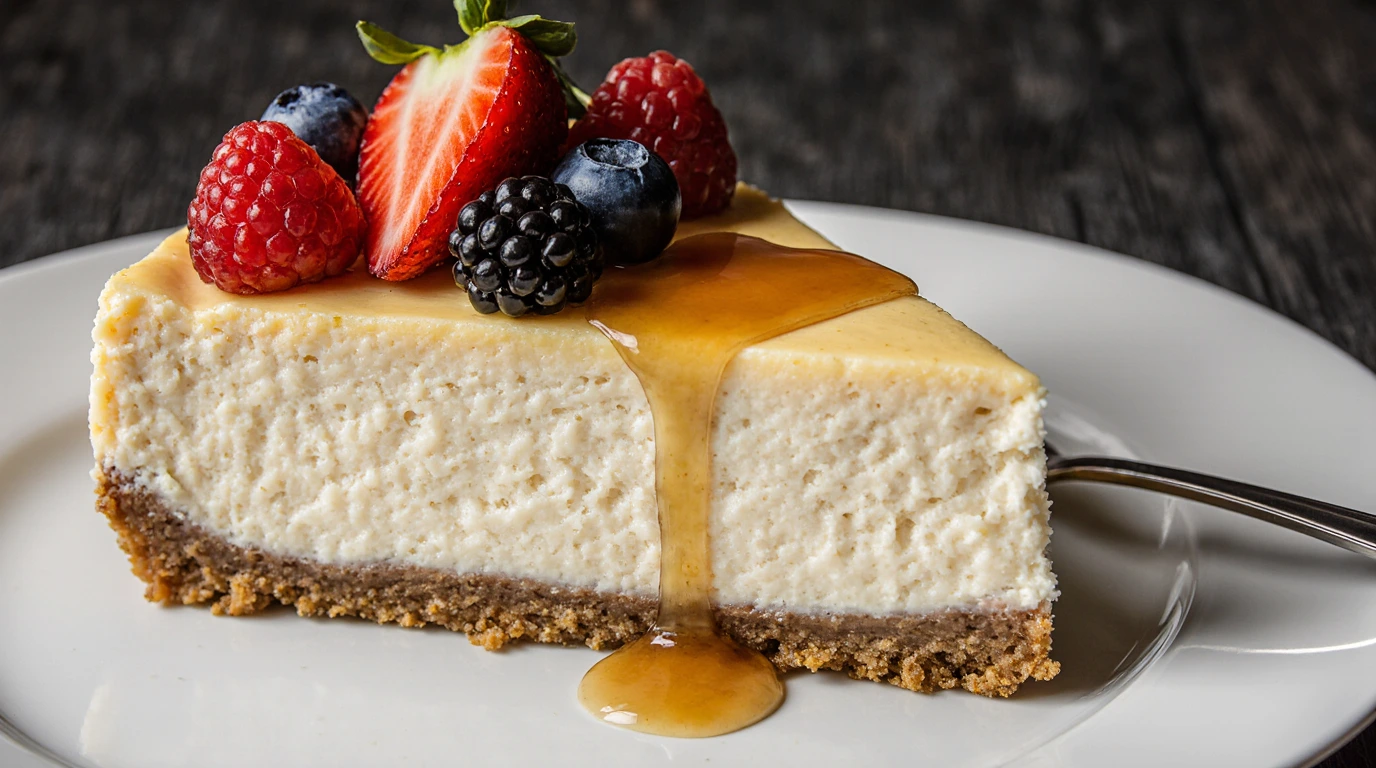
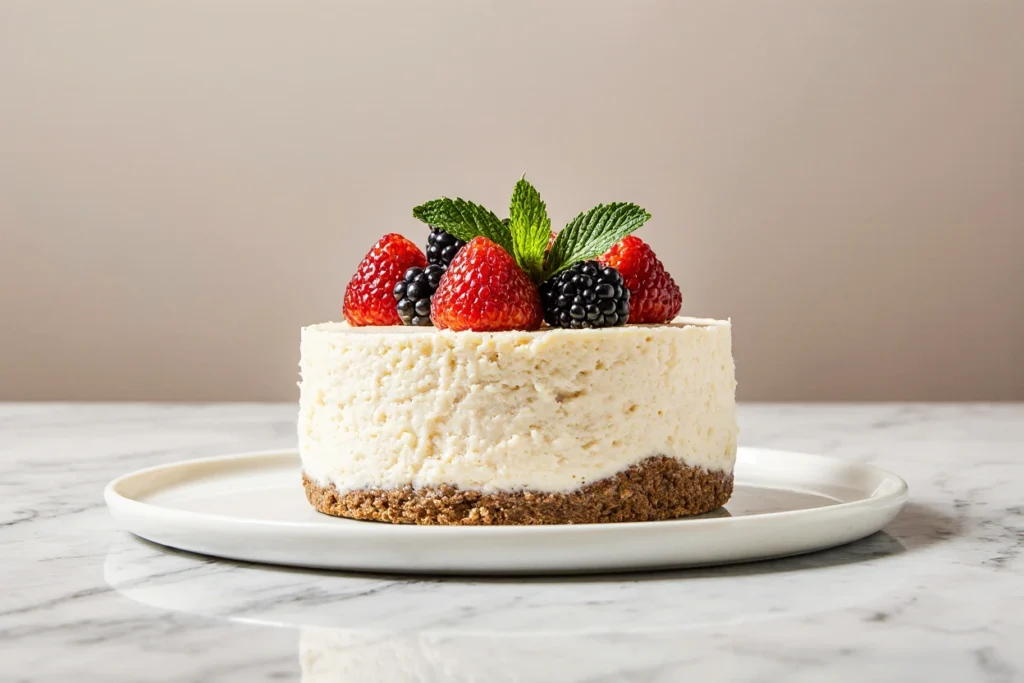
Run a knife around the edges before releasing the springform. Top with fresh berries or a dollop of whipped cream just before serving.

Pro Tips
Tip 1: Don’t skip the water bath – it creates a humid environment that prevents cracks and ensures even baking. If you’re worried about leaks, wrap the outside of your springform pan with aluminum foil.
Tip 2: Use room temperature ingredients for a fluffier healthy cheesecake. Cold cream cheese creates lumps, and cold eggs can cause the batter to seize up.
Tip 3: Swap regular sweetener with stevia or monk fruit sweetener for an even lower calorie option. Start with less since these are sweeter than sugar.
Tip 4: Grease your pan thoroughly and use parchment paper – trust me, it makes a huge difference when releasing your cheesecake! Nothing’s worse than a beautiful dessert that sticks to the pan.
Tip 5: For extra protein, add a scoop of unflavored or vanilla protein powder to the filling. It won’t affect the taste but adds nutritional value.
Serving Suggestions
Serve this easy cheesecake recipe at room temperature or slightly chilled for the best flavor. It pairs beautifully with hot coffee or herbal tea for an afternoon treat. Fresh seasonal fruit like sliced strawberries, raspberries, or blueberries adds natural sweetness and a pop of color.
For special occasions, add a dollop of sugar-free whipped cream or a small scoop of frozen yogurt. A light drizzle of honey or sugar-free chocolate sauce takes it to the next level. These serving ideas elevate your low calorie cheesecake experience and make every slice feel special.
Storage & Reheating
Store your cheesecake in an airtight container in the refrigerator for up to 5 days. The flavors actually develop more after a day or two! For longer storage, wrap individual slices tightly in plastic wrap, then place in a freezer-safe container. Leftover healthy cheesecake stays moist and delicious when frozen for up to 2 months. To thaw, transfer slices to the refrigerator overnight – avoid thawing at room temperature for food safety. No reheating needed; this dessert is best enjoyed cold or at room temperature. The creamy texture holds up beautifully over several days.
Health & Nutrition Info
Each slice of this healthy cheesecake contains approximately 250 calories, significantly less than traditional versions that can exceed 500 calories per slice. By using Greek yogurt and cottage cheese, you’re getting about 12-15 grams of protein per serving.
The recipe can easily be made dairy-free by using dairy-free cream cheese and coconut yogurt. For a gluten-free option, substitute the graham cracker crust with almond flour or gluten-free crackers. Natural sweeteners keep blood sugar more stable than refined sugar.
You can reduce calories further by using only Greek yogurt and eliminating cream cheese entirely, though the texture will be lighter. This healthier low calorie cheesecake option is perfect for weekend treats when you want to indulge mindfully.
No-Bake Variation for Summer Days
When the weather’s too hot to turn on the oven, try this refreshing no-bake version! Mix 16 oz softened cream cheese with 1 cup Greek yogurt, ½ cup natural sweetener, 2 teaspoons vanilla extract, and 1 tablespoon lemon juice until smooth and creamy. In a separate bowl, whip 1 cup heavy cream until stiff peaks form, then gently fold it into the cream cheese mixture. Pour into a pre-made graham cracker crust (no baking needed) and refrigerate for at least 6 hours or overnight until firm.
This no-bake healthy cheesecake is incredibly light and refreshing – perfect for summer barbecues and picnics. Top with fresh berries just before serving for a beautiful presentation. The best part? No oven means no heating up your kitchen, and you still get that amazing easy cheesecake recipe everyone loves!
Conclusion
Try this healthy cheesecake recipe and let me know how it turned out! This guilt-free dessert proves you don’t have to sacrifice flavor to eat better. With protein-packed Greek yogurt, natural sweeteners, and a fraction of the calories, you can enjoy creamy, delicious cheesecake any time. Whether you bake it traditionally or whip up the no-bake version, this low calorie cheesecake is guaranteed to satisfy your sweet tooth.
I’d love to hear about your experience – did you try any fun variations? What toppings did you use? Leave a comment below, rate the recipe, and share photos on social media so others can discover this amazing dessert too! Don’t forget to check out my other healthy dessert recipes like protein brownies and Greek yogurt parfaits for more guilt-free treats.
FAQ
Can I freeze this healthy cheesecake?
Yes, your healthy cheesecake can be frozen for up to 2 months! Wrap it tightly in plastic wrap, then aluminum foil to prevent freezer burn. Thaw overnight in the refrigerator before serving. Individual slices freeze beautifully too.
What if I don’t have Greek yogurt?
You can substitute with plain regular yogurt, though it will be slightly thinner. Sour cream also works well and creates an extra tangy flavor. For a dairy-free option, use coconut yogurt.
Can I make this easy cheesecake recipe ahead of time?
Absolutely! In fact, this dessert tastes even better the next day after the flavors have melded. Make it up to 3 days in advance and store covered in the refrigerator until you’re ready to serve.
How can I adjust the sweetness?
Start with less sweetener and taste the filling before baking (just avoid tasting raw eggs). You can always add more honey or your preferred sweetener. Remember that cheesecake tastes less sweet after chilling, so account for that.
Why did my cheesecake crack?
Cracks usually happen from temperature shock or overbaking. Use a water bath, don’t open the oven door during baking, and let it cool gradually in the turned-off oven. Following these steps should give you a smooth, crack-free top!
Can I make this gluten-free?
Yes! Simply use gluten-free graham crackers or make an almond flour crust. The filling is naturally gluten-free if you use almond flour instead of regular flour, making this a perfect gluten-free dessert option.
Have You Tried Our Recipe?
There are no reviews yet. Be the first one to write one.