
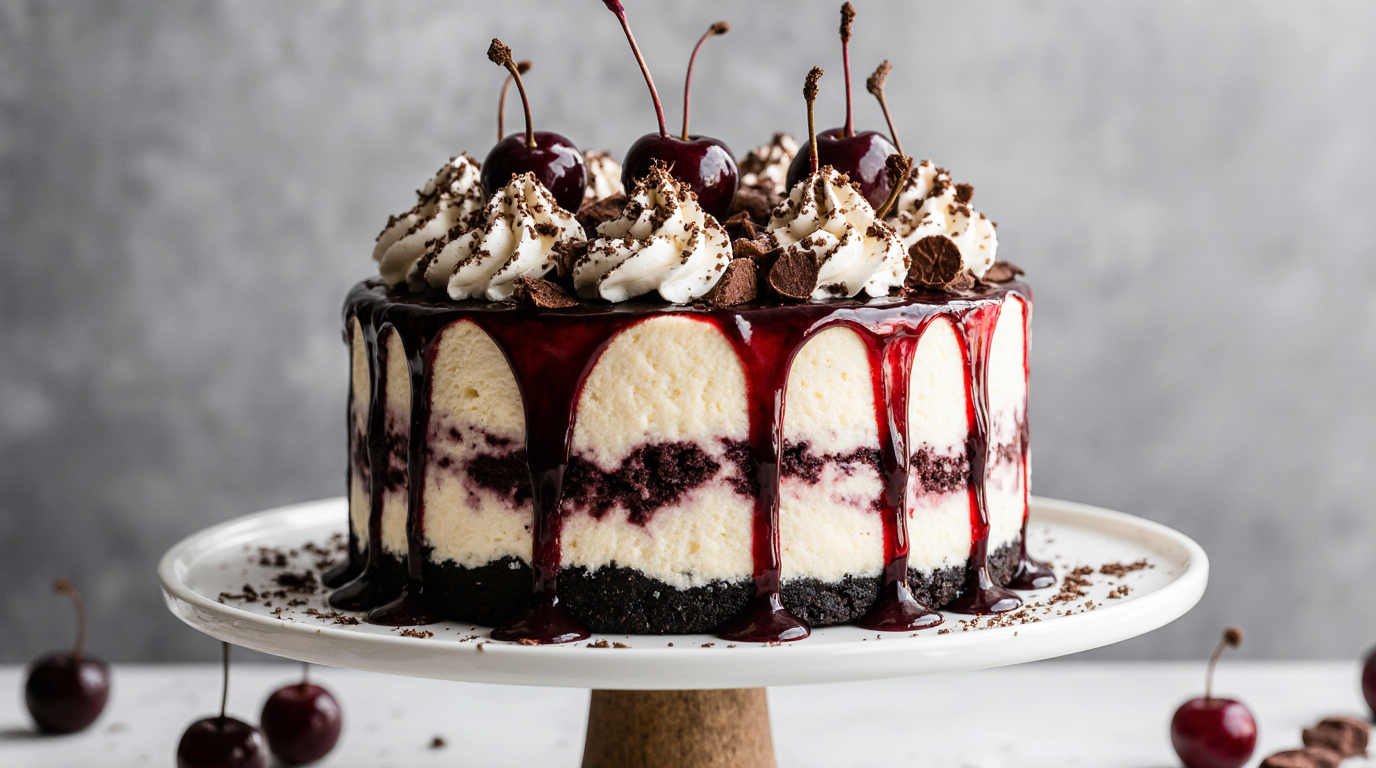
Easy Creamy Black Forest Cheesecake – A Stunning Dessert Anyone Can Make
Welcome to my kitchen! Today, I’m sharing my Creamy Black Forest Cheesecake, a dessert that’s always a showstopper at family gatherings. I first tried black forest cheesecake at a friend’s wedding reception years ago, and I was absolutely mesmerized by how the tangy cream cheese balanced perfectly with rich chocolate and tart cherries. That moment sparked my obsession with recreating it at home, and after dozens of trials (my family didn’t complain!), I finally perfected this recipe.
This homemade dessert combines everything we love about classic Black Forest cake with the luxurious creaminess of New York-style cheesecake. The chocolate cookie crust provides a satisfying crunch, while layers of velvety cheesecake and cherry compote create an irresistible flavor combination. What makes this easy Creamy Black Forest Cheesecake recipe so special is that it looks incredibly impressive but doesn’t require advanced baking skills.
Whether you’re planning a special celebration or just want to treat yourself to something extraordinary, this recipe delivers every single time. The best part? You can make it a day ahead, which means less stress and more time to enjoy with your loved ones. Let’s dive in and discover why this stunning dessert deserves a permanent spot in your recipe collection!
Table of Contents
Quick Recipe Facts
Prep Time: 30 minutes
Cook Time: 1 hour 15 minutes
Chill Time: 6 hours (or overnight)
Total Time: 7 hours 45 minutes
Servings: 12 slices
Difficulty: Intermediate
Calories: ~420 per slice
This recipe is surprisingly manageable once you break it down into steps – perfect for impressing guests without the stress!
Ingredients
For this Creamy Black Forest Cheesecake, you’ll need the following ingredients. I’ve organized everything by component to make your prep work easier. You can swap regular cream cheese for reduced-fat if you prefer, though I find full-fat creates that signature silky texture we’re after.
For the Chocolate Crust:
- 2 cups chocolate cookie crumbs (about 24 Oreos, filling removed)
- 5 tablespoons unsalted butter, melted
- 2 tablespoons granulated sugar
- Pinch of salt
For the Cheesecake Filling:
- 24 oz (three 8-oz packages) cream cheese, softened to room temperature
- 1 cup granulated sugar
- 3 large eggs, room temperature
- 1 cup sour cream, room temperature
- 2 teaspoons vanilla extract
- 3 tablespoons unsweetened cocoa powder
- 4 oz dark chocolate, melted and slightly cooled
- 1/4 cup heavy cream
For the Cherry Compote:
- 2 cups fresh or frozen dark sweet cherries, pitted
- 1/3 cup granulated sugar
- 2 tablespoons cornstarch
- 1/4 cup water
- 1 tablespoon lemon juice
- 1/2 teaspoon almond extract (optional, but highly recommended)
For the Topping:
- 1 cup heavy whipping cream
- 3 tablespoons powdered sugar
- 1/2 teaspoon vanilla extract
- Chocolate shavings or curls for garnish
- Extra cherries for decoration
Ingredient Notes: Brown sugar can replace granulated sugar in the crust for a deeper, molasses-like flavor. If you can’t find dark sweet cherries, regular sweet cherries work beautifully too. The almond extract in the cherry compote adds an authentic Black Forest touch that really elevates this homemade dessert.
Instructions
Step 1: Prepare Your Pan
Preheat your oven to 325°F – this moderate temperature helps your Creamy Black Forest Cheesecake bake evenly without cracking. Wrap the outside of a 9-inch springform pan with two layers of heavy-duty aluminum foil, covering the bottom and coming up the sides. This waterproofs your pan for the water bath we’ll use later.
Step 2: Make the Chocolate Crust
In a medium bowl, combine chocolate cookie crumbs, melted butter, sugar, and salt. Mix until the texture resembles wet sand – everything should be evenly moistened. Press this mixture firmly into the bottom of your prepared springform pan, using the bottom of a measuring cup to create an even, compact layer. Bake for 10 minutes, then set aside to cool while you prepare the filling.
Step 3: Prepare the Cheesecake Batter
In a large mixing bowl, beat the softened cream cheese with an electric mixer on medium speed for about 3 minutes until it’s completely smooth and fluffy with no lumps. Scrape down the sides of the bowl frequently – this makes a huge difference in texture. Add the sugar and beat for another 2 minutes until well incorporated.
Step 4: Add Eggs and Dairy
Add eggs one at a time, beating on low speed just until each egg is incorporated. Don’t overbeat at this stage – we want a dense, creamy texture, not a fluffy one. Mix in the sour cream and vanilla extract until just combined. For a soft black forest cheesecake texture, the key is gentle mixing once the eggs go in.
Step 5: Create the Chocolate Swirl
Remove about 1 cup of the plain cheesecake batter and set aside. To the remaining batter, add the cocoa powder, melted dark chocolate, and heavy cream. Mix on low speed until the color is uniform and no streaks remain. The chocolate should be completely cooled but still pourable when you add it.
Step 6: Layer the Batter
Pour the chocolate cheesecake batter over the cooled crust, spreading it evenly. Spoon the reserved plain batter on top in dollops, then use a butter knife to create swirls by dragging it through both layers in a figure-eight motion. Don’t overmix – you want distinct marbled patterns.
Step 7: Bake in a Water Bath
Place your foil-wrapped springform pan in a larger roasting pan. Carefully pour hot water into the roasting pan until it reaches about halfway up the sides of the springform pan. This water bath creates gentle, even heat that prevents cracks and ensures a creamy center. Bake for 1 hour and 15 minutes. The edges should be set, but the center will still jiggle slightly when gently shaken.
Step 8: Cool Gradually
Turn off the oven and crack the door open about 4 inches. Let the cheesecake cool in the oven for 1 hour – this gradual temperature change prevents cracking. After an hour, remove from the water bath and let cool completely on a wire rack. Once at room temperature, cover with plastic wrap and refrigerate for at least 6 hours or overnight.
Step 9: Make the Cherry Compote
While the cheesecake chills, prepare your cherry topping. In a medium saucepan, combine cherries and sugar over medium heat. In a small bowl, whisk together cornstarch and water until smooth, then add to the cherries. Cook, stirring frequently, for 8-10 minutes until the mixture thickens and becomes glossy. Remove from heat and stir in lemon juice and almond extract. Let cool completely, then refrigerate until ready to use.
Step 10: Whip the Cream
When you’re ready to serve, beat heavy cream, powdered sugar, and vanilla extract with an electric mixer on high speed until stiff peaks form. This takes about 3-4 minutes. Be careful not to overbeat, or you’ll end up with butter!
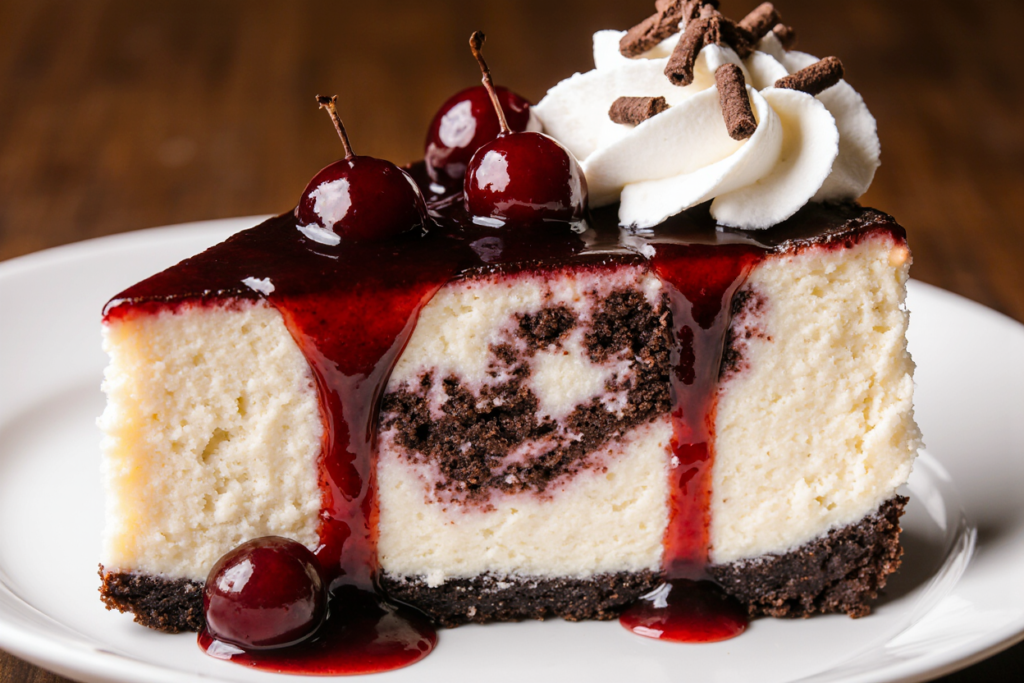
Step 11: Assemble and Serve
Run a thin knife around the edge of the cheesecake, then release the springform pan sides. Transfer to a serving plate. Spread or pipe the whipped cream around the edges, leaving the center clear for the cherry compote. Spoon the cherry mixture over the center, allowing some to cascade down the sides naturally. Garnish with chocolate shavings and a few whole cherries. Slice with a hot, clean knife for the prettiest pieces.

Pro Tips
Tip 1: Room temperature ingredients are absolutely crucial for this recipe. Take your cream cheese, eggs, and sour cream out of the fridge at least 2 hours before baking. Cold ingredients create lumps and prevent proper incorporation, which affects the final texture of your easy Creamy Black Forest Cheesecake recipe.
Tip 2: Don’t skip the water bath! I know it seems like an extra hassle, but this technique is what gives cheesecake that signature creamy, crack-free top. The steam creates humidity in the oven, and the gentle heat prevents the edges from overcooking while the center sets.
Tip 3: Use a springform pan with a tight seal. If your pan is older or the seal seems loose, double or even triple-wrap with foil. Water seeping into your crust is heartbreaking, so take the extra minute to protect it properly.
Tip 4: When checking for doneness, look for a slight wobble in the center (about a 2-inch circle). The cheesecake will continue to set as it cools. Overbaking creates a dry, crumbly texture instead of that luxurious creaminess we’re after.
Tip 5: For the cleanest slices, wipe your knife clean with a hot, damp towel between each cut. This one simple trick makes your presentation look absolutely professional.
Tip 6: If you notice any cracks after cooling (it happens to everyone!), don’t stress. The whipped cream and cherry topping will cover them beautifully. That’s the beauty of this black forest cheesecake – the toppings are forgiving.
Serving Suggestions
This showstopper dessert is perfect for any special occasion. I love serving it at room temperature (take it out of the fridge about 30 minutes before serving) so the flavors really shine through. The slight chill remains, but the cheesecake becomes even creamier.
Pair each slice with a hot cup of freshly brewed coffee or espresso – the bitterness complements the sweet cherries and rich chocolate perfectly. For an elegant dinner party, serve alongside a small glass of cherry liqueur or Kirsch, the traditional spirit used in authentic Black Forest cake.
Want to make it extra indulgent? Add a small scoop of vanilla bean ice cream on the side. The contrast between cold ice cream and creamy cheesecake creates an amazing textural experience. Fresh mint leaves make a beautiful garnish that adds a pop of color and a subtle freshness that cuts through the richness.
For holiday gatherings, I sometimes drizzle extra chocolate sauce over individual slices right before serving. These serving ideas elevate your homemade dessert from impressive to truly unforgettable.
Storage & Reheating
Store your Creamy Black Forest Cheesecake covered in the refrigerator for up to 5 days. I use a cake dome or cover the entire cheesecake loosely with plastic wrap, being careful not to let it touch the whipped cream topping. If you’ve already assembled the dessert with toppings, it’s best enjoyed within 2-3 days for optimal freshness.
For longer storage, you can freeze the plain cheesecake (without toppings) for up to 2 months. Wrap it tightly in plastic wrap, then again in aluminum foil. Thaw overnight in the refrigerator before adding the cherry compote and whipped cream. The texture remains remarkably creamy after freezing.
I don’t recommend reheating this cheesecake – it’s meant to be enjoyed chilled or at room temperature. Leftover Creamy Black Forest Cheesecake actually tastes even better the next day as the flavors meld together and deepen. The cherry compote can be stored separately in an airtight container in the fridge for up to a week, making it easy to assemble individual slices as needed.
Health & Nutrition Info
While this is definitely an indulgent treat, there are ways to lighten it up if desired. You can substitute reduced-fat cream cheese for half of the full-fat version, though the texture will be slightly less rich. Greek yogurt can replace some of the sour cream for added protein and a tangy flavor that actually complements the cherries beautifully.
One generous slice contains approximately 420 calories, 28g of fat, 38g of carbohydrates, and 7g of protein. The cherries provide vitamin C and antioxidants, while the dark chocolate offers flavonoids that support heart health. Of course, this is a special occasion dessert, not an everyday treat!
For a gluten-free version, use gluten-free chocolate cookies for the crust. The rest of the recipe is naturally gluten-free. If you’re watching sugar intake, you can reduce the sugar in the filling by about 1/4 cup, though the sweetness will be noticeably less pronounced. This healthier homemade dessert option is perfect for weekend celebrations when you want something special without going completely overboard.
Conclusion
There you have it – my tried-and-true recipe for the most decadent Creamy Black Forest Cheesecake you’ll ever make! This dessert never fails to impress, whether I’m serving it at a holiday dinner or bringing it to a potluck. The combination of creamy chocolate cheesecake, tart cherry compote, and fluffy whipped cream creates layers of flavor and texture that keep everyone coming back for seconds.
I hope you feel confident giving this recipe a try. Yes, it takes some time with the chilling, but the actual hands-on work is totally manageable, even if you’re not an experienced baker. Trust the process, follow the steps, and you’ll create something truly special.
Try this Creamy Black Forest Cheesecake and let me know how it turned out! I’d love to see your creations – tag me on social media or leave a comment below with your results. Did you make any fun substitutions? How did your family react? Your feedback helps me create even better recipes to share.
If you loved this recipe, check out my other cheesecake variations, including Salted Caramel Pecan Cheesecake and Lemon Blueberry Swirl Cheesecake. Don’t forget to rate this recipe and share it with friends who appreciate a truly spectacular homemade dessert!
FAQ
Can I freeze this recipe?
Yes! Your Creamy Black Forest Cheesecake freezes beautifully for up to 2 months. Freeze it without the whipped cream and cherry topping – add those fresh after thawing. Wrap the cheesecake tightly in plastic wrap, then aluminum foil. Thaw overnight in the refrigerator, and it’ll taste just as creamy as the day you made it.
What if I don’t have a springform pan?
While a springform pan makes removing the cheesecake much easier, you can use a regular 9-inch cake pan lined with parchment paper, leaving extra hanging over the sides to lift it out. Just be aware that it’s trickier to get clean edges this way. I highly recommend investing in a springform pan if you plan to make cheesecakes regularly – they’re worth every penny.
Can I make it ahead of time?
Absolutely! In fact, cheesecake tastes better after resting. Make the cheesecake base up to 3 days in advance and store it covered in the fridge. Prepare the cherry compote up to a week ahead. Add the whipped cream and assemble just a few hours before serving for the freshest presentation.
How can I adjust the sweetness?
The sugar levels in this recipe are carefully balanced, but you can reduce the sugar in the filling by up to 1/4 cup if you prefer a less sweet dessert. The cherry compote can also be adjusted – use less sugar if your cherries are particularly sweet, or add a bit more if they’re quite tart. Taste as you go and adjust to your preference.
Why did my cheesecake crack?
Cracks usually happen from rapid temperature changes or overbaking. Make sure to use the water bath method, cool the cheesecake gradually in the oven, and don’t overbake – the center should still wobble slightly when done. The good news? Any cracks will be completely hidden under your gorgeous cherry and cream topping!
Can I use cherry pie filling instead of making my own compote?
While homemade compote tastes significantly better and allows you to control the sweetness and texture, you can use a high-quality cherry pie filling in a pinch. Choose one with large cherry pieces and not too much gloppy gel. You’ll need about 1.5 cups total. The homemade version only takes 15 minutes and really does elevate this black forest cheesecake to another level, so I encourage you to try it at least once!
Have You Tried Our Recipe?
There are no reviews yet. Be the first one to write one.