
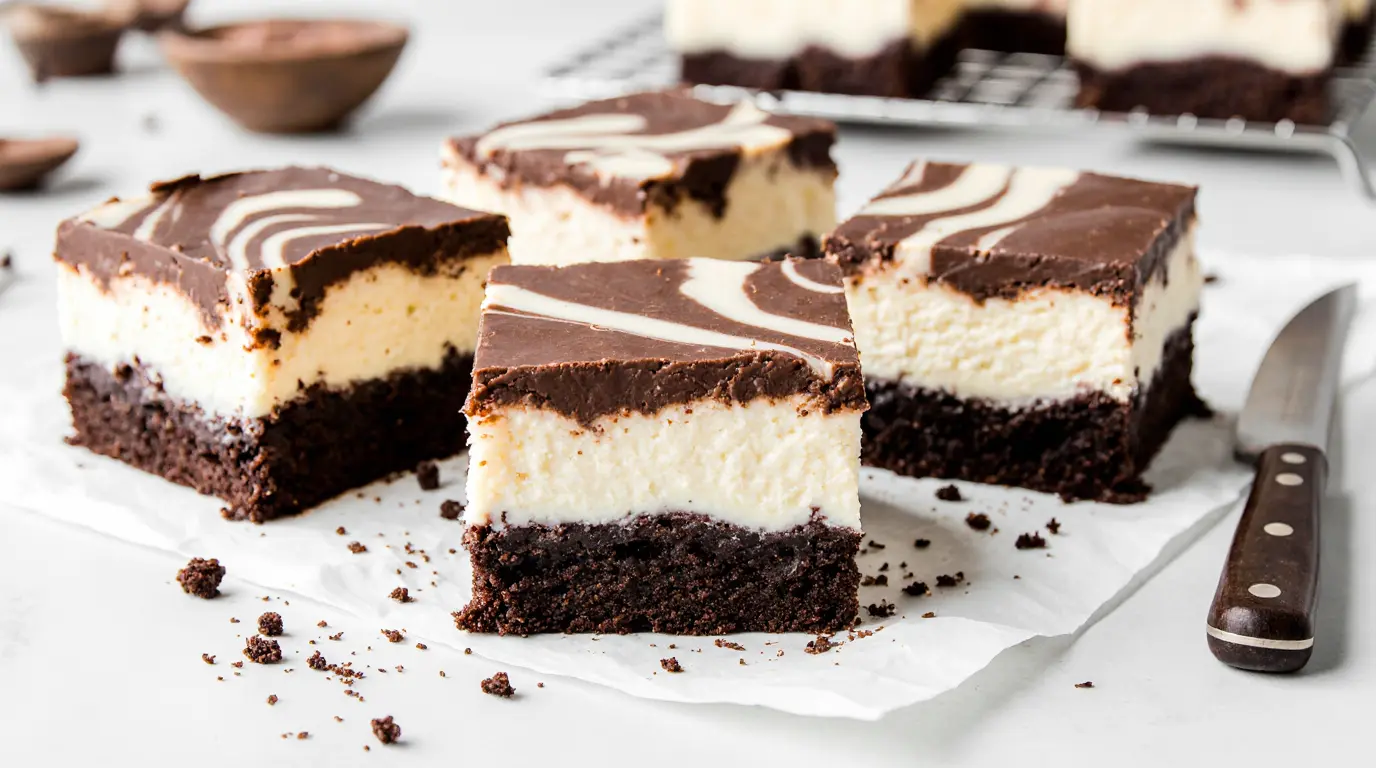
Ultimate Cheesecake Brownies: A Dessert Lover’s Dream
Have you ever experienced the magic that happens when two beloved desserts become one? My Ultimate Cheesecake Brownies bring together everything wonderful about dense, chocolaty brownies and velvety cheesecake in a single spectacular treat. I discovered this combination during a baking experiment on a rainy Sunday afternoon, and it immediately became my signature dessert for family celebrations. This recipe delivers the perfect marriage of tangy cream cheese and deep chocolate flavors, creating something truly unforgettable. Whether you’re planning a special gathering or simply craving an extraordinary homemade treat, these marbled beauties will absolutely steal the show. Let’s explore why this dessert masterpiece deserves a permanent spot in your baking collection!
Table of Contents
Quick Recipe Facts
- Prep Time: 50 minutes
- Cook Time: 30-35 minutes
- Total Time: 80-85 minutes
- Servings: 16-24 brownies
- Difficulty: Medium
- Calories: Approximately 310 calories per serving
This recipe creates an impressive bakery-quality dessert that’s surprisingly manageable – ideal for weekend baking adventures!
Ingredients
For this Ultimate Cheesecake Brownies recipe, you’ll need simple pantry staples that transform into pure magic. Feel free to substitute coconut oil for butter if you prefer a different flavor profile. When you use quality cocoa and real butter, the richness becomes absolutely divine.
For the Chocolate Brownie Layer:
- ½ cup unsalted butter (1 stick)
- ⅔ cup quality semisweet chocolate chips
- 1 cup white granulated sugar
- 2 large eggs
- 1 teaspoon pure vanilla extract
- 1 cup standard all-purpose flour
- ⅓ cup Dutch-process cocoa powder
- ¼ teaspoon fine sea salt
For the Cream Cheese Swirl:
- 32 ounces (4 blocks) full-fat cream cheese
- 1 cup white granulated sugar
- 1 large egg
- 1 teaspoon pure vanilla extract
Premium chocolate brands like Ghirardelli or Guittard make a noticeable difference in the final result. This ingredient combination ensures both layers complement each other beautifully.
Instructions
Step 1: Set your oven temperature to 350°F and allow it to fully preheat — proper oven temperature ensures your brownies bake uniformly throughout.
Step 2: Prepare your chocolate brownie mixture and cream cheese filling in two separate mixing bowls. Combine wet and dry ingredients according to standard brownie-making techniques.
Step 3: Pour most of your chocolate batter into your prepared baking pan, but reserve approximately one-third for the final layer.
Step 4: Carefully spread your cream cheese mixture over the chocolate base in an even layer.
Step 5: Dollop the remaining chocolate batter on top, then create beautiful swirls using a butter knife or wooden skewer. Gently drag through the layers — fewer swirls create bolder patterns, while more swirling blends the layers together.
Step 6: Transfer to your preheated oven and bake for 30-35 minutes. Test for doneness by inserting a toothpick near the center — it should emerge with just a few moist crumbs attached.
Step 7: Allow your pan to cool completely on a wire rack before slicing. Patience here guarantees clean cuts and perfect texture.
Pro Tips
Tip 1: Watch your baking time carefully — removing them at just the right moment prevents dry, overcooked edges.
Tip 2: Bring all dairy ingredients to room temperature before starting. This simple step creates smoother batters and prevents lumps in your cream cheese layer.
Tip 3: Line your baking dish with parchment paper, leaving an overhang on two sides. This creates easy “handles” for lifting out your brownies.
Tip 4: When working with glass bakeware, reduce your oven temperature to 325°F. Glass conducts heat differently and can cause over-browning.
Tip 5: Mix one tablespoon of near-boiling water into your reserved chocolate batter if it’s become too thick. This creates better flow for swirling.
Tip 6: Begin testing for doneness around the 20-minute mark. The ideal texture shows firm edges with a slightly soft center.
Tip 7: The secret to fudgy texture lies in your ratios — more fat from chocolate and butter compared to flour creates that sought-after dense consistency.
Serving Suggestions
Refrigerate your finished brownies for at least two hours before cutting. Cold brownies slice much cleaner and maintain their gorgeous layered appearance. For the neatest cuts, warm your knife under hot water, dry it thoroughly, and wipe it clean between each slice.
- Add a scoop of premium vanilla bean ice cream alongside each portion
- Drizzle with melted chocolate or dust generously with confectioners’ sugar
- Crown each square with freshly whipped cream and toasted nuts
- Garnish with fresh strawberries or raspberries for color and flavor contrast
- Remember these are quite decadent, so smaller portions satisfy beautifully
Pair your brownies with freshly brewed coffee or cold milk for a classic combination. For adult gatherings, try serving alongside dessert wines like tawny port or sweet Moscato. An Irish coffee or spiked hot chocolate creates an extra-special finishing touch.
Storage & Reheating
Maintain freshness by storing your brownies in a sealed container inside your refrigerator for up to five days. The cream cheese layer requires refrigeration to stay safe and delicious.
For extended storage, individually wrap pieces in plastic film, then place them inside freezer-safe bags. Properly frozen brownies last up to three months. Thaw overnight in your refrigerator before serving.
Refrigeration actually enhances the texture and flavor, allowing the layers to set perfectly while the tastes meld together.
Health & Nutrition Info
Want to lighten this indulgent recipe? Several simple substitutions can reduce calories while maintaining deliciousness. Consider using reduced-fat cream cheese (or Neufchatel) instead of the full-fat version. This modification cuts fat content significantly without sacrificing the creamy texture.
You can also decrease sweetness by using alternative sweeteners. Try pure maple syrup, raw honey, or date paste in place of some refined sugar. These natural options add complexity to the flavor profile.
- Choose reduced-fat cream cheese to lower the overall fat content
- Experiment with natural sweeteners like maple syrup or honey to reduce refined sugar
- Add whole wheat flour for additional fiber and nutritional value
- Skip high-calorie mix-ins like nuts to further decrease the calorie count
For added nutrition, replace half your all-purpose flour with whole wheat flour. This boosts fiber content and adds complex carbohydrates. You can even incorporate pureed black beans or mashed avocado into the chocolate layer — these additions increase nutrition while maintaining moisture.
Nutritional Information Per Serving: Approximately 5-6g protein | 5-6g fiber | 150-310 calories depending on portion size | Contains calcium, iron, and potassium
Conclusion
This Ultimate Cheesecake Brownies recipe represents the best of both worlds — rich chocolate decadence meets tangy cream cheese luxury. While the recipe requires some attention to detail, the results are absolutely worth the effort.
These brownies work beautifully for any occasion, from casual family dinners to elegant celebrations. The recipe is flexible enough to customize based on your preferences and dietary needs. Once you master the basic technique, it becomes a reliable go-to dessert that never fails to impress.
Ready to create dessert magic in your kitchen? Try this Ultimate Cheesecake Brownies recipe today and share your results! Drop a comment below with your experience, give it a star rating, or post your beautiful creations on social media. Be sure to explore our collection of related dessert recipes for even more baking inspiration!
FAQ
Can I freeze this recipe?
Absolutely! These brownies freeze beautifully for up to three months. Wrap each piece individually in plastic wrap, then store them together in a freezer-safe bag or container. For best results, thaw them slowly in your refrigerator overnight before enjoying.
What if I don’t have semisweet chocolate chips?
No problem — feel free to use whatever chocolate you have available. Dark chocolate creates a more intense flavor, while milk chocolate makes them sweeter. White chocolate chips offer an interesting twist. Quality matters more than variety, so choose the best chocolate your budget allows.
Can I make it ahead of time?
Definitely! In fact, these brownies taste even better after resting in the refrigerator for several hours or overnight. The flavors develop and the texture firms up perfectly. Store them in an airtight container in your fridge for up to five days.
How can I adjust sweetness?
Reduce the sugar quantity in both layers to suit your taste preferences. You can also substitute natural sweeteners like pure maple syrup, raw honey, or blended dates. Start by replacing one-third of the sugar and adjust from there based on your preference.
What are some creative flavor variations I can try?
The possibilities are endless! Fold fresh or frozen raspberries into the cream cheese layer for fruity brightness. Swirl in smooth peanut butter or salted caramel for different flavor dimensions. Add crushed sandwich cookies, fresh mint extract with a drop of green food coloring, or layer in extra chocolate chips throughout.
How do I avoid dry brownies?
The key is avoiding overbaking. Start checking at 20 minutes using the toothpick test. Perfect brownies show set edges but remain slightly soft in the middle. Using room-temperature ingredients and the correct fat-to-flour ratio also ensures moist, fudgy results.
What’s the best cream cheese to use?
Full-fat cream cheese (not the spreadable kind) works best for achieving that luxurious, creamy texture. Look for blocks of cream cheese rather than tubs. Always bring it to room temperature before mixing — this prevents lumps and creates silky-smooth results.
Have You Tried Our Recipe?
There are no reviews yet. Be the first one to write one.