
Delicious Cookie Monster Ice Cream Recipe: A Fun Blue Treat for All Ages
Welcome to my kitchen! Today, I’m sharing my cookie monster ice cream recipe, a dessert that’s always a crowd-pleaser and brings smiles to faces of all ages. I first tried this vibrant blue treat at a friend’s Sesame Street-themed birthday party, and it instantly became a favorite in my household. The combination of creamy vanilla ice cream, crunchy cookie pieces, and that signature bright blue color captured my heart—and my taste buds!
This recipe is perfect for anyone who loves easy homemade ice cream and wants something delicious, fun, and surprisingly simple to create. Whether you’re a die-hard Sesame Street fan or just someone who appreciates the magical pairing of cookies and ice cream, this dessert delivers pure joy in every spoonful.
Let’s dive in and discover why this cookie monster ice cream is a must-try for your next family gathering, birthday celebration, or simply when you’re craving something sweet and nostalgic!
Table of Contents
Quick Recipe Facts
Prep Time: 15 minutes
Freeze Time: 4-6 hours
Total Time: 4 hours 15 minutes
Servings: 8 generous scoops
Difficulty: Easy (beginner-friendly!)
Calories: Approximately 256 per serving
This recipe is surprisingly quick and easy to prepare – perfect for busy afternoons when you want a homemade treat without spending hours in the kitchen! Prep your ingredients for a smooth homemade cookie ice cream experience, and you’ll be amazed at how simple it is to create this bakery-quality dessert right at home.
Ingredients
For this cookie monster ice cream, you’ll need the following ingredients that come together to create magic. The beauty of this recipe is its simplicity—you don’t need fancy equipment or hard-to-find items. You can swap heavy whipping cream with coconut cream for a lighter dairy-free ice cream version if you prefer. The sweetened condensed milk adds incredible richness and sweetness that makes your cookie monster ice cream luxuriously creamy and irresistible. I’ve found that using gel food coloring works better than liquid versions because it gives you that perfect Cookie Monster blue without watering down your mixture.
Main Ice Cream Base:
- 2 cups heavy whipping cream (chilled for best results)
- 1 can (14 ounces) sweetened condensed milk
- 2 teaspoons pure vanilla extract (the real stuff makes a difference!)
- 1 tablespoon blue gel food coloring (adjust for desired shade)
Cookie Mix-Ins:
- 3/4 cup crumbled OREO cookies (about 8-10 cookies)
- 3/4 cup crumbled chocolate chip cookies (homemade or store-bought)
Ingredient Tips: For the best texture, make sure your heavy cream is very cold before whipping. Room temperature cream won’t whip properly and you’ll end up with a runny base. When it comes to the cookies, I love using a combination of OREOs and chocolate chip cookies because they provide different textures—the OREOs give you that classic chocolatey crunch while the chocolate chip cookies add buttery sweetness. Feel free to experiment with your favorite cookie varieties like Chips Ahoy, homemade sugar cookies, or even peanut butter cookies for a unique twist on this easy ice cream recipe.
Instructions
Creating this delightful frozen treat is easier than you might think. Follow these step-by-step instructions and you’ll have perfect cookie monster ice cream every single time. I’ve made this recipe countless times, and these tips come from real experience in my own kitchen.
Step 1: Prepare Your Workspace
Start by placing a large mixing bowl and your electric mixer beaters in the freezer for about 10 minutes. Chilled equipment helps the cream whip faster and hold its peaks better. Trust me on this—it’s a game-changer for achieving that perfect fluffy texture in your homemade ice cream.
Step 2: Whip the Cream
Pour your 2 cups of cold heavy whipping cream into the chilled bowl. Using an electric mixer on medium-high speed, beat the cream until stiff peaks form. This usually takes about 3-4 minutes. You’ll know it’s ready when you lift the beaters and the cream holds its shape without drooping. Don’t overbeat though, or you’ll end up with butter instead of whipped cream!
Step 3: Combine Sweet Base
In a separate bowl, mix together the sweetened condensed milk, vanilla extract, and blue gel food coloring. Stir gently until the color is evenly distributed and you have a beautiful bright blue mixture. This is where the magic happens—watching that plain white milk transform into Cookie Monster blue is always fun!
Step 4: Fold Ingredients Together
Gently fold the blue sweetened condensed milk mixture into your whipped cream. Use a rubber spatula and make broad, sweeping motions from the bottom of the bowl upward. The key word here is “gently”—you want to maintain all those lovely air bubbles you just whipped into the cream. This folding technique ensures your no-churn ice cream stays light and creamy rather than dense.
Step 5: Add Cookie Pieces
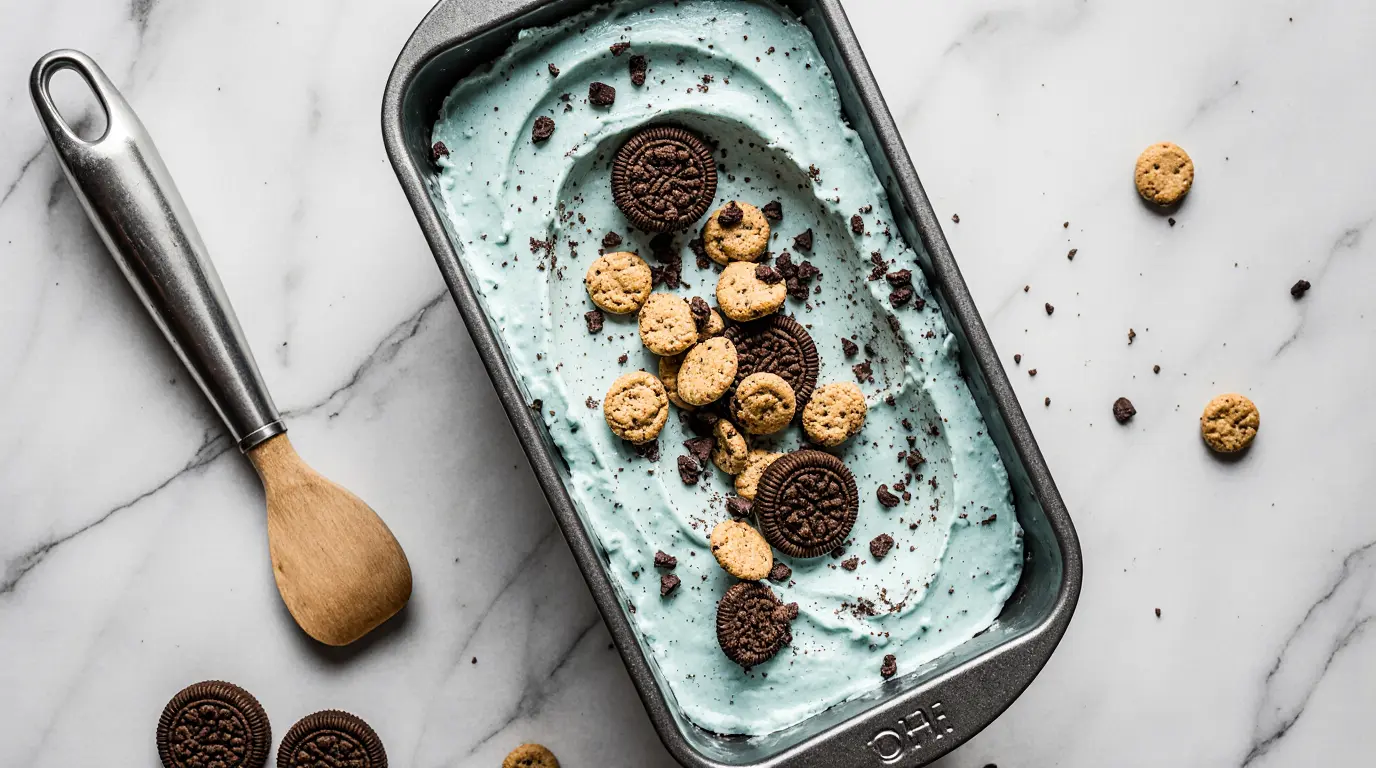
Once your mixture is mostly combined with just a few white streaks remaining, fold in your crumbled OREO cookies and chocolate chip cookies. Reserve a few cookie pieces to sprinkle on top before freezing—this creates a beautiful presentation and lets people know what delicious surprises await inside!
Step 6: Transfer and Freeze
Pour your ice cream mixture into a freezer-safe loaf pan or container (9×5 inches works perfectly). Smooth the top with your spatula and sprinkle those reserved cookie crumbles on top. Cover tightly with plastic wrap, pressing it directly onto the surface of the ice cream to prevent ice crystals from forming. Then cover with aluminum foil for extra protection.
Step 7: Freeze Until Set
Place your container in the freezer and let it set for at least 4-6 hours, or preferably overnight. I know waiting is the hardest part, but patience pays off with perfectly scoopable, creamy cookie monster ice cream!
Step 8: Serve and Enjoy
When you’re ready to serve, let the ice cream sit at room temperature for about 5 minutes to soften slightly. This makes scooping much easier and gives you those beautiful round scoops that look like they came from an ice cream parlor.
Pro Tips
Tip 1: Temperature Matters
Don’t skip the step of chilling your bowl and beaters before whipping cream. Cold equipment makes a significant difference in how quickly and well your cream whips. I learned this the hard way after wondering why my cream wasn’t thickening one hot summer day!
Tip 2: Choose Quality Vanilla
Use real vanilla extract rather than imitation vanilla for the best flavor. The difference is noticeable, and since vanilla is one of the main flavors in this cookie monster ice cream, you want it to shine through beautifully.
Tip 3: Color Customization
Start with less blue food coloring than you think you need—you can always add more, but you can’t take it away. Add it drop by drop until you achieve that perfect Cookie Monster shade. Gel food coloring is preferable because it’s more concentrated and won’t thin out your mixture like liquid coloring can.
Tip 4: Cookie Preparation
Crumble your cookies into various sizes—some fine crumbs and some chunkier pieces. This creates an interesting texture throughout your ice cream. I like to place cookies in a sealed plastic bag and gently crush them with a rolling pin for perfect control.
Tip 5: Prevent Ice Crystals
Press plastic wrap directly onto the surface of your ice cream before covering with a lid or foil. This prevents ice crystals from forming on top and keeps your homemade ice cream smooth and creamy even after several days in the freezer.
Tip 6: Make It Your Own
Don’t be afraid to experiment with different cookies! Snickerdoodles, peanut butter cookies, or even brownie chunks work wonderfully in this recipe. The base is versatile enough to handle any cookie you love.
Serving Suggestions
This cookie monster ice cream is incredibly versatile when it comes to serving options. Here are some of my favorite ways to present and enjoy this delightful frozen treat:
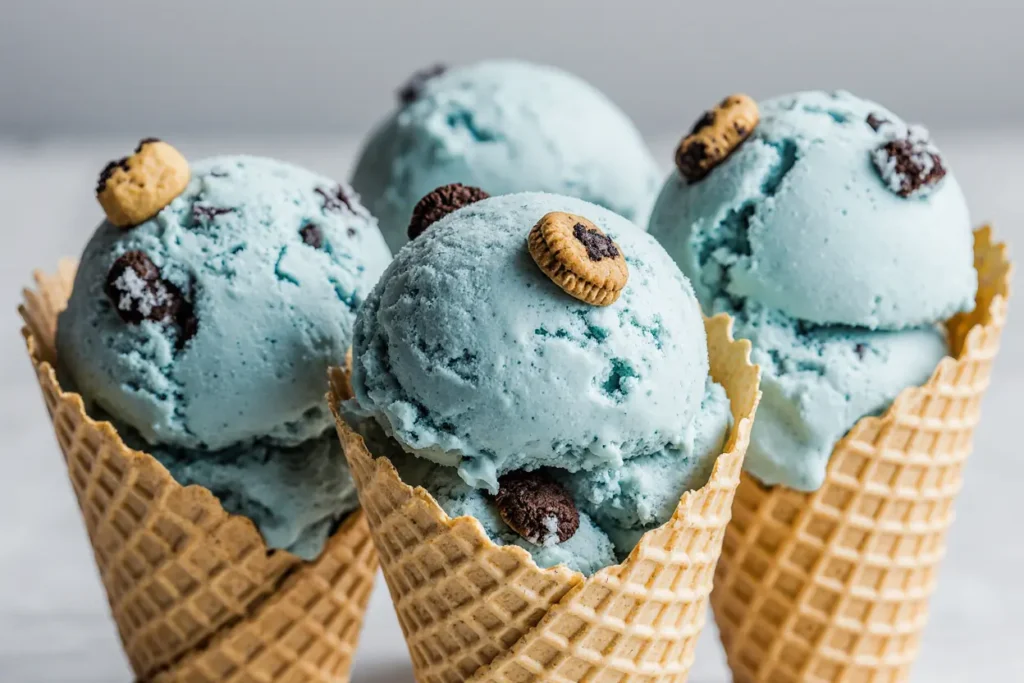
Serve it in classic waffle cones for a nostalgic ice cream parlor experience that kids and adults both adore. The contrast between the crunchy cone and creamy blue ice cream is absolutely perfect. For a fancier presentation, try serving scoops in pretty dessert bowls with a drizzle of hot fudge sauce and a mountain of whipped cream on top.
Create an impressive ice cream sundae bar for parties by setting out your cookie monster ice cream alongside various toppings like chocolate chips, sprinkles, crushed cookies, mini marshmallows, chocolate sauce, caramel drizzle, and maraschino cherries. Let your guests build their own creations—it’s interactive and fun!
Pair your ice cream with warm chocolate chip cookies for a cookies-and-cream experience that takes things to the next level. The temperature contrast between warm cookies and cold ice cream is absolutely heavenly. You can also serve it alongside a slice of birthday cake or brownies for an extra indulgent dessert.
For a refreshing summer treat, blend scoops of this ice cream with milk to create the most amazing cookie monster milkshake you’ve ever tasted. Add extra cookie crumbles on top and serve with a thick straw.
These serving ideas elevate your easy dessert recipe experience and turn a simple homemade ice cream into something truly special and memorable for any occasion.
Storage & Reheating
Proper storage ensures your cookie monster ice cream maintains its wonderful texture and flavor for as long as possible. Here’s everything you need to know about keeping your frozen treat at its best:
Store your ice cream in an airtight container in the freezer at a consistent temperature of 0°F (-18°C) or below. This homemade version will stay fresh and delicious for up to 2 weeks, though I doubt it’ll last that long in most households! The key is minimizing exposure to air and temperature fluctuations.
Always press plastic wrap or parchment paper directly onto the surface before sealing with the lid. This extra step prevents freezer burn and keeps ice crystals from forming on top. When you’re ready to enjoy another serving, remove the paper, scoop what you need, then replace the paper before covering again.
If your homemade cookie ice cream becomes too hard after several days in the freezer, simply let it sit at room temperature for 5-10 minutes before scooping. This softening period makes serving much easier and brings the ice cream to the perfect temperature for enjoying its full flavor and creamy texture.
Unlike store-bought ice cream, this homemade version doesn’t contain stabilizers or preservatives, so it’s best enjoyed within two weeks for optimal quality. The cookie pieces stay wonderfully crunchy throughout the storage period, maintaining that delightful textural contrast in every bite.
Leftover cookie monster ice cream stays moist and creamy when stored properly, ensuring every scoop tastes just as good as the first day you made it.

Health & Nutrition Info
While this cookie monster ice cream is definitely an indulgent treat, it’s helpful to understand its nutritional content so you can enjoy it as part of a balanced diet.
Each generous serving contains approximately 256 calories, with 14 grams of total fat (7 grams saturated fat), 30 grams of carbohydrates, and about 5 grams of protein. The sweetened condensed milk contributes most of the sugar content, while the heavy cream provides the rich, satisfying fat that makes this ice cream so luxuriously creamy.
This recipe can be easily adapted to fit various dietary preferences and restrictions. For a dairy-free version, substitute coconut cream for the heavy whipping cream and use dairy-free sweetened condensed milk—the result is still incredibly creamy and delicious. If you’re looking for a lower-sugar option, try using sugar-free sweetened condensed milk and sugar-free cookies to reduce the carbohydrate content significantly.
For those following a keto or low-carb lifestyle, you can create a modified version using sugar-free alternatives and low-carb cookie options. The basic technique remains the same, just with ingredient substitutions that fit your dietary needs.
One of the benefits of making homemade ice cream is knowing exactly what goes into it—no artificial stabilizers, mysterious preservatives, or unpronounceable ingredients. You control the quality and can make substitutions based on your family’s preferences and dietary requirements.
This healthier homemade dessert option is perfect for weekend treats, special celebrations, or whenever you want to enjoy something sweet without the guilt of unknown ingredients. Everything is made from scratch with real food, which makes it a better choice than many store-bought alternatives.
Conclusion & Call to Action
Congratulations! You now have everything you need to create the most amazing cookie monster ice cream right in your own kitchen. This recipe combines simplicity with spectacular results—creamy texture, vibrant color, and that irresistible combination of cookies and ice cream that everyone loves.
Whether you’re making this for a child’s birthday party, a Sesame Street-themed celebration, a summer BBQ, or just because you’re craving something fun and delicious, this easy ice cream recipe delivers every single time. The no-churn method means you don’t need expensive equipment, and the simple ingredient list means you can whip this up on a whim whenever the craving strikes.
I hope you and your family enjoy making and eating this cookie monster ice cream as much as my family does. It’s become one of our most requested desserts, and I love seeing the joy on everyone’s faces when they see that bright blue color and take that first delicious bite.
Try this cookie monster ice cream recipe and let me know how it turned out! I’d love to hear about your experience—did you try any fun variations? What cookies did you use? Leave a comment below sharing your results, rate this recipe with stars, and don’t forget to share photos on social media using the hashtag #CookieMonsterIceCream so I can see your beautiful creations!
Looking for more fun and easy dessert recipes? Check out our other homemade ice cream flavors, no-bake treats, and kid-friendly desserts that are perfect for any occasion. Happy scooping!
FAQ
Can I freeze this recipe for longer than 2 weeks?
Yes, your cookie monster ice cream can be frozen for up to 2 months if stored in an airtight container with proper wrapping. However, the texture and flavor are best within the first two weeks. After extended freezing, you might notice some ice crystal formation, but the ice cream will still be perfectly safe to eat and delicious.
What if I don’t have blue food coloring?
While the blue color is iconic for Cookie Monster theme, you can absolutely skip the food coloring altogether! Your ice cream will still taste exactly the same—it just won’t have that signature blue appearance. Alternatively, you could use a different color to match another theme or character your family loves.
Can I make this ahead of time for a party?
Absolutely! In fact, this is one of the best make-ahead desserts. Prepare your cookie monster ice cream 1-2 days before your event and keep it frozen until serving time. Just remember to let it soften at room temperature for about 5 minutes before scooping to make serving easier.
How can I adjust the sweetness level?
If you find traditional recipes too sweet, try using light sweetened condensed milk or reduce the amount slightly. You can also balance sweetness by using less-sweet cookies or adding a tiny pinch of salt to the mixture, which helps balance the overall flavor profile.
What’s the best way to get stiff peaks when whipping cream?
Make sure your cream, bowl, and beaters are all very cold. Start on medium speed and gradually increase to medium-high. Watch carefully—the cream will go from liquid to soft peaks to stiff peaks within just a few minutes. Stop as soon as you achieve stiff peaks to avoid overbeating.
Can I use an ice cream maker instead of the no-churn method?
Definitely! If you have an ice cream maker, you can use the same ingredients. Simply combine everything (except the cookies) and churn according to your machine’s instructions. Add the cookie pieces during the last few minutes of churning, then transfer to a container and freeze until firm.
What are the best cookies to use in this recipe?
The classic combination is OREO cookies and chocolate chip cookies, but feel free to experiment! Chocolate sandwich cookies, peanut butter cookies, snickerdoodles, sugar cookies, or even brownie chunks work wonderfully. Choose cookies that won’t become soggy easily and that complement the vanilla base flavor.
Why is my ice cream too hard to scoop straight from the freezer?
Homemade ice cream typically freezes harder than store-bought versions because it lacks commercial stabilizers and air incorporation from industrial machines. Simply let it sit at room temperature for 5-10 minutes before scooping. This softening period brings it to the perfect consistency for serving.
Have You Tried Our Recipe?
There are no reviews yet. Be the first one to write one.