
Easy & Adorable Cute Cookies Everyone Will Love
Welcome to my kitchen! Today, I’m sharing my favorite cute cookies recipe – decorated sugar cookies that are both adorable and absolutely irresistible. I first discovered the magic of these delightful treats during a holiday baking session with my grandmother, and they instantly became a family favorite. The smell of vanilla and butter filling the house, the joy of cutting out fun shapes, and the creative freedom of decorating each cookie made it an unforgettable experience.
This recipe is perfect for anyone who loves decorated cookies and wants something easy, delicious, and fun to bake. Whether you’re planning a birthday party, holiday celebration, or just want to brighten someone’s day, these cute cookies are guaranteed to bring smiles. From classic sugar cookie dough to royal icing decorations, I’ll walk you through every step to create bakery-quality treats right in your own kitchen.
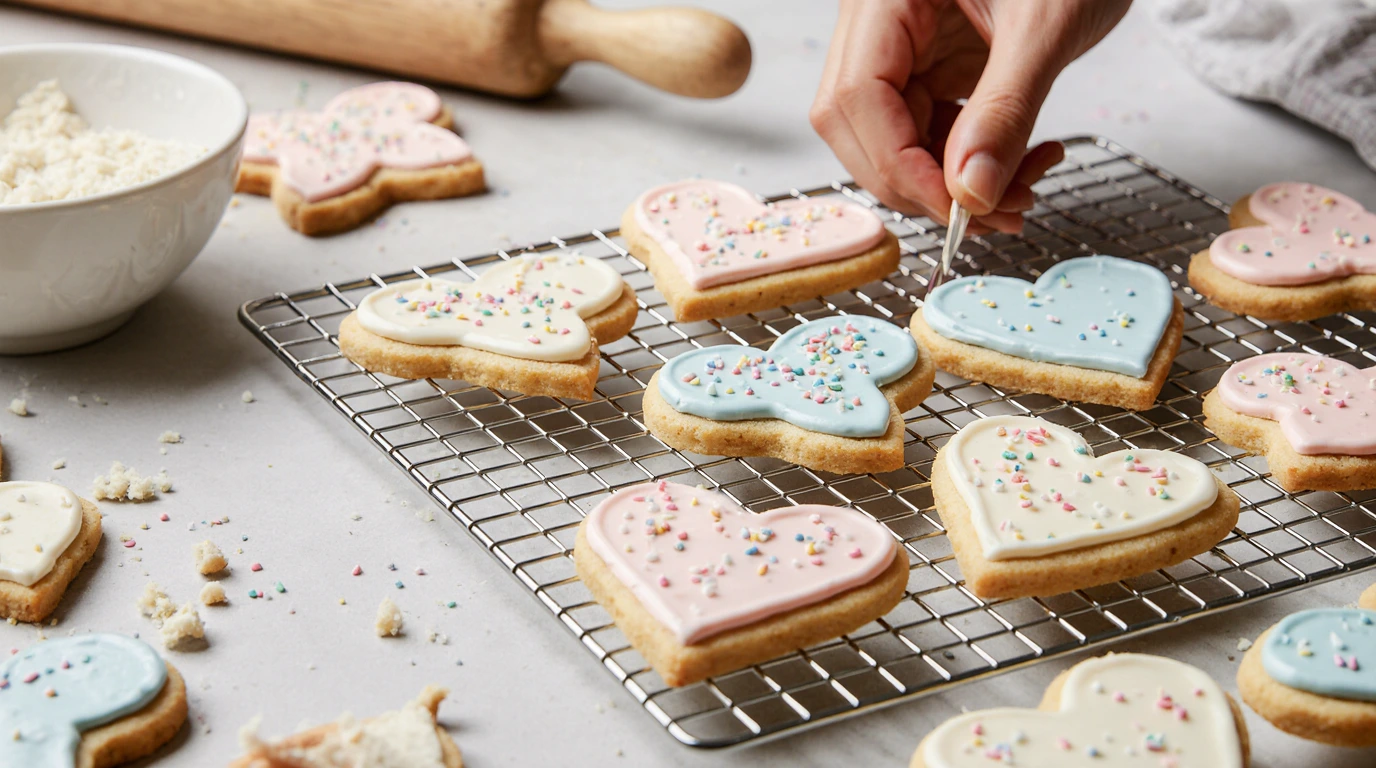
What makes these cute cookies so special is their versatility. You can transform them into snowflakes with silver dust, pumpkins with orange icing, or heart-shaped treats for Valentine’s Day. They’re deeply satisfying to make, beautifully customizable, and absolutely delicious. Crafting these adorable baked treats will fill your kitchen with a heavenly aroma, providing a delightful dessert or afternoon pick-me-up for any occasion. Let’s dive in and see why these decorated sugar cookies are a must-try!
Table of Contents
Quick Recipe Facts
- Prep Time: 30 minutes
- Cook Time: 10-12 minutes
- Chill Time: 4+ hours
- Total Time: 4 hours 45 minutes
- Servings: 24-30 cookies
- Difficulty: Easy
- Calories: ~120 per cookie
This recipe is surprisingly manageable and perfect for both beginners and experienced bakers! The dough needs chilling time, but the active work is quick and easy. Prep your ingredients for a smooth decorated cookies experience.
Main Ingredients
For these cute cookies, you’ll need high-quality ingredients that create the perfect texture and flavor. Good tools are the base of successful cookie baking, but quality ingredients make all the difference. Use unsalted butter for optimal texture control, fresh room-temperature eggs for better incorporation, and pure vanilla extract for that authentic homemade taste. You can swap butter with coconut oil for a lighter version, though I recommend sticking with butter for the best flavor and texture in these classic decorated sugar cookies.
For the Cookie Dough:
- 3 cups all-purpose flour (spooned and leveled)
- 1 cup unsalted butter (2 sticks), softened to room temperature
- 1 cup granulated sugar (for light, crisp edges)
- 1 large egg, room temperature
- 2 teaspoons pure vanilla extract
- 1/2 teaspoon almond extract (optional, but adds depth)
- 1/2 teaspoon baking powder
- 1/4 teaspoon salt
For Royal Icing Decoration:
- 4 cups powdered sugar, sifted
- 3 tablespoons meringue powder
- 5-6 tablespoons warm water
- High-quality food coloring (gel colors work best)
- Optional: Edible glitter, sprinkles, colored sugar, or edible paint
For decorated sugar cookies, combining granulated sugar with premium ingredients ensures your cute cookies hold their shape beautifully during baking. The royal icing creates a smooth, professional finish that hardens perfectly for stacking and gifting. Chocolate lovers can also mix premium cocoa powder with dark chocolate chunks for a chocolate variation, but today we’re focusing on the classic vanilla version that serves as the perfect canvas for your creative decorating ideas.
Essential Tools for Perfect Decorated Cookies
Start with quality mixing bowls, a stand mixer or hand mixer, and precise measuring tools. Heavy-duty baking sheets and parchment paper ensure even heat distribution and prevent sticking, while a cookie scoop guarantees uniform dough portions for whimsical cookie creations. Here’s what you’ll need for the complete process:
- Stand mixer or hand mixer with paddle attachment
- Large mixing bowls
- Kitchen scale for accurate measurements
- Rolling pin (preferably with thickness rings)
- Cookie cutters in various shapes
- Heavy-duty baking sheets
- Parchment paper or silicone baking mats
- Piping bags and tips for decorating
- Small bowls for colored icing
- Toothpicks for detail work
Having the right tools makes creating festive cookie designs so much easier and more enjoyable. Don’t worry if you don’t have everything – you can start simple and build your collection as you grow more confident with cookie decorating.
Instructions
Step 1: Prepare Your Ingredients
Before you begin, make sure your butter is softened to room temperature – this is crucial for creating light and fluffy cute cookies. Set your eggs out about 30 minutes before baking as well. Soften butter to room temperature for easy creaming, which should take about 30-45 minutes on your counter. The butter should be soft enough to leave an indent when pressed but not melting or greasy.
Step 2: Cream Butter and Sugar
In your stand mixer or large bowl, cream butter and sugar until fluffy – this should take about 3-4 minutes on medium speed. The mixture should be light, pale, and noticeably increased in volume. This step incorporates air into your dough, creating a tender texture in your finished decorated cookies. Don’t rush this process; proper creaming makes all the difference in achieving that perfect, soft cookie texture.
Step 3: Add Eggs and Vanilla
Beat in the egg, vanilla extract, and almond extract (if using) until fully combined. Use room temperature eggs for better incorporation into the batter. Scrape down the sides of the bowl to ensure everything is evenly mixed. The mixture might look slightly curdled at this point – that’s completely normal and will come together once you add the dry ingredients.
Step 4: Mix Dry Ingredients
In a separate bowl, whisk together the flour, baking powder, and salt. Use a kitchen scale for dry ingredients if possible – this ensures consistent results every time. Whisking the dry ingredients together first helps distribute the baking powder evenly throughout your cute cookies, ensuring they all bake uniformly.
Step 5: Combine and Mix Gently
Gradually add the dry ingredients to the wet mixture, mixing on low speed just until combined. For a soft cute cookies texture, don’t overbeat! Mixing too much activates gluten, resulting in dense cookies rather than the tender texture you want. I like using a wooden spoon for the final mixing; it just works better and gives you more control. The dough should come together into a soft, slightly sticky ball.
Step 6: Chill the Dough
This is the most important step for perfect decorated cookies! Divide the dough in half, flatten each portion into a disk about 1 inch thick, and wrap tightly in plastic wrap. Chill dough for 4+ hours to maintain shape, or overnight for enhanced flavor and texture. I usually make the dough the night before I plan to decorate. The chilling process firms up the butter, which prevents your cookies from spreading too thin during baking and helps them hold intricate shapes beautifully.
Step 7: Preheat and Prepare
Preheat your oven to 350°F (175°C) – this helps your cute cookies bake evenly from the moment they go in. Line your baking sheets with parchment paper or silicone mats. Avoid warm baking sheets between batches; let them cool completely or use multiple sheets to prevent cookies from spreading.
Step 8: Roll and Cut
Remove one disk of dough from the refrigerator. On a lightly floured surface (or between two sheets of parchment paper to prevent sticking), roll the dough to about 1/4 inch thickness. Use your favorite cookie cutters to create fun shapes – hearts, stars, circles, animals, or holiday-themed designs. Portion dough with consistent thickness for evenly sized cute cookies. Place cut cookies on prepared baking sheets, spacing them about 2 inches apart.
Step 9: Bake to Perfection
Bake at 350°F (175°C) for 8-12 minutes, rotating sheets halfway through for even browning. The cookies are done when the edges are just barely golden – the centers might look slightly underdone, but they’ll firm up as they cool. For thicker cookies, add 1-2 minutes; for thinner cookies, reduce time slightly. Watch them carefully during the last few minutes to prevent overbaking.
Step 10: Cool Completely
Let cookies cool on the baking sheet for 5 minutes, then carefully transfer to a wire rack to cool completely before decorating. This is crucial – decorating warm cookies will cause your icing to melt and slide off. I know it’s tempting to start decorating right away, but patience here makes all the difference in creating beautiful festive cookie designs.
Pro Tips for Perfect Cute Cookies
Tip 1: Temperature Matters
Don’t skip chilling the batter – it helps the cookies maintain their shape and prevents excessive spreading. If your kitchen is warm, chill the dough for longer or even pop cut shapes back in the fridge for 10 minutes before baking.
Tip 2: Room Temperature Eggs
Use room temperature eggs for a fluffier cute cookies texture. They incorporate more easily into the batter and create better structure. If you forget to set them out, place them in a bowl of warm water for 5-10 minutes.
Tip 3: Healthier Substitutions
Swap regular sugar with coconut sugar for a healthier decorated cookies twist, though note that this will create a slightly different flavor and color. For gluten-free options, substitute almond flour and reduce sugar by 25%, but know that the texture will be more delicate.
Tip 4: Prevent Sticking
Grease your pan thoroughly or use parchment paper to prevent sticking – trust me, it makes a difference! I prefer parchment paper because it also makes cleanup incredibly easy and ensures even baking.
Tip 5: Consistent Thickness
For professional-looking results, invest in rolling pin rings or guides that ensure consistent 1/4-inch thickness. This helps all cookies bake evenly and prevents some from being overdone while others are underdone.
Tip 6: Re-rolling Scraps
When re-rolling dough scraps, handle them as little as possible and chill again briefly if the dough becomes too warm. This prevents tough cookies from overworking the dough.
Creative Cookie Decorating
Now comes the fun part – transforming your baked cute cookies into edible art! The decoration process is where your creativity truly shines, and there’s no wrong way to do it.
Making Royal Icing
In a large bowl, combine sifted powdered sugar and meringue powder. Add warm water gradually, beating on low speed for 7-10 minutes until stiff peaks form. The icing should be bright white and hold its shape. For flooding consistency (filling in outlined areas), thin a portion with water a few drops at a time until it flows smoothly but still holds a line when drizzled.
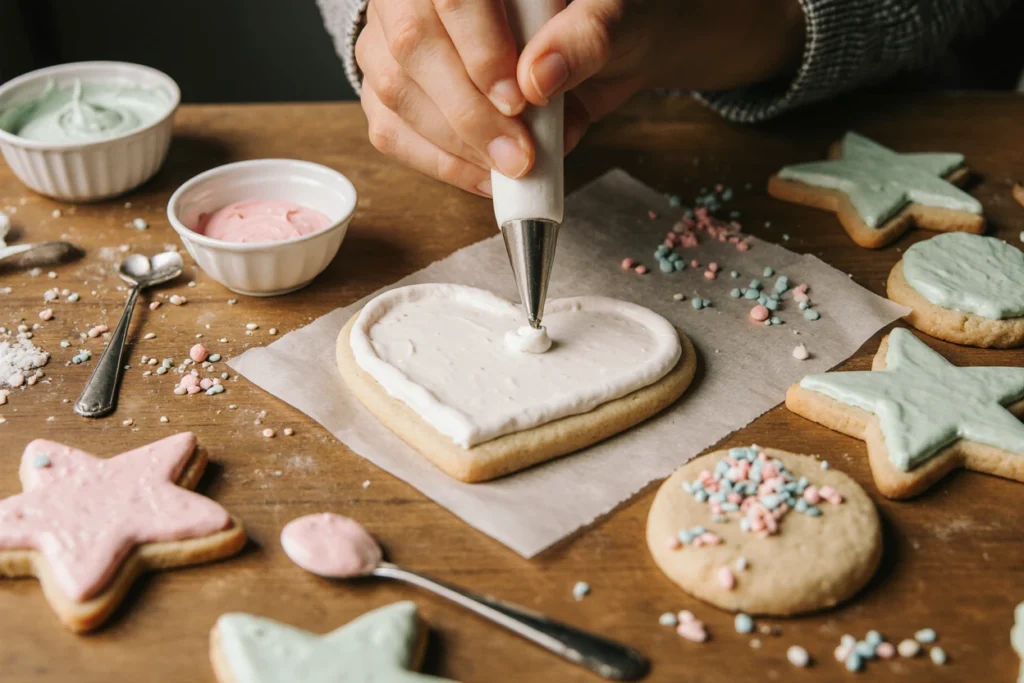
Basic Decorating Technique
Step 1: Outline. Outline designs with royal icing using a piping bag with a small round tip (size 2 or 3). Create a border around the edge of each cookie, leaving a small gap from the edge.
Step 2: Flood. Then “flood” with thinned icing to fill in the outlined area. Use a toothpick to spread the icing into corners and pop any air bubbles.
Step 3: Dry. Let base layer dry completely before adding details – this usually takes 2-4 hours or overnight. If you add details too soon, the icing bleeding will ruin your design.
Step 4: Add Details. Add edible glitter, sprinkles, or hand-painted details while the base is still slightly wet, or pipe additional designs once fully dry.
Innovative Garnishing Ideas
These serving ideas elevate your decorated cookies experience and create truly memorable treats:
- Holiday Themes: Create snowflakes with silver dust, pumpkins with orange icing, or heart-shaped cute cookies for Valentine’s Day. Match colors to the season or celebration.
- 3D Effects: Stack cookies with icing “glue” to create edible gift boxes, mini houses, or dimensional flower designs that stand out on any dessert table.
- Edible Paint: Mix food coloring with vodka or clear extract for watercolor-style designs. The alcohol evaporates quickly, leaving behind beautiful painted effects.
- Stencils and Lace: Use stencils or lace for intricate festive cookie designs by placing them over cookies and dusting with powdered sugar or edible glitter.
- Marbled Effect: Drop different colored icing onto a wet base and swirl with a toothpick for a sophisticated marble look.
- Character Cookies: Use different piping tips to create faces, animals, or characters – kids especially love decorated cookies that look like their favorite things!

Common Problems & Solutions
Even experienced bakers encounter challenges. Here’s how to solve the most common issues when making cute cookies:
| Issue | Solution |
|---|---|
| Cookies spreading too thin | Chill dough longer; avoid warm baking sheets. Make sure butter isn’t too soft. |
| Icing bleeding | Let base layer dry completely before adding details – at least 2-4 hours. |
| Dry texture | Add 1 tbsp milk or reduce baking time by 2 minutes. Don’t overbake! |
| Cookies too hard | Reduce baking time and check doneness when edges are barely golden. |
| Dough too sticky to roll | Chill longer or roll between parchment paper sheets dusted with flour. |
| Colors too dark or intense | Use gel food coloring sparingly – a little goes a long way. Add gradually. |
Serving Suggestions
Your beautifully decorated cute cookies deserve to be presented and enjoyed in style! Here are my favorite ways to serve these adorable treats:
- Serve warm or at room temperature – both ways are delicious, though room temperature shows off your decorating work best.
- Pair with hot beverages – coffee, tea, hot chocolate, or even warm apple cider complement the sweet vanilla flavor perfectly.
- Add to dessert platters – arrange with fresh fruit, chocolate-covered strawberries, or other small desserts for elegant entertaining.
- Create cookie sandwiches – add a dollop of buttercream, Nutella, or jam between two cookies for an extra-special treat.
- Serve with ice cream – a scoop of vanilla, strawberry, or cookies-and-cream ice cream makes these decorated cookies even more indulgent.
- Package as gifts – decorative tins, boxes, or cellophane bags with ribbons make beautiful homemade presents that everyone appreciates.
These serving ideas elevate your decorated cookies experience from simple treats to memorable moments that bring joy to any occasion.
Storage & Reheating
Proper storage keeps your cute cookies fresh and beautiful for days. Here’s how to maintain their quality:
Room Temperature Storage
Store in airtight containers for up to 1 week at room temperature. Use parchment paper between layers to prevent decorated cookies from sticking together. The royal icing acts as a protective seal, keeping cookies fresh longer than undecorated ones. Leftover cute cookies stay moist when stored properly in airtight containers away from humidity.
Freezing Options
Undecorated cookies: Wrap individually in cling film, place in freezer bags, and freeze for up to 3 months. Thaw at room temperature for 20-30 minutes before decorating.
Decorated cookies: Freeze in single layers on baking sheets until solid, then stack carefully with parchment between layers in airtight containers. They’ll keep for up to 2 months. Thaw at room temperature.
Cookie dough: Make-ahead dough can be frozen in disks for up to 3 months. Thaw overnight in the refrigerator before rolling and cutting.
Reviving Stale Cookies
If your undecorated cookies become slightly stale, microwave for 5-8 seconds or bake at 300°F for 2 minutes to refresh texture. Avoid the fridge to keep them soft – refrigeration actually makes cookies go stale faster due to moisture loss. For decorated cookies, skip reheating as it can melt the icing.
Health & Nutrition Info
Based on a standard decorated sugar cookie, here’s the approximate nutrition information per serving:
Nutrition (Per Cookie)
- Calories: 120
- Carbs: 18g
- Fat: 5g
- Protein: 1g
Note: Nutrition values vary based on cookie size and decoration amount.
While these cute cookies are definitely a treat, they can be modified to fit different dietary needs:
- Gluten-Free: Can be made dairy-free or gluten-free with substitutions. For gluten-free options, substitute almond flour or a 1:1 gluten-free baking flour and reduce sugar by 25%. The texture will be slightly more delicate.
- Dairy-Free: Replace butter with vegan butter or coconut oil (though flavor will differ slightly). Use aquafaba-based royal icing instead of meringue powder.
- Lower Sugar: Consider swaps for lower sugar by reducing the granulated sugar to 3/4 cup – the cookies will be less sweet but still delicious. You can’t reduce the powdered sugar in royal icing without affecting consistency.
- Healthier Fats: Using high-fat European-style butter can improve taste and texture, and some bakers add a tablespoon of Nutella to the dough for extra richness.
This healthier decorated cookies option is perfect for weekend treats when you want to indulge mindfully. Remember, homemade cookies made with quality ingredients are always better than store-bought alternatives, and when enjoyed in moderation, they’re part of a balanced lifestyle.
Conclusion
Making cute cookies is a fun way to show your creativity and spread happiness. These decorated sugar cookies are delicious, easy to make, and perfect for any occasion – from holidays and birthdays to simple afternoon treats. You can find techniques for all skill levels here, whether you’re a complete beginner or an experienced baker looking to refine your decorating skills.
Try different flavors, decorations, and techniques to find your unique style. The beauty of these cute cookies is that there’s no wrong way to decorate them. Each batch is an opportunity to experiment with new colors, designs, and ideas. With practice, you’ll get better at decorating cookies, and your friends and family will be impressed with your beautiful, professional-looking creations.
Homemade cookies are a great way to make someone’s day. They bring smiles and warmth to those who receive them, whether it’s for yourself or as a gift. The time and love you put into baking and decorating shows, and people truly appreciate handmade treats. To make great cookies, you need to know the basics – the right ingredients, tools, and techniques we’ve covered today.
So, get ready to bake! Gather your supplies and let your creativity shine. Baking cute cookies is rewarding and fun. It lets you share the joy of homemade treats with everyone around you. Don’t be afraid to try new things and enjoy the process and the delicious results. The world of decorated cookies is full of possibilities, and everyone will love what you make.
Try this cute cookies recipe and let me know how it turned out! I’d love to see photos of your decorated creations – share them in the comments below or tag me on social media. If you enjoyed this recipe, please rate it with five stars and share it with friends who love baking. Check out my other dessert recipes for more delicious ideas!
FAQ
What essential ingredients and tools do I need for baking perfect cookies?
You’ll need unsalted butter, granulated sugar, eggs, all-purpose flour, vanilla extract, and baking powder for the cookie dough. For decorating, you’ll need powdered sugar, meringue powder, and food coloring for royal icing. Quality tools like mixing bowls, a stand mixer, measuring cups, rolling pin, cookie cutters, and baking sheets with parchment paper are key for great results with your cute cookies.
What are some tips for achieving the perfect cookie texture?
Make butter and sugar light and fluffy for better texture – cream them for 3-4 minutes. Chill the dough for at least 4 hours to stop it from spreading during baking. Use a cookie scoop or roll to consistent 1/4-inch thickness for even sizes, and space cookies at least 2 inches apart on the baking sheet. Don’t overbake – remove them when edges are just barely golden.
How can I personalize and decorate my cute cookies?
Use royal icing and try different piping tips for cool designs – outline first, then flood with thinned icing. Add sprinkles, edible glitter, or colored sugar for extra sparkle while the icing is still wet. Melted chocolate or colored candy melts can give a rustic look. Try stencils, edible paint (food coloring mixed with vodka), or hand-painting for intricate festive cookie designs.
What are some quick and easy cookie recipes for busy bakers?
While this recipe requires chilling time, you can prep the dough overnight for next-day baking. For no-chill dough options, try shortbread and drop cookies. Five-ingredient recipes like peanut butter blossoms or coconut macaroons are also great alternatives. You can also use cake mix for quick cookies, though the texture and flavor won’t match homemade sugar cookies.
Can I freeze this recipe?
Yes! Your cute cookies can be frozen for up to 2 months. Freeze unbaked cookie dough in disks wrapped tightly, or freeze baked cookies (decorated or not) in airtight containers with parchment between layers. Make-ahead dough can be frozen in portioned balls for up to 3 months – just thaw in the fridge overnight before rolling and baking.
How can I store and package my decorated cookies?
Keep cookies in airtight containers at room temperature for up to one week. Use parchment paper between layers to prevent decorated surfaces from sticking. Decorative tins, boxes, or cellophane bags with ribbons make great gifts. For shipping, wrap cookies individually in plastic wrap, then use bubble wrap or packing peanuts in a sturdy box to prevent breakage during transit.
What if I don’t have meringue powder for royal icing?
You can substitute with pasteurized egg whites (about 3 tablespoons per batch) or aquafaba (liquid from canned chickpeas) for a vegan option. The consistency might vary slightly, so adjust water amounts as needed. Meringue powder is preferred because it’s shelf-stable and creates more consistent results.
Can I make these cookies ahead of time?
Absolutely! Make the dough up to 3 days ahead and keep refrigerated, or freeze for up to 3 months. Baked undecorated cookies can be made 2-3 days ahead and stored airtight. Fully decorated cute cookies can be made up to one week ahead since the royal icing acts as a protective seal. This makes them perfect for parties and events.
How can I adjust sweetness?
For less sweet cookies, reduce granulated sugar to 3/4 cup in the dough. The cookies will still taste great but won’t be as sweet. For royal icing, you can’t reduce powdered sugar without affecting consistency, but you can make the icing layer thinner. Consider using naturally sweet decorations like fresh fruit or chocolate instead of heavily sweetened designs.
What common mistakes should I avoid when baking cookies?
Don’t overmix dough to avoid tough cookies – mix just until combined. Don’t swap ingredients without knowing their role; for example, using salted butter affects the final taste. Make sure your oven temperature is accurate using an oven thermometer, and don’t overbake – remove cookies when edges are barely golden. Always chill the dough fully, and let cookies cool completely before decorating to prevent icing from melting.
Have You Tried Our Recipe?
There are no reviews yet. Be the first one to write one.