
The Ultimate Flourless Chocolate Mousse Cake: Only 4 Ingredients, No Flour, Pure Heaven!
Welcome to my kitchen! Today, I’m sharing my flourless chocolate mousse cake, a dessert that’s always a hit at dinner parties and family gatherings. I first tried a version of this cake at a friend’s birthday celebration years ago, and I was absolutely blown away by how rich and decadent it tasted—all without a single speck of flour. I immediately asked for the recipe, and after some tweaking and experimenting, I created this 4 ingredient chocolate mousse cake that’s become my go-to whenever I need to impress guests or satisfy my own chocolate cravings.
This recipe is perfect for anyone who loves an easy chocolate mousse cake recipe and wants something that looks fancy but is surprisingly simple to make. Whether you’re gluten-free by choice or necessity, or you just want a dessert that melts in your mouth, this gluten free chocolate mousse cake is about to become your new favorite. Let’s dive in and see why this flourless beauty is a must-try!
Table of Contents
Quick Recipe Facts
- Prep Time: 15 minutes
- Cook Time: 25 minutes
- Total Time: 40 minutes (plus 2 hours chilling)
- Servings: 8-10 slices
- Difficulty: Easy
- Calories: ~280 per serving
Friendly touch: This recipe is surprisingly quick and easy – perfect for when you want an impressive dessert without spending hours in the kitchen! The hardest part is waiting for it to chill.
Ingredients
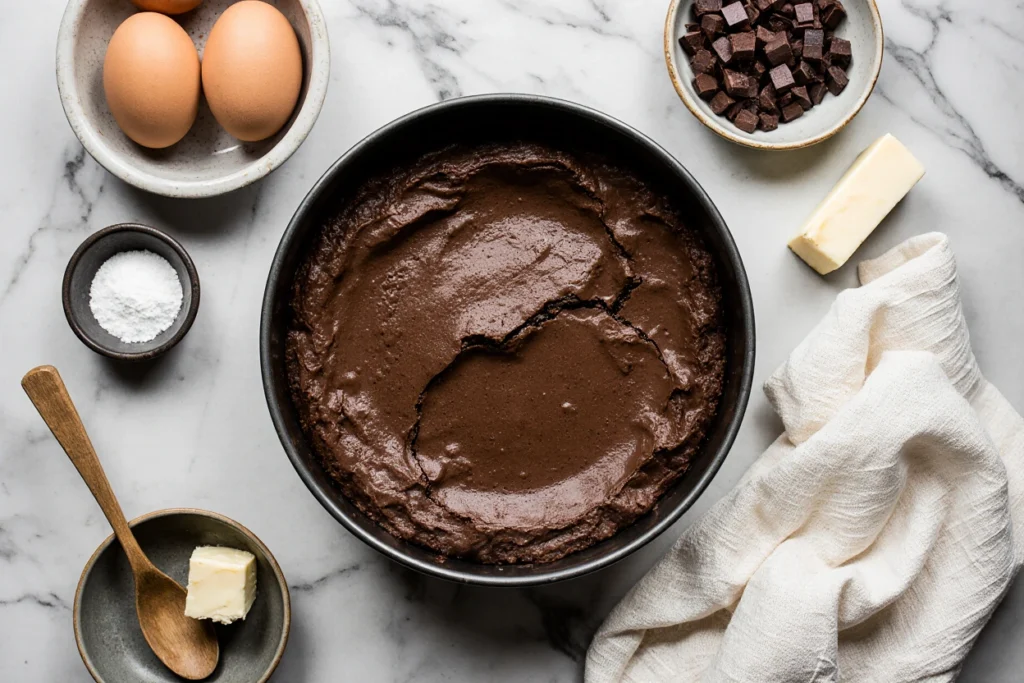
For this flourless chocolate mousse cake, you’ll need just four simple ingredients. Yes, you read that right – only four! This is what makes it such an easy chocolate mousse cake recipe that anyone can master. The simplicity doesn’t sacrifice flavor, though. Each ingredient plays a crucial role in creating that perfect mousse-like texture.
Main Ingredients:
- 12 oz (340g) dark chocolate (60-70% cocoa works best) – chopped into small pieces
- 6 large eggs – separated into whites and yolks, at room temperature
- ½ cup (100g) granulated sugar – divided
- ½ cup (115g) unsalted butter – cut into cubes
Optional Garnish:
- Powdered sugar for dusting
- Fresh berries
- Whipped cream
Ingredient Notes:
You can swap the dark chocolate for semi-sweet if you prefer a milder flavor. For a dairy-free version of this gluten free chocolate mousse cake, use coconut oil instead of butter – it works beautifully! The quality of your chocolate really matters here since it’s the star ingredient. I always recommend using good-quality chocolate that you’d enjoy eating on its own.
Instructions
Step 1: Prepare Your Workspace
Preheat your oven to 350°F (175°C). This helps your flourless chocolate mousse cake bake evenly and achieve that perfect texture. Grease an 8-inch or 9-inch springform pan thoroughly with butter, then line the bottom with parchment paper. Don’t skip the greasing – trust me, you want this cake to release perfectly!
Step 2: Melt the Chocolate and Butter
In a medium heatproof bowl, combine the chopped dark chocolate and butter cubes. Set the bowl over a pot of barely simmering water (make sure the bottom of the bowl doesn’t touch the water). Stir occasionally until everything is completely melted and smooth. This gentle heating method prevents the chocolate from seizing or burning. Once melted, remove from heat and let it cool for about 5 minutes.
Step 3: Mix the Egg Yolks
While the chocolate mixture is cooling, separate your eggs. Add the egg yolks and ¼ cup of the sugar to the chocolate mixture. Whisk until well combined and slightly thickened. The mixture should look glossy and smooth. This is where your cake starts developing that incredible mousse-like quality.
Step 4: Whip the Egg Whites
In a clean, dry mixing bowl, beat the egg whites with an electric mixer on medium speed until they start to get foamy. Gradually add the remaining ¼ cup of sugar while continuing to beat. Increase the speed to high and beat until stiff, glossy peaks form – this usually takes about 3-4 minutes. For a soft, airy 4 ingredient chocolate mousse cake, don’t overbeat the whites! They should be firm but still smooth and shiny.
Step 5: Fold Everything Together
Here’s the technique that makes or breaks this recipe: gently fold about one-third of the whipped egg whites into the chocolate mixture to lighten it. Use a rubber spatula and fold with a gentle turning motion – you want to maintain as much air as possible. Once that’s incorporated, add the remaining egg whites and fold carefully until no white streaks remain. I like using a wooden spoon for this part; it just works better for me and helps me be more gentle with the batter.
Step 6: Bake to Perfection
Pour the batter into your prepared springform pan and smooth the top with a spatula. Bake for 25-30 minutes. The center should still have a slight jiggle when you gently shake the pan – it will firm up as it cools. The top might crack slightly, which is completely normal and part of the rustic charm!
Step 7: Cool and Chill
Remove from the oven and let the cake cool in the pan for 15 minutes. Then run a knife around the edge and remove the springform ring. Let it cool completely at room temperature, then refrigerate for at least 2 hours or overnight. The chilling time is essential for achieving that perfect mousse texture.
Pro Tips
Tip 1: Don’t skip chilling the cake – this is what transforms it from a regular chocolate cake into a mousse-like masterpiece. The texture becomes incredibly smooth and creamy after proper chilling.
Tip 2: Use room temperature eggs for a fluffier flourless chocolate mousse cake. Cold eggs don’t whip as well, and you’ll end up with less volume in your egg whites.
Tip 3: When folding the egg whites, be patient and gentle. Aggressive stirring will deflate all those beautiful air bubbles you worked hard to create. Think of it as coaxing the ingredients together rather than forcing them.
Tip 4: Grease your pan thoroughly and use parchment paper on the bottom to prevent sticking. This cake is too precious to have it fall apart when you’re trying to remove it from the pan!
Tip 5: If your chocolate mixture is too hot when you add it to the egg whites, it can cook them and deflate everything. Make sure it’s just warm to the touch, not hot.
Tip 6: For an extra-smooth top, tap the filled pan gently on the counter a few times before baking to release any air bubbles.
Serving Suggestions
This no bake chocolate mousse cake (well, minimal baking!) is incredibly versatile when it comes to serving. I love presenting it at room temperature, which allows the mousse texture to really shine. The cake is rich enough to stand alone, but here are some of my favorite ways to serve it:
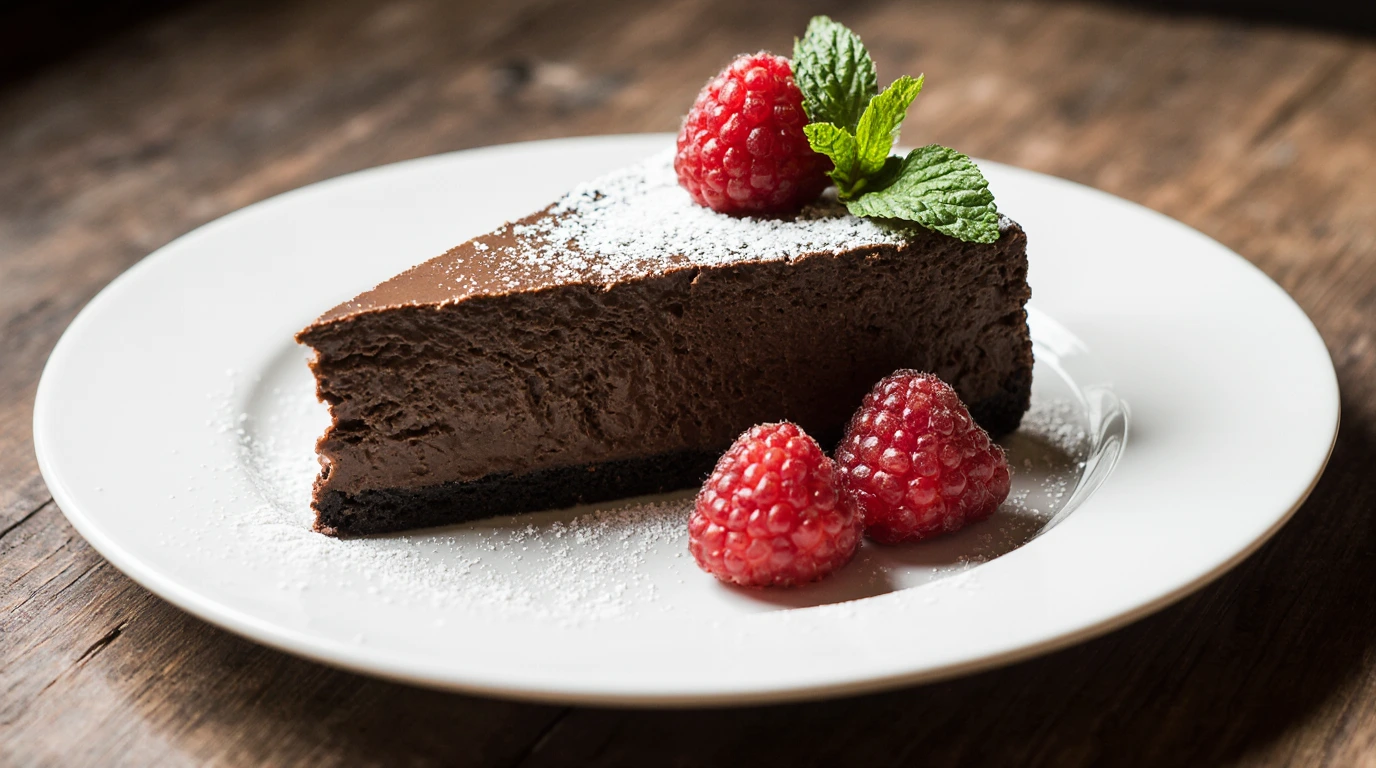
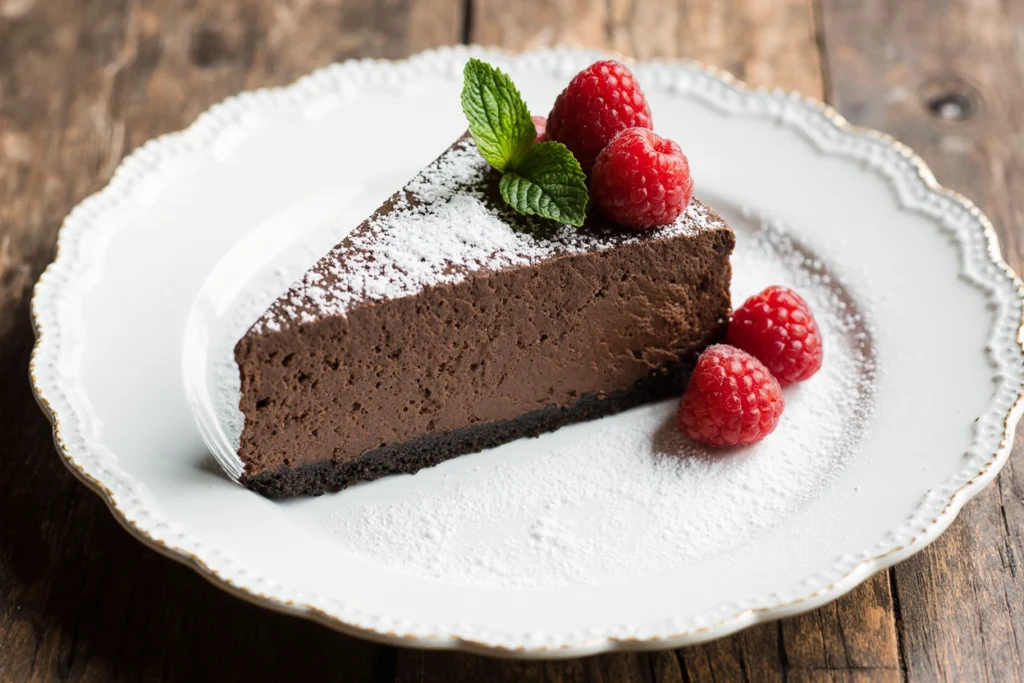
Classic Presentation: Dust the top generously with powdered sugar just before serving. The contrast of white powder against dark chocolate is stunning and makes it look like something from a fancy bakery.
Berry Beautiful: Top each slice with fresh raspberries, strawberries, or a mix of berries. The tartness cuts through the richness beautifully and adds a pop of color.
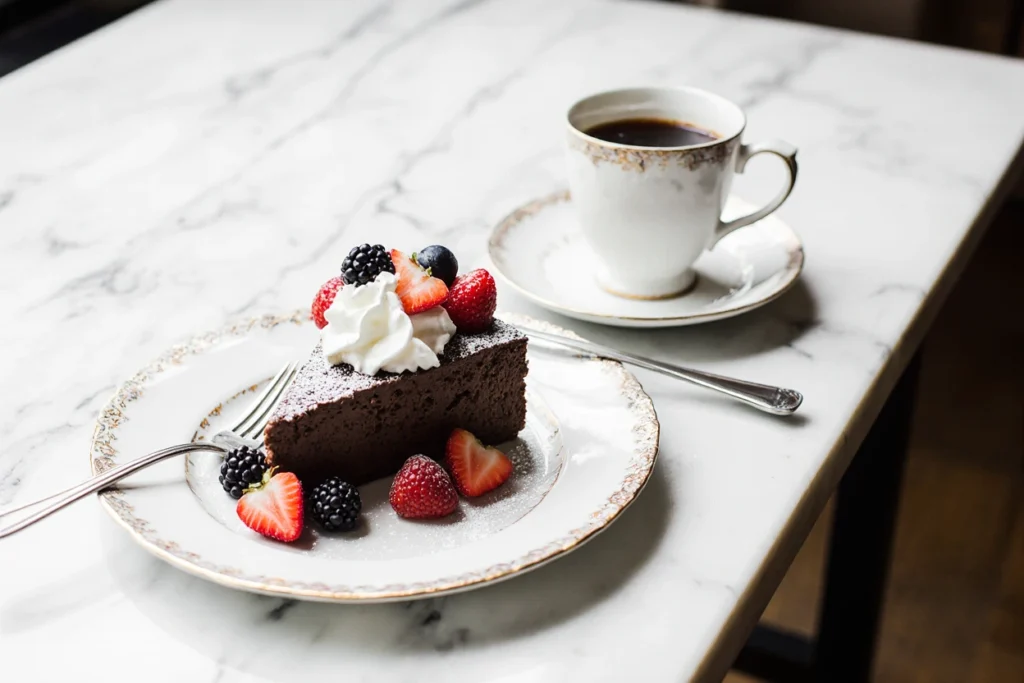
Cream Dream: Add a dollop of freshly whipped cream or a scoop of vanilla ice cream on the side. The cold cream melting into the warm (or room temp) cake is absolutely divine.
Coffee Companion: Serve with a strong espresso or cappuccino. The bitter coffee notes complement the chocolate perfectly and make for an elegant dessert course.
Sauce It Up: Drizzle individual slices with raspberry coulis, salted caramel, or even a simple chocolate ganache for extra decadence.
These serving ideas elevate your easy chocolate mousse cake recipe experience from delicious to absolutely memorable!
Storage & Reheating
Refrigerator Storage: Store your leftover flourless chocolate mousse cake in an airtight container or cover the springform pan tightly with plastic wrap. It will stay fresh and moist in the refrigerator for up to 5 days. In fact, many people (myself included) think it tastes even better on day two or three as the flavors meld together.
Freezer Storage: Yes, you can freeze this cake! Wrap individual slices or the whole cake tightly in plastic wrap, then in aluminum foil. Freeze for up to 3 months. When you’re ready to enjoy it, thaw overnight in the refrigerator.
Serving Temperature: This cake is actually delicious at various temperatures. Straight from the fridge, it’s firm and fudgy. At room temperature (let it sit out for 30 minutes), it becomes more mousse-like and creamy. Some people even enjoy it slightly warm – just microwave a slice for 10-15 seconds.
Pro Storage Tip: Avoid storing this cake near foods with strong odors in your fridge, as chocolate can absorb flavors. Keep it well-covered!
Leftover flourless chocolate mousse cake stays moist when stored properly thanks to the butter and eggs in the recipe – there’s no flour to dry out!
Health & Nutrition Info
While this 4 ingredient chocolate mousse cake is definitely an indulgent treat, it does have some interesting nutritional benefits compared to traditional cakes:
Gluten-Free Naturally: Since there’s absolutely no flour in this recipe, it’s a perfect dessert for anyone with celiac disease or gluten sensitivity. This gluten free chocolate mousse cake doesn’t sacrifice texture or flavor for its gluten-free status.
Lower in Carbs: Without flour and with minimal sugar, this cake is lower in carbohydrates than most traditional cakes, making it a better choice for those watching their carb intake.
Protein-Rich: Thanks to the six eggs, each slice provides a decent amount of protein – approximately 6-7 grams per serving.
Calorie Breakdown: Each slice contains roughly 280-300 calories (based on 10 servings), with the majority coming from the chocolate and butter. The fat content is higher than regular cake, but remember – these are satisfying fats that will keep you full.
Modification Options:
- Lower Sugar Version: You can reduce the sugar to ⅓ cup total if you’re using very dark chocolate, which is less sweet to begin with.
- Dairy-Free: Swap the butter for coconut oil in a 1:1 ratio for a dairy-free version.
- Portion Control: This cake is rich, so smaller slices are perfectly satisfying. Cut it into 12 servings instead of 8-10 for a lighter treat.
This healthier gluten free chocolate mousse cake option is perfect for weekend treats when you want something special without completely derailing your nutrition goals!
Conclusion
There you have it – the most incredible flourless chocolate mousse cake that will make you wonder why you ever bothered with flour in the first place! This 4 ingredient chocolate mousse cake proves that simple can be spectacular. The rich, velvety texture, the intense chocolate flavor, and that beautiful mousse-like consistency make this dessert absolutely irresistible.
What I love most about this recipe is how forgiving it is for beginners while still impressive enough to serve at elegant dinner parties. The fact that it’s naturally gluten-free means everyone at your table can enjoy it, and the minimal ingredient list means you can whip it up on a whim whenever that chocolate craving strikes.
I’d love to hear how your cake turns out! Did you add any special toppings? Serve it for a special occasion? Leave a comment below and let me know your experience. If you loved this recipe, please give it a 5-star rating and share it with your fellow chocolate lovers on Pinterest or Facebook. Your feedback helps me create more recipes you’ll love!
Looking for more chocolate desserts? Check out my Dark Chocolate Truffles, Chocolate Lava Cakes, or my Famous Fudgy Brownies (also gluten-free!).
Happy baking, and remember – life is too short for mediocre chocolate!
FAQ
Can I freeze this flourless chocolate mousse cake?
Yes! Your flourless chocolate mousse cake can be frozen for up to 2-3 months. Wrap it tightly in plastic wrap and then aluminum foil to prevent freezer burn. For best results, freeze individual slices so you can thaw just what you need. Thaw overnight in the refrigerator before serving.
What if I don’t have a springform pan?
While a springform pan makes removal easier, you can use a regular 8 or 9-inch round cake pan. Just line it thoroughly with parchment paper on the bottom and sides, leaving some overhang to help lift the cake out. You can also bake it in individual ramekins – just reduce the baking time to about 12-15 minutes.
Can I make this cake ahead of time?
Absolutely! In fact, this easy chocolate mousse cake recipe is perfect for making ahead. You can prepare it up to 2 days in advance and keep it refrigerated until you’re ready to serve. Just add any garnishes like powdered sugar or berries right before serving for the freshest presentation.
How can I adjust the sweetness?
If you find the cake too sweet, reduce the sugar to ⅓ cup and use a darker chocolate (70-80% cocoa). Conversely, if you prefer sweeter desserts, use semi-sweet chocolate or increase the sugar to ⅔ cup. Remember that the chocolate you choose makes the biggest impact on sweetness level.
Why did my cake sink in the middle?
Some sinking is totally normal! This happens because there’s no flour to provide structure. As long as it’s cooked through and tastes good, a slight depression in the center is just part of this cake’s charm. You can cover it with powdered sugar or whipped cream if it bothers you aesthetically.
Can I use milk chocolate instead of dark chocolate?
You can, but I’d recommend using at least 60% cocoa dark chocolate for the best flavor and texture. Milk chocolate is sweeter and softer, which might make the cake overly sweet and affect the mousse-like texture. If you must use milk chocolate, reduce the sugar to ¼ cup total.
Is this really a mousse cake or just a flourless cake?
It’s both! The texture is somewhere between a traditional flourless chocolate cake and chocolate mousse. When chilled, it has that creamy, mousse-like consistency that just melts in your mouth. The name “mousse cake” perfectly describes its unique texture.
What’s the best way to get clean slices?
For picture-perfect slices, use a sharp knife dipped in hot water and wiped clean between each cut. The warm knife glides through the chilled cake without dragging or crumbling. This professional trick makes all the difference!
Have You Tried Our Recipe?
There are no reviews yet. Be the first one to write one.