

Greek Yogurt Cheesecake with Protein: The Ultimate Healthy Dessert
Welcome to my kitchen! Today, I’m sharing my Greek Yogurt Cheesecake with Protein, a dessert that’s always a hit at family gatherings and potlucks. I first tried making this after returning from a trip to Greece, where I fell in love with the tangy richness of authentic Greek yogurt. I wanted to recreate that creamy texture but with a protein boost for my post-workout treats. After several kitchen experiments (and a few happy taste-testers), I perfected this recipe that combines indulgence with nutrition.
This recipe is perfect for anyone who loves a healthy cheesecake recipe and wants something easy, delicious, and guilt-free to bake. What makes this Greek yogurt recipe so special is its incredible creaminess without the heavy feeling traditional cheesecakes leave behind. The addition of protein powder not only boosts the nutritional value but also creates an amazingly smooth texture that rivals any fancy bakery dessert.
Whether you’re a fitness enthusiast looking for a high protein dessert or simply someone who appreciates a lighter take on classic cheesecake, this recipe delivers on all fronts. The tanginess from the Greek yogurt balances perfectly with the subtle sweetness, creating layers of flavor that keep you coming back for more. Plus, with significantly less sugar and fat than traditional recipes, you can enjoy a generous slice without derailing your health goals. Let’s dive in and see why this Greek Yogurt Cheesecake with Protein is a must-try!
Table of Contents
Quick Recipe Facts
Prep Time: 20 minutes
Cook Time: 45 minutes
Total Time: 4 hours 5 minutes (includes cooling)
Servings: 12 slices
Difficulty: Easy
Calories: ~220 per slice
This recipe is surprisingly quick and easy – perfect for busy afternoons! Most of the time is hands-off cooling, so you can prep your ingredients for a smooth protein powder recipe experience and let the oven do the work.
Ingredients
For this Greek Yogurt Cheesecake with Protein, you’ll need the following ingredients. You can swap honey with maple syrup for a different flavor profile, or use stevia for a lower-calorie version. The combination of Greek yogurt and cream cheese creates that classic cheesecake richness while keeping things lighter and more nutritious.
For the Crust:
- 1½ cups graham cracker crumbs (or almond flour for gluten-free)
- 3 tablespoons melted coconut oil (or butter)
- 2 tablespoons honey
- Pinch of sea salt
For the Cheesecake Filling:
- 16 oz (2 cups) plain Greek yogurt (full-fat or 2% works best)
- 8 oz cream cheese, softened to room temperature
- ⅔ cup honey (or your preferred sweetener)
- 3 large eggs, room temperature
- ⅓ cup vanilla protein powder (whey or plant-based)
- 2 tablespoons all-purpose flour (or almond flour)
- 1 tablespoon vanilla extract
- 1 tablespoon lemon juice
- Zest of 1 lemon
Optional Topping:
- Fresh berries (strawberries, blueberries, raspberries)
- Sugar-free berry compote
- A drizzle of honey
Ingredient Tips: Room temperature ingredients blend more smoothly, preventing lumps in your batter. If you’re using plant-based protein powder, choose an unflavored or vanilla option to avoid an artificial taste. For the crust, digestive biscuits make an excellent alternative to graham crackers, adding a slightly different texture that’s absolutely delicious.
Instructions
Step 1: Prepare Your Pan
Preheat your oven to 325°F (163°C) – this moderate temperature helps your Greek Yogurt Cheesecake with Protein bake evenly without cracking. Line a 9-inch springform pan with parchment paper and lightly grease the sides. This simple step makes removing your cheesecake so much easier later!
Step 2: Make the Crust
In a medium bowl, combine graham cracker crumbs, melted coconut oil, honey, and a pinch of salt. Mix until the texture resembles wet sand – it should hold together when pressed. Press the mixture firmly into the bottom of your prepared pan, creating an even layer. I like using the bottom of a measuring cup to really pack it down. Bake the crust for 8 minutes, then set aside to cool while you prepare the filling.
Step 3: Blend the Filling Base
In a large mixing bowl, beat the softened cream cheese with an electric mixer on medium speed for about 2 minutes until smooth and creamy. Add the Greek yogurt and beat for another minute. The key here is patience – don’t rush this step, as smooth cream cheese is essential for a lump-free cheesecake.
Step 4: Add Sweetener and Protein
Mix in the honey, vanilla protein powder, and flour. Beat on low speed until just combined. For a soft, creamy texture in your healthy cheesecake recipe, don’t overbeat once you add the protein powder – it can make the texture slightly grainy if overmixed. The batter should be smooth and thick.
Step 5: Incorporate Eggs and Flavoring
Add eggs one at a time, beating on low speed after each addition until just incorporated. Fold in vanilla extract, lemon juice, and lemon zest using a spatula. I like using a wooden spoon for this part; it just works better for gentle folding and prevents overmixing. The lemon adds a bright note that really makes the Greek yogurt shine.
Step 6: Pour and Smooth
Pour the filling over your cooled crust, smoothing the top with a spatula. Tap the pan gently on the counter a few times to release any air bubbles. This helps prevent large air pockets from forming during baking.
Step 7: Bake with Care
Place the cheesecake on the middle rack of your preheated oven. Bake for 45-50 minutes. The edges should be set, but the center should still have a slight jiggle – about 2-3 inches in diameter. It will continue to set as it cools. Overbaking is the enemy of creamy cheesecake, so keep a close eye during the last 10 minutes.
Step 8: Cool Gradually
Turn off the oven and crack the door open slightly. Let the cheesecake cool in the oven for 1 hour. This gradual temperature change prevents the dreaded cracks on top. After an hour, remove from oven and cool to room temperature, then refrigerate for at least 3 hours or overnight.
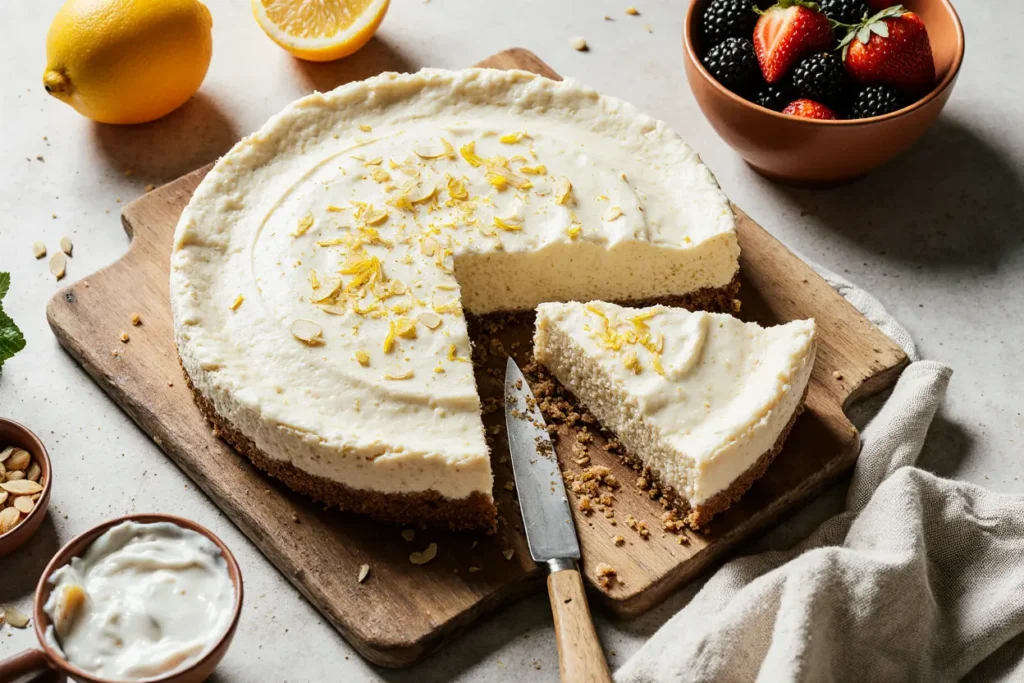
Step 9: Serve and Enjoy
Once fully chilled, run a knife around the edges before releasing the springform pan. Slice with a clean, warm knife (dip in hot water and wipe between cuts) for picture-perfect slices. Top with fresh berries or your favorite toppings right before serving.
Pro Tips
Tip 1: Don’t skip bringing ingredients to room temperature – cold cream cheese creates lumps, and cold eggs can cause the batter to seize up. Leave them out for about 30-45 minutes before starting.
Tip 2: Use full-fat or 2% Greek yogurt for the creamiest Greek Yogurt Cheesecake with Protein. Non-fat yogurt can make the texture slightly watery and less rich.
Tip 3: Swap regular honey with coconut sugar or monk fruit sweetener for a lower-glycemic option. Just adjust the amount to taste, as some sweeteners are more concentrated.
Tip 4: Grease your pan thoroughly and use parchment paper – trust me, it makes a difference! There’s nothing worse than a beautiful cheesecake stuck to the pan.
Tip 5: For an extra protein boost, add an additional 2 tablespoons of protein powder, but compensate by reducing the flour slightly to maintain the right texture.
Tip 6: The water bath method isn’t necessary for this recipe due to the Greek yogurt’s moisture, but if you want extra insurance against cracks, wrap your springform pan in foil and place it in a roasting pan with 1 inch of hot water.
Tip 7: Let your cheesecake chill overnight if possible. The flavors meld together beautifully, and the texture becomes even more luxurious after a full night in the refrigerator.
Serving Suggestions
This high protein dessert is incredibly versatile! Here are my favorite ways to serve it:
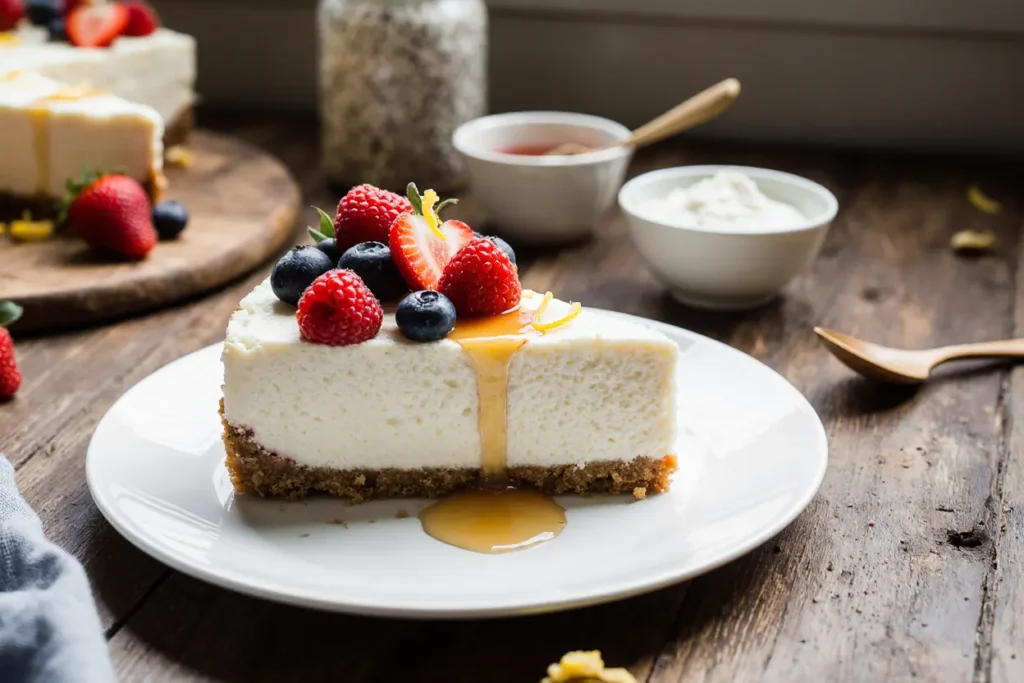
Classic Style: Serve chilled with a handful of fresh mixed berries on top. The tartness of the berries complements the tangy yogurt beautifully.
Decadent Touch: Add a dollop of whipped cream (or Greek yogurt whipped cream for extra protein) and a drizzle of honey or sugar-free maple syrup.
Coffee Pairing: This cheesecake pairs wonderfully with a hot cup of coffee or espresso. The slight bitterness of coffee balances the sweetness perfectly.
Brunch Star: Serve smaller slices alongside fresh fruit salad for a protein-packed brunch dessert that won’t leave guests feeling heavy.
Compote Topping: Make a quick berry compote by simmering frozen berries with a touch of lemon juice and sweetener. The warm compote over cold cheesecake is heavenly.
Chocolate Drizzle: Melt dark chocolate and drizzle over individual slices for an elegant presentation at dinner parties.
These serving ideas elevate your greek yogurt recipe experience and make it suitable for any occasion, from casual family dinners to special celebrations.
Storage & Reheating
Refrigerator Storage: Store your Greek Yogurt Cheesecake with Protein in an airtight container or covered with plastic wrap in the refrigerator for up to 5 days. The cheesecake actually tastes better after a day or two as the flavors continue to develop.
Freezing: Yes, you can freeze this! Wrap individual slices tightly in plastic wrap, then place in a freezer-safe container or bag. Freeze for up to 2 months. Thaw overnight in the refrigerator before serving.
Serving Temperature: While traditional cheesecake is served cold, you can let slices sit at room temperature for 10-15 minutes before serving for a slightly softer, more melt-in-your-mouth texture.
Toppings: Add fresh fruit or toppings right before serving rather than storing them on top of the cheesecake, as this keeps the toppings fresh and the cheesecake’s texture perfect.
Leftover Greek Yogurt Cheesecake with Protein stays moist and delicious when stored properly – just make sure your container is truly airtight to prevent the cheesecake from absorbing refrigerator odors.
Health & Nutrition Info
This protein powder recipe offers several nutritional advantages over traditional cheesecake:
Protein Content: Each slice contains approximately 12-14 grams of protein, thanks to the Greek yogurt, protein powder, and eggs. That’s nearly double the protein of regular cheesecake!
Lower in Fat: Using Greek yogurt instead of all cream cheese cuts the fat content significantly while maintaining that creamy texture we all love.
Calcium Rich: Greek yogurt is an excellent source of calcium, supporting bone health with every delicious bite.
Probiotic Benefits: Greek yogurt contains beneficial probiotics that support digestive health, making this dessert easier on your stomach.
Customizable for Dietary Needs:
- Gluten-Free: Use almond flour crust and ensure your protein powder is certified gluten-free
- Lower Sugar: Substitute honey with stevia, monk fruit, or erythritol
- Dairy-Free: While challenging, you can use dairy-free cream cheese and coconut yogurt (though texture will differ slightly)
Approximate Nutrition per Slice:
- Calories: 220
- Protein: 13g
- Carbohydrates: 24g
- Fat: 8g
- Fiber: 1g
This healthier high protein dessert option is perfect for post-workout treats, weekend indulgences, or anytime you want dessert without the guilt. It fits beautifully into balanced eating plans and can even work for those managing their macros.
Conclusion & CTA
There you have it – a Greek Yogurt Cheesecake with Protein that’s creamy, satisfying, and nutritious! This recipe proves you don’t have to sacrifice flavor for health benefits. The tangy richness of Greek yogurt, combined with the protein boost, creates a dessert that’s both indulgent and nourishing.
I’ve made this cheesecake countless times for family gatherings, meal prep Sundays, and even as a special breakfast treat (yes, cheesecake for breakfast is acceptable when it’s this healthy!). Every time, it disappears quickly, and people are always surprised when I tell them it’s packed with protein.
Try this Greek Yogurt Cheesecake with Protein and let me know how it turned out! I’d love to see your creations – tag me on social media or leave a comment below with your experience. Did you try any fun topping combinations? Make any creative substitutions? Share your thoughts!
FAQ
Can I freeze this Greek Yogurt Cheesecake with Protein?
Yes! Your Greek Yogurt Cheesecake with Protein can be frozen for up to 2 months. Wrap individual slices tightly in plastic wrap, then store in a freezer-safe container. Thaw overnight in the refrigerator for best results. The texture remains creamy and delicious after freezing.
What if I don’t have protein powder?
No problem! You can replace the protein powder with an equal amount of all-purpose flour or cornstarch. Your cheesecake will still be delicious, just with less protein. Alternatively, increase the Greek yogurt by ¼ cup for extra tanginess and a protein boost.
Can I make this ahead of time?
Absolutely! This cheesecake is actually better when made ahead. It needs at least 3 hours to chill, but I recommend making it the day before you plan to serve it. The flavors meld together beautifully overnight, and the texture becomes even more velvety.
How can I adjust the sweetness?
The honey can be adjusted to taste. Start with ½ cup if you prefer less sweet desserts, or increase to ¾ cup for a sweeter treat. Remember that the tanginess of Greek yogurt balances sweetness well, so taste your batter before baking (just don’t eat raw eggs!).
Why did my cheesecake crack?
Cracking usually happens from sudden temperature changes or overbaking. Make sure to cool gradually in the oven with the door cracked, and don’t bake beyond the slight jiggle stage. Small cracks are normal and can be covered with toppings!
Can I use flavored Greek yogurt?
I don’t recommend it for this healthy cheesecake recipe, as flavored yogurts contain added sugars and can make the sweetness unpredictable. Stick with plain Greek yogurt and add your own flavorings for best control over taste.
What’s the best protein powder to use?
Vanilla whey protein works beautifully, but unflavored or vanilla plant-based proteins (pea, brown rice, or blended) also work well. Avoid chocolate or heavily flavored proteins as they’ll change the classic cheesecake taste.
Can I make this without eggs?
Eggs provide structure and richness, making them difficult to substitute in cheesecake. You could try using flax eggs (3 tablespoons ground flaxseed + 9 tablespoons water), but the texture will be less creamy and more pudding-like.
How do I know when it’s done baking?
The edges should be set and slightly puffed, while the center (about 2-3 inches in diameter) should still have a gentle jiggle when you shake the pan. It will firm up completely as it cools. An instant-read thermometer should register around 150°F in the center.
Can I double this recipe?
Yes, but use two 9-inch pans rather than one larger pan. Baking times may vary, so watch for the visual cues of doneness rather than relying solely on timing.
Have You Tried Our Recipe?
There are no reviews yet. Be the first one to write one.