
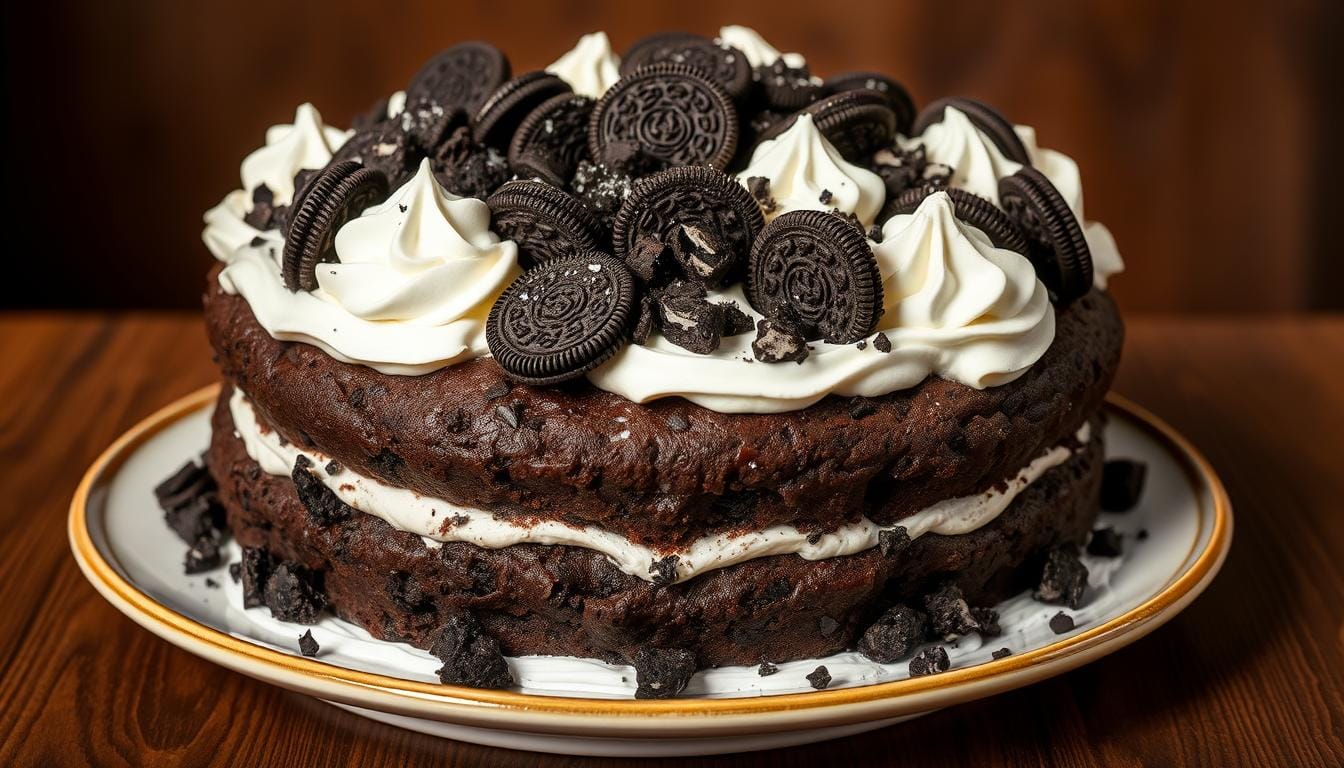
Oreo Dump Cake – Easy and Fast
Welcome to my kitchen! Today, I’m sharing my Oreo Dump Cake, a dessert that’s always a hit and truly lives up to its name. Imagine a rich, decadent dessert ready in no time with just a few ingredients. I first discovered this magical recipe when I was looking for quick, delicious desserts without long kitchen hours, and it instantly became a favorite in my home. The beauty of this dump cake is that it’s so easy to make and will satisfy your sweet tooth every single time.
This recipe is perfect for anyone who loves easy Oreo desserts and wants something delicious and fun to bake without the fuss. You only need 5 ingredients for this tasty cake – yes, just five! The Oreo Dump Cake is ideal for those seeking a hassle-free dessert that doesn’t compromise on flavor. Whether you’re an experienced baker or just starting out, this homemade Oreo Dump Cake will make you look like a pro. It requires 28 Oreo cookies, a 14-ounce can of sweetened condensed milk, an 8-ounce Cool Whip, a chocolate cake mix, and 1-1/2 sticks of butter. It bakes in 40 to 45 minutes at 350°F, making it great for a fuss-free, yet absolutely delicious treat. Let’s dive in and see why this Oreo Dump Cake is a must-try!
Table of Contents
Quick Recipe Facts
Prep Time: 10 minutes
Cook Time: 40-45 minutes
Total Time: 50-55 minutes
Servings: 12-15 servings
Difficulty: Easy
Calories: Approximately 350 per serving
This recipe is surprisingly quick and easy – perfect for busy afternoons when you want something sweet but don’t have hours to spend in the kitchen! Prep your ingredients for a smooth best Oreo Dump Cake experience.
What Makes Oreo Dump Cake So Special
Desserts like the Oreo Dump Cake are loved by many, and for good reason. It’s a favorite in homes everywhere. Its mix of flavors and easy making make it irresistible for both novice and experienced bakers alike.
The Origin of Dump Cakes
Dump cakes started in the 1960s as a revolutionary way to simplify baking. They’re simple to make with just a few ingredients, and this simplicity is part of their enduring charm. The concept was genius – just dump your ingredients in layers, bake, and enjoy. Adding Oreos to the mix made them even more popular over the years. Now, they’re a top choice for those who adore Oreo desserts and want maximum flavor with minimal effort.
Why Oreos Make Everything Better
Let’s be honest – Oreos are a classic favorite that have been beloved for generations. Adding them to dump cakes makes the dessert special and takes it to a whole new level. The mix of crunchy Oreos and creamy sweetened condensed milk is absolutely perfect. There’s something magical about how those chocolate cookies soften and meld with the other ingredients during baking, creating pockets of deliciousness throughout the cake.
The Perfect Combination of Convenience and Taste
The Oreo Dump Cake is incredibly easy to make and doesn’t require any special skills. It’s ready in just 50 minutes from start to finish. Its rich flavor and moist texture make it ideal for any event, from casual family dinners to special celebrations. The convenience factor cannot be overstated – this is truly a recipe you can whip up on a whim.
If you love dump cakes or want to try something new, the Oreo Dump Cake is a must-try. Its unique flavors and ease of making make it perfect for Oreo fans of all ages. The combination of chocolate cake, creamy filling, and crushed Oreos creates a dessert that’s both comforting and exciting. So, why not give it a try and see why it’s so popular?
Ingredients
For this Oreo Dump Cake, you’ll need the following ingredients. The beauty of this recipe is that everything is readily available at your local grocery store. You can swap butter with coconut oil for a lighter chocolate Oreo Dump Cake version if you prefer. The sweetened condensed milk adds a rich, creamy sweetness that makes your Oreo Dump Cake moist and absolutely delicious.
To make a tasty Oreo Dump Cake, you’ll need some key ingredients that work together perfectly. You’ll need Oreo cookies, sweetened condensed milk, chocolate cake mix, Cool Whip, and butter. Choosing the best ingredients is important for a great taste, so don’t skimp on quality here.
For an easy recipe, use a store-bought chocolate cake mix and sweetened condensed milk. These are easy to find in most supermarkets, making this truly an accessible dessert for everyone.
The ingredients for a chocolate Oreo Dump Cake are common household items. You’ll need:
- 20 Oreos for the bottom of a 9×11 baking dish (crushed)
- 25 Oreos for the top layer after baking (roughly chopped)
- 15 ounces of sweetened condensed milk (1 can, 14-ounce)
- 8 ounces of Cool Whip (1 container)
- 15.25 ounces of chocolate cake mix (1 box)
- ¾ cup of salted butter cut into thin slices (approximately 1-1/2 sticks)
Pro tip: Having your ingredients measured and ready before you start makes the assembly process even smoother. This is what we call “mise en place” in professional kitchens, and it works wonders for home baking too!
Kitchen Tools and Equipment Needed
To make a tasty Oreo dump cake, you’ll need some basic kitchen tools that you probably already have. For a simple dessert like this, having the right tools is key to success. You’ll need a 9×13 inch baking dish, a mixing bowl, and a whisk. These are the must-haves for preparing your quick Oreo dessert.
Must-Have Baking Items
- 9×13 inch baking dish (this size is perfect for the recipe proportions)
- Mixing bowl (medium to large size)
- Whisk (for combining ingredients smoothly)
- Cooking spray or butter (for greasing the pan)
Optional Tools for Enhanced Results
Some optional tools can make baking easier and yield even better results. A stand mixer or a food processor can be helpful if you have them available. They make mixing the cake mix and other ingredients a breeze, ensuring everything is perfectly combined. With these tools, your Oreo dump cake will be light and fluffy, just right.
- Stand mixer (makes mixing effortless)
- Food processor (great for crushing Oreos uniformly)
- Rubber spatula (perfect for spreading layers evenly)
Having these kitchen tools will help you make a delicious Oreo dump cake. This simple dessert recipe is a hit with friends and family every single time. The right tools make all the difference in your baking experience. So, gather your equipment and get ready to create something amazing!
Instructions
To make the best Oreo Dump Cake, follow this simple recipe that yields incredible results every time. The process is straightforward, but each step matters for achieving that perfect texture and taste. Start by preparing your baking dish properly.
Step 1: Preparing Your Baking Dish
Spray your 9×13 inch baking dish with cooking spray or grease it generously with butter. This step is key to a smooth and even homemade Oreo Dump Cake that releases perfectly from the pan. Make sure you get into all the corners – trust me, this makes cleanup so much easier later! Once your dish is ready, you’re set to layer your ingredients.
Step 2: Layering Your Ingredients
Layering is where the magic happens! This involves carefully adding Oreo cookies, sweetened condensed milk, chocolate cake mix, and Cool Whip in the right order. This specific mix creates a moist and delicious dessert that bakes up beautifully. Don’t rush this step – taking your time with the layers ensures even distribution of all those wonderful flavors.
Here’s the detailed layering process for your easy Oreo Dump Cake recipe:
- First Layer: Take 20 Oreo cookies and crush them (you can use a food processor or place them in a ziplock bag and crush with a rolling pin). Spread the crushed Oreos evenly across the bottom of your prepared baking dish.
- Second Layer: Pour the entire can of sweetened condensed milk (15 ounces) over the crushed Oreos, making sure to distribute it as evenly as possible across the surface.
- Third Layer: Spread the Cool Whip (8 ounces) gently over the sweetened condensed milk layer. Use a rubber spatula to create an even layer without disturbing the milk beneath too much.
- Fourth Layer: Sprinkle the dry chocolate cake mix evenly over the Cool Whip layer. Don’t worry about mixing – just let it sit on top as a dry layer. This is the “dump” part of the dump cake!
- Fifth Layer: Arrange the thin slices of butter evenly across the top of the cake mix, covering as much surface area as possible. The butter will melt during baking and help create that golden, crispy top.
- Final Touch: Roughly chop the remaining 25 Oreos and sprinkle them over the butter layer for extra Oreo goodness throughout.
Step 3: Baking Instructions
After layering, it’s time to bake your easy Oreo Dump Cake recipe in the oven. Preheat your oven to 350°F (175°C) – this helps your Oreo Dump Cake bake evenly from the start. Place your assembled cake on the middle rack of your preheated oven.
Bake for 40 to 45 minutes, until the top is golden brown and the ingredients are well combined. You’ll know it’s done when the edges are bubbly and the center has set. The butter should have melted completely and created a beautiful golden crust on top. Let it cool for about 10-15 minutes before serving – this allows the layers to set properly. The result is a delicious, best Oreo Dump Cake perfect for any occasion!
Pro Tips
Here are some insider secrets to elevate your Oreo Dump Cake game:
Tip 1: Don’t skip the butter distribution step – spreading those butter slices evenly across the top helps the cake bake uniformly and creates that irresistible golden crust. I like using cold butter and slicing it thin; it just works better for even coverage.
Tip 2: Use room temperature Cool Whip for easier spreading. Take it out of the fridge about 10 minutes before you start assembling your cake. This makes it much more pliable and creates a smoother layer.
Tip 3: For a fluffier Oreo Dump Cake, make sure your oven is fully preheated before baking. An oven thermometer can help ensure accuracy – sometimes our ovens aren’t quite at the temperature the dial says!
Tip 4: Grease your pan thoroughly to prevent sticking – trust me, it makes a huge difference when you’re trying to serve perfect slices! Pay special attention to the corners and edges.
Tip 5: Don’t skip chilling time if you want cleaner slices. While the cake is delicious served warm, letting it cool for 15-20 minutes helps it hold together better when cutting.
Tip 6: Swap regular Oreos with Double Stuf Oreos for an even richer chocolate Oreo Dump Cake experience. You can also try Golden Oreos for a vanilla variation!
Tip 7: Use high-quality chocolate cake mix for the best results. The quality of your base ingredients really does shine through in the final product.
Keep these tips friendly, personal, and casual in mind, and you’ll create a dessert that impresses every time!
Creative Variations of Classic Oreo Dump Cake
There are so many fun ways to customize your Oreo Dump Cake to suit different tastes and occasions! The base recipe is incredibly versatile and welcomes experimentation.
Double Chocolate Version
You can add more cocoa powder (2-3 tablespoons mixed into the cake mix) or use chocolate fudge cake mix instead of regular chocolate for an intensely chocolatey double chocolate version. This is perfect for those serious chocolate lovers in your life who believe you can never have too much chocolate!
Mint Oreo Alternative
For a refreshing mint twist, use mint Oreos instead of regular ones and add ½ teaspoon of peppermint extract to the sweetened condensed milk before pouring. This gives the classic recipe a cool, refreshing spin that’s especially popular during the holiday season. It’s a great choice for a unique dessert that stands out.
Birthday Cake Oreo Edition
Use birthday cake-flavored Oreos and add colorful sprinkles on top before baking for a festive celebration cake. This variation is perfect for birthday parties and always brings smiles!
Peanut Butter Lover’s Version
Add ½ cup of peanut butter chips between the layers or drizzle melted peanut butter over the top before serving. The combination of peanut butter, chocolate, and Oreos is absolutely divine!
Try different Oreo flavors and combinations for the best Oreo Dump Cake that suits your preferences. Here are some more creative variations to explore:
- Cookies and Cream Supreme: Use white cake mix instead of chocolate for a lighter base
- Salted Caramel Delight: Drizzle caramel sauce between layers and sprinkle sea salt on top
- Red Velvet Oreo: Use red velvet cake mix and red velvet Oreos for a colorful twist
These variations can help you create the best Oreo Dump Cake for any occasion. Whether you’re looking for a classic dessert or something new and adventurous, the Oreo Dump Cake is a great choice as your canvas. Its easy recipe and endless customization options make it a favorite among many home bakers. So, why not experiment and find your signature version?

Serving Suggestions
After making your homemade Oreo Dump Cake, presentation and accompaniments can take it from great to extraordinary! This dessert is delicious on its own, but these serving ideas elevate your easy Oreo dessert experience.
Serve warm or at room temperature – both ways are absolutely delicious! Warm cake has that gooey, melty quality, while room temperature allows the flavors to fully develop and the texture to set perfectly.
Pair with coffee, tea, or fresh fruit for a well-rounded dessert experience. A hot cup of coffee complements the sweetness beautifully, while fresh berries add a tart contrast that cuts through the richness.
Add a dollop of whipped cream or a generous scoop of vanilla ice cream for an indulgent treat. The cold ice cream melting into the warm cake creates an amazing temperature and texture contrast that’s simply irresistible. You can also try:
- Chocolate sauce drizzle for extra decadence
- Fresh mint leaves as a garnish for a pop of color and freshness
- Crushed Oreos sprinkled on top of ice cream for added crunch
- Caramel sauce for a sweet and buttery addition
- Chocolate whipped cream for double the chocolate pleasure
Consider serving individual portions in small dessert bowls or ramekins for a more elegant presentation at dinner parties. These serving suggestions will make your Oreo Dump Cake the star of any gathering!
Storage and Serving Suggestions
After making your homemade Oreo Dump Cake, you’ll want to keep it fresh so you can enjoy it for days. Proper storage is essential for maintaining that delicious texture and flavor.
Room Temperature Storage
Store your cake in an airtight container at room temperature for up to 2 days. This works well if you know you’ll finish it quickly (and trust me, you probably will!). Make sure the container seals properly to prevent the cake from drying out.
Refrigerator Storage
Keep it in the fridge in an airtight container for up to 5 days. The cool temperature helps preserve the Cool Whip layer and keeps everything fresh. Just be aware that refrigeration can slightly firm up the texture, but it’s still absolutely delicious.
Freezer Storage
For longer storage, freeze individual portions wrapped tightly in plastic wrap and then aluminum foil for up to 3 months. This is perfect for meal prep or keeping dessert on hand for unexpected guests.
Reheating Instructions
To reheat, thaw frozen portions overnight in the refrigerator, and then microwave individual servings for 20-30 seconds until warm. Or, warm it up in a 300°F oven for 10-15 minutes until it’s gooey and heated through. The oven method is my preferred way because it helps restore that slightly crispy top layer.
Serving Enhancements
Serve with vanilla ice cream, whipped cream, or chocolate sauce for a special treat that takes this dessert to the next level. You can also dust with powdered sugar for an elegant finish.
Here’s a quick reference guide:
| Storage Method | Storage Time | Best For |
|---|---|---|
| Room Temperature | Up to 2 days | Quick consumption |
| Refrigerator | Up to 5 days | Extended freshness |
| Freezer | Up to 3 months | Long-term storage |
By following these storage tips and suggestions, you can enjoy your Oreo Dump Cake for days after baking. It’s perfect for parties or keeping on hand as a quick dessert when that sweet craving hits. This cake stores beautifully and is sure to impress everyone, whether served fresh or from the freezer!
Common Mistakes to Avoid
When making an easy Oreo Dump Cake recipe, it’s key to avoid common mistakes that can affect your final result. Learning from these pitfalls will help you create the perfect dessert every single time.
Mistake #1: Overmixing the Batter
Overmixing the cake mix layer with other layers can make the dessert dense and tough instead of light and moist. To prevent this, resist the urge to stir everything together. The beauty of a dump cake is that the layers stay separate during assembly and come together during baking. Mix the ingredients just until they’re combined (if you’re combining anything at all), then stop. Remember, this is called a “dump” cake for a reason – you literally just dump and layer!
Mistake #2: Using Low-Quality Ingredients
Another common mistake is using low-quality ingredients or generic substitutes that don’t deliver the same results. This can harm the flavor and texture of your best Oreo Dump Cake significantly. Using top-notch Oreos (the real deal, not knock-offs) and quality cake mix will help your dessert turn out perfect every time. The ingredient quality really does make a noticeable difference in the final product.
Mistake #3: Not Following Instructions Carefully
Skipping steps or changing the order of operations can lead to disappointing results. Each layer serves a specific purpose in creating the perfect texture and flavor profile. Follow the recipe as written, especially the first time you make it.
Mistake #4: Incorrect Oven Temperature
Not preheating your oven properly or using the wrong temperature can result in uneven baking. Always preheat to 350°F and use an oven thermometer to verify accuracy. Ovens can be surprisingly inaccurate!
Mistake #5: Cutting Too Soon
Slicing into your cake immediately after removing it from the oven can cause it to fall apart. Let it cool for at least 10-15 minutes to allow the layers to set properly.
Here’s a quick reference guide to avoid these pitfalls:
| Mistake | Effect | Prevention |
|---|---|---|
| Overmixing | Dense and tough texture | Keep layers separate during assembly |
| Low-quality ingredients | Affected flavor and texture | Use high-quality Oreos and cake mix |
| Not following instructions | Incorrect texture and taste | Follow the recipe carefully step by step |
| Wrong temperature | Uneven baking | Preheat oven and verify temperature |
| Cutting too soon | Messy, falling apart slices | Cool for 10-15 minutes before serving |
By avoiding these mistakes, you can ensure your Oreo Dump Cake is delicious and perfect every time you make it. Always follow the easy Oreo Dump Cake recipe carefully and don’t be afraid to try different ingredients and variations once you’ve mastered the basic technique. With practice, you’ll create the best Oreo Dump Cake tailored to your taste preferences. So go ahead, give it a try, and enjoy the process of creating a mouth-watering dessert that’s easy to make and fun to eat!

Make-Ahead and Freezing Instructions
Preparing an Oreo Dump Cake ahead of time is incredibly easy and convenient. It’s great for parties or events when you’re short on time and need to prepare in advance. The flexibility of this recipe makes it perfect for busy schedules and planned entertaining.
Make-Ahead Tips
You can prepare the cake up to 2 days in advance and store it in the refrigerator covered with plastic wrap or aluminum foil. This is especially helpful when hosting parties – you can bake it the day before and simply reheat portions as needed. Just make the dessert according to the recipe, let it cool completely, wrap it tightly, and refrigerate until you’re ready to serve.
Freezing Instructions
For longer storage, you can freeze your homemade Oreo Dump Cake for up to 3 months! This is perfect for those times when you want dessert on hand but don’t want to bake from scratch. Here’s how to do it properly:
- Allow the cake to cool completely after baking
- Cut into individual portions for easier thawing and serving
- Wrap each portion tightly in plastic wrap, ensuring no air pockets
- Wrap again in aluminum foil for extra protection against freezer burn
- Label with the date and contents
- Place wrapped portions in a freezer-safe container or bag
Thawing Instructions
To thaw your Oreo Dump Cake, you have two options: let it sit at room temperature for 2-3 hours, or thaw it in the fridge overnight. The refrigerator method is slower but helps maintain the best texture. This keeps your cake fresh and ready to serve whenever the craving strikes.
Reheating Frozen Cake
Once thawed, reheat individual portions in the microwave for 30-45 seconds, or warm in a 300°F oven for 10-15 minutes until heated through. The oven method helps restore that slightly crispy top that makes this cake so irresistible.
Here are some additional tips for freezing your Oreo Dump Cake:
- Prepare the cake up to 2 days in advance and store it in the refrigerator for best results
- Freeze the cake for up to 3 months and thaw it when you’re ready to serve
- Consider portioning out the cake into individual slices before freezing for easy access later – this is especially convenient for grab-and-go desserts
- Flash freeze slices on a baking sheet before wrapping to prevent them from sticking together
Preparation Timeline
| Preparation Time | Freezing Time | Thawing Time |
|---|---|---|
| 10 minutes prep + 40-45 minutes baking | 2-3 hours to freeze solid | 2-3 hours at room temp or overnight in fridge |
Following these make-ahead and freezing tips, you can enjoy your homemade Oreo Dump Cake anytime without the stress of last-minute preparation. It’s perfect for any occasion or when you want a quick dessert ready to go. This easy recipe is sure to be a hit, and having it prepared ahead means you can spend more time enjoying your guests and less time in the kitchen!
Health & Nutrition Info
While this Oreo Dump Cake is definitely an indulgent treat, it’s helpful to know what you’re enjoying! One serving contains approximately 350 calories, though this can vary depending on portion size and any additions like ice cream or whipped cream.
Making It Healthier
The cake can be made with some healthier substitutions if desired:
- Reduced-fat Cool Whip instead of regular for fewer calories
- Sugar-free cake mix for a lower-sugar option
- Light sweetened condensed milk to reduce fat content
- Dark chocolate Oreos for added antioxidants
Dietary Modifications
This chocolate Oreo Dump Cake can be adapted for various dietary needs:
- Gluten-free version: Use gluten-free Oreos and gluten-free cake mix
- Dairy-free option: Use dairy-free Cool Whip alternative and ensure your cake mix is dairy-free
- Lower sugar: Reduce the sweetened condensed milk by 1/4 cup and use reduced-sugar Oreos
Consider these swaps for healthier fats or lower sugar content while maintaining that delicious taste. This healthier easy Oreo dessert option is perfect for weekend treats when you want to indulge a little more mindfully. Remember, dessert is meant to be enjoyed, so find the balance that works for you!
Conclusion
The Oreo Dump Cake is a tasty dessert that perfectly mixes the beloved flavor of Oreos with a simple cake recipe that anyone can master. It’s perfect for both experienced bakers and beginners who want impressive results without complicated techniques. This cake is wonderfully moist and filled with Oreo flavor in every single bite, making it a favorite for dessert lovers of all ages.
Ready to make this amazing easy Oreo Dump Cake recipe? It’s quick and easy to prepare, requiring minimal effort but delivering maximum deliciousness. Perfect for any event, it’s great for family dinners, potlucks, holiday gatherings, or just because you deserve something sweet. The convenience of this recipe means you can whip it up on a weeknight or prepare it ahead for weekend entertaining.
Try this Oreo Dump Cake and let me know how it turned out! I’d love to hear about your experience making it, any variations you tried, or how your family and friends reacted to this delicious dessert. Leave a comment below sharing your results, rate the recipe if you enjoyed it, or share photos on social media – tag me so I can see your beautiful creations!
Enjoy every bite and make wonderful memories with your loved ones over slices of this incredible cake. You’ll be the star of the dessert table, and people will be asking for your recipe! The combination of convenience and outstanding taste makes this homemade Oreo Dump Cake a recipe you’ll return to again and again. Happy baking, and don’t forget to check out my other easy dessert recipes for more sweet inspiration!
FAQ
Can I freeze this recipe?
Yes! Your Oreo Dump Cake can be frozen for up to 3 months. Wrap it tightly in plastic wrap and aluminum foil, then store in a freezer-safe container. Thaw overnight in the refrigerator or for 2-3 hours at room temperature before serving. For best results, freeze in individual portions for easy serving later.
What if I don’t have Cool Whip?
No problem! You can substitute Cool Whip with homemade whipped cream (whip 1 cup heavy cream with 2 tablespoons sugar until stiff peaks form). You can also use another brand of whipped topping. The texture will be slightly different but still delicious.
Can I make it ahead of time?
Absolutely! You can prepare this easy Oreo Dump Cake up to 2 days in advance. Store it covered in the refrigerator and reheat portions as needed. This makes it perfect for entertaining and party planning when you want to reduce day-of stress.
How can I adjust the sweetness?
If you find the cake too sweet, you can reduce the sweetened condensed milk by 1/4 cup or use unsweetened whipped cream instead of Cool Whip. You can also balance the sweetness by serving it with unsweetened whipped cream or pairing it with black coffee. For a less sweet version, consider using dark chocolate cake mix.
What’s the best way to cut clean slices?
Allow the cake to cool for 15-20 minutes after baking, then use a sharp knife dipped in hot water (wipe clean between cuts) for the cleanest slices. Chilling the cake slightly also helps it hold together better when cutting.
Can I use a different size pan?
The recipe is designed for a 9×13 inch pan. If using a different size, adjust the baking time accordingly. A smaller, deeper pan will need more time, while a larger, shallower pan will bake faster. Watch for golden brown edges and a set center.
What other Oreo flavors work well?
Almost any Oreo flavor works beautifully! Try Golden Oreos, Mint Oreos, Peanut Butter Oreos, Red Velvet Oreos, or Birthday Cake Oreos for fun variations. Each brings its own unique twist to this chocolate Oreo Dump Cake.
Why is my cake soggy in the middle?
This usually happens if the cake hasn’t baked long enough. Make sure your oven is properly preheated to 350°F and bake for the full 40-45 minutes until the center is set and edges are bubbly. Every oven is different, so you may need an extra 5 minutes.
Can I double the recipe?
Yes, you can double the ingredients and use two 9×13 inch pans, or use a large roasting pan. Keep the baking time similar but check for doneness, as larger cakes may need a few extra minutes.
Is this recipe kid-friendly?
Absolutely! Kids love this Oreo Dump Cake, and they can even help with assembly since it doesn’t require complicated techniques. It’s a great recipe to make together as a family activity.
Have You Tried Our Recipe?
There are no reviews yet. Be the first one to write one.