

Easy Lemon Pound Cake from Scratch – Better Than Bakery!
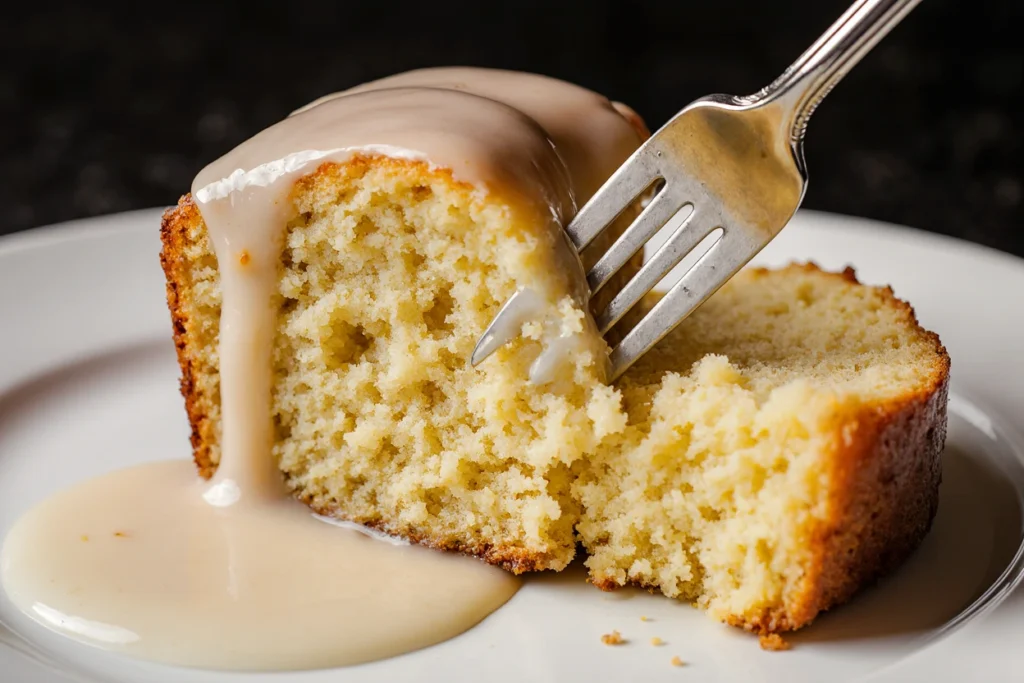
There’s something magical about the smell of fresh lemon pound cake baking in your kitchen – that buttery, citrusy aroma that makes everyone gather around asking, “Is it ready yet?” I’ll never forget the first time I made this homemade lemon pound cake from scratch. It was a rainy Sunday afternoon, and I was craving something bright and comforting. One bite of that moist, tender crumb topped with sweet-tart lemon glaze, and I knew this recipe would become my go-to for every occasion. What makes this lemon cake with glaze so special is its perfect balance – it’s rich without being heavy, sweet without being cloying, and has just enough lemon flavor to make your taste buds dance. Whether you’re baking for a spring brunch, a birthday celebration, or simply treating yourself on a Tuesday, this moist lemon pound cake delivers bakery-quality results every single time. The best part? You don’t need any fancy equipment or hard-to-find ingredients. Just simple pantry staples, a little patience, and you’ll have a stunning dessert that looks like it came from an expensive bakery. Trust me when I say this lemon pound cake from scratch is easier than you think, and once you master it, you’ll be making it on repeat. Let me walk you through every step to ensure your cake turns out absolutely perfect!
Table of Contents
Quick Recipe Facts
Prep Time: 15 minutes
Cook Time: 60 minutes
Total Time: 1 hour 15 minutes
Servings: 10-12 slices
Difficulty: Easy
Calories: ~320 per slice
This recipe is surprisingly simple and foolproof – perfect for beginner bakers and seasoned pros alike!
Ingredients
For the Lemon Pound Cake:
- 3 cups all-purpose flour – Sift it for the lightest texture
- 1/2 teaspoon baking powder – Helps the cake rise just a bit
- 1/2 teaspoon salt – Enhances all the flavors beautifully
- 1 cup (2 sticks) unsalted butter, softened – Room temperature is crucial! You can substitute with coconut oil if you prefer
- 2 1/2 cups granulated sugar – Creates that classic pound cake sweetness
- 5 large eggs, room temperature – Cold eggs can make your batter seize up
- 1 cup whole milk – Buttermilk works wonderfully too for extra tang
- 2 tablespoons fresh lemon zest – From about 2-3 large lemons
- 1/4 cup fresh lemon juice – Bottled works in a pinch, but fresh is best
- 1 teaspoon vanilla extract – Rounds out the lemon flavor
- 1/2 teaspoon lemon extract (optional) – For an extra lemony punch
For the Lemon Glaze:
- 2 cups powdered sugar – Sifted to avoid lumps
- 3-4 tablespoons fresh lemon juice – Adjust for desired thickness
- 1 tablespoon lemon zest – Adds beautiful flecks and flavor
- 1 tablespoon melted butter – Makes the glaze shiny and rich
Instructions
Step 1: First things first, let’s preheat your oven to 325°F (165°C). This lower temperature is the secret to a perfectly moist pound cake that doesn’t dry out. While it’s heating, generously grease a 10-inch bundt pan or two 9×5-inch loaf pans with butter and dust with flour, making sure to get into all those nooks and crannies. I always use a pastry brush for this – it really makes a difference!
Step 2: In a medium bowl, whisk together your flour, baking powder, and salt. Set this aside – we’ll come back to it in a minute. This simple step of combining your dry ingredients ensures everything is evenly distributed, so you won’t get pockets of baking powder in your finished cake.
Step 3: Now for the fun part! In a large mixing bowl (or your stand mixer), beat the softened butter and sugar together on medium-high speed for about 5 minutes until it’s light, fluffy, and pale yellow. Don’t rush this step – proper creaming incorporates air and creates that tender crumb we’re after. The mixture should look almost like whipped frosting when it’s ready.
Step 4: Add your eggs one at a time, beating well after each addition. I know it’s tempting to dump them all in at once, but patience pays off here! After each egg, scrape down the sides of the bowl to make sure everything is incorporating evenly. Mix in the vanilla extract and lemon extract (if using).
Step 5: Time to add the citrus magic! Stir in your fresh lemon zest and lemon juice. You’ll notice the batter might look slightly curdled at this point – don’t panic, that’s completely normal and it’ll come together beautifully in the next step.
Step 6: Now we’ll alternate adding the dry ingredients and milk. Start and end with the flour mixture: add about one-third of the flour, mix on low speed just until combined, then add half the milk. Repeat this process, ending with the final third of flour. Mix just until no white streaks remain, but don’t overbeat – overworking the batter leads to a tough, dense cake instead of that light, tender texture we want.
Step 7: Pour the batter into your prepared pan(s), smoothing the top with a spatula. Gently tap the pan on the counter a few times to release any air bubbles. This little trick helps prevent holes in your finished cake.
Step 8: Bake for 60-70 minutes for a bundt pan, or 50-60 minutes for loaf pans. You’ll know it’s done when the top is golden brown, the cake springs back when lightly touched, and a toothpick inserted into the center comes out clean or with just a few moist crumbs. Start checking around the 50-minute mark – every oven is different!
Step 9: Remove from the oven and let the cake cool in the pan for about 15 minutes. This cooling period is essential – if you try to remove it too soon, it might stick or break apart. After 15 minutes, carefully invert the cake onto a wire rack and let it cool completely before glazing.
Step 10: While your cake cools, let’s make that gorgeous glaze! In a medium bowl, whisk together the powdered sugar, lemon juice, melted butter, and lemon zest until smooth. The consistency should be thick but pourable – add more lemon juice if it’s too thick, or more powdered sugar if it’s too thin.
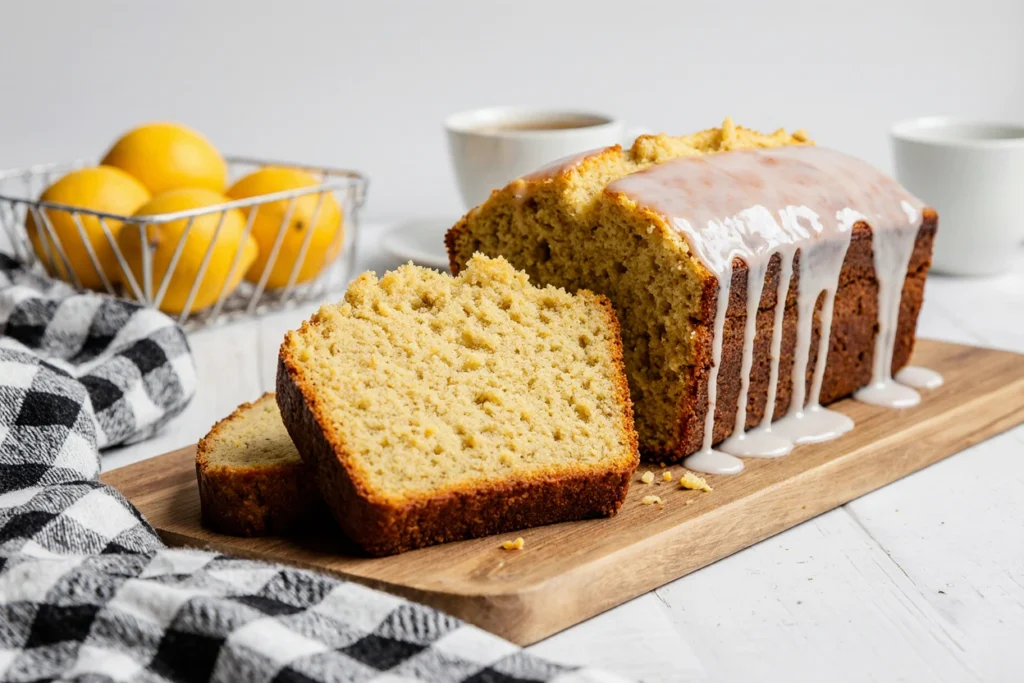
Step 11: Once your cake is completely cool (I know it’s hard to wait!), place it on your serving plate and drizzle the glaze generously over the top, letting it cascade down the sides naturally. For a picture-perfect finish, you can use a spoon to guide the glaze exactly where you want it. Let the glaze set for about 10-15 minutes before slicing.
Pro Tips
Tip 1: Room temperature ingredients are absolutely crucial for this recipe. Cold butter won’t cream properly, and cold eggs can cause the batter to curdle. Take everything out of the fridge about an hour before you start baking. If you forgot, you can quick-warm eggs by placing them in a bowl of warm water for 5 minutes.
Tip 2: Don’t skip the zest! While lemon juice adds tartness, lemon zest is where all those aromatic, floral lemon oils live. Use a microplane grater and only zest the yellow part – the white pith underneath is bitter.
Tip 3: Measure your flour correctly by spooning it into the measuring cup and leveling it off with a knife. Scooping directly from the bag packs the flour down and you’ll end up with too much, resulting in a dry, dense cake. Better yet, use a kitchen scale if you have one (3 cups = 360 grams).
Tip 4: If your cake starts browning too quickly on top but isn’t done in the middle, tent it loosely with aluminum foil for the remaining baking time. This prevents over-browning while allowing the center to finish cooking.
Tip 5: For an even more intense lemon flavor, poke holes all over the warm cake with a skewer and brush it with a simple syrup made from equal parts lemon juice and sugar before adding the glaze. This creates a wonderfully moist, lemony cake that stays fresh longer.
Tip 6: Want to make this cake dairy-free? Swap the butter for coconut oil (measured solid, then melted) and use your favorite plant-based milk. The texture will be slightly different but still delicious!
Serving Suggestions
This lemon pound cake with glaze is incredibly versatile and shines in so many ways! Serve it simply with a cup of hot tea or coffee for an elegant afternoon treat. For a more indulgent dessert, add a dollop of fresh whipped cream and a handful of fresh berries – the combination of tart berries with sweet cake is absolutely divine.
I love serving this at spring brunches alongside fresh fruit salad and mimosas. The bright lemon flavor feels so fresh and seasonal! For a summer dinner party, pair a slice with lemon sorbet or vanilla ice cream and a drizzle of berry compote. The warm-cold contrast is incredible.
Want to make it fancy? Dust the glazed cake with powdered sugar just before serving, add candied lemon slices on top, or garnish with fresh edible flowers like pansies or violets. For a more rustic presentation, serve slices on individual plates with a sprig of fresh mint and a few fresh raspberries scattered around.
This cake also makes a wonderful gift! Bake it in mini loaf pans, wrap in cellophane with a pretty ribbon, and you’ve got a thoughtful homemade present that anyone would be thrilled to receive.

Storage & Reheating
The beauty of this homemade lemon pound cake is that it actually gets better after a day or two! The flavors meld together and the texture becomes even more moist. Store your cake in an airtight container at room temperature for up to 5 days – yes, it lasts that long if you can resist eating it all!
For longer storage, wrap the unglazed cake tightly in plastic wrap, then aluminum foil, and freeze for up to 3 months. Thaw overnight in the refrigerator, bring to room temperature, and add your fresh glaze before serving. You can also freeze individual slices wrapped well, perfect for grabbing a quick treat whenever the craving strikes.
If you prefer your cake slightly warm, pop a slice in the microwave for 10-15 seconds – just don’t overdo it or it’ll dry out. Alternatively, warm it in a 300°F oven for about 5 minutes. That gentle warmth brings out all those buttery, lemony flavors beautifully.
Pro tip: If your cake seems a bit dry after a few days (though it rarely does!), brush the slices lightly with simple syrup or extra lemon glaze before serving to revive the moisture.
Health & Nutrition Info
Let’s be real – this is a treat, and that’s perfectly okay! Each generous slice contains approximately 320 calories, making it a reasonable indulgence when you want something special. The recipe does contain butter, sugar, and eggs, which contribute to that classic rich pound cake texture we all love.
If you’re looking to lighten it up a bit, you can substitute half the butter with unsweetened applesauce (though the texture will be slightly different), use a sugar substitute like monk fruit sweetener, or reduce the glaze by half. Greek yogurt can replace some of the butter for added protein and a tender crumb.
This cake is naturally vegetarian but not vegan or gluten-free in its classic form. However, it’s quite adaptable! For a gluten-free version, use a 1:1 gluten-free baking flour blend – I’ve had great success with this substitution. For egg-free baking, try using flax eggs or commercial egg replacer, though the texture will be denser.
The good news? Lemons are packed with vitamin C, and you’re getting plenty of fresh citrus in every bite. Plus, baking from scratch means you know exactly what’s going into your food – no preservatives, artificial flavors, or mysterious ingredients!
I’d Love to Hear From You!
There you have it – my tried-and-true recipe for the most incredible lemon pound cake from scratch! This moist, tender, perfectly balanced cake has been a star at countless family gatherings, potlucks, and quiet afternoons in my kitchen. Every time I make it, I’m reminded why simple, classic recipes never go out of style.
I really hope you’ll give this recipe a try and experience that moment when you take your first bite of warm, lemony, glazed perfection. Whether you’re baking it for a special occasion or just because it’s Tuesday and you deserve something wonderful, I promise this cake won’t disappoint.
Now it’s your turn! Have you made this recipe? I’d absolutely love to see how it turned out! Drop a comment below and let me know – did you add any fun twists? Serve it with something unexpected? I’m always curious to hear how you make recipes your own. And if you loved it (which I’m confident you will!), please leave a rating and share it with your fellow baking enthusiasts!
FAQ
Can I freeze lemon pound cake? Absolutely! This cake freezes beautifully for up to 3 months. I recommend freezing it before adding the glaze for best results. Wrap the completely cooled cake tightly in plastic wrap, then aluminum foil. When you’re ready to serve, thaw it overnight in the refrigerator, bring it to room temperature, and add fresh glaze. You can also freeze individual slices wrapped well, which is perfect for portion control or quick treats!
What if I don’t have fresh lemons? Fresh lemons really do make a difference in this recipe, but I understand they’re not always available. In a pinch, you can use bottled lemon juice, though the flavor won’t be quite as bright and fresh. For the zest, there’s no great substitute – it adds those essential aromatic oils that make the cake sing. If you absolutely can’t get fresh lemons, increase the lemon extract to 1 teaspoon to boost the lemon flavor.
Can I make this cake ahead of time? Yes! This is actually one of those magical recipes that gets better with time. The flavors meld and deepen after a day or two. You can bake the cake up to 3 days in advance – just store it in an airtight container at room temperature. I’d recommend adding the glaze the day you plan to serve it for the prettiest presentation, though the cake is delicious even with day-old glaze.
My pound cake turned out dry – what went wrong? The most common culprits for dry pound cake are overbaking and too much flour. Always start checking your cake 5-10 minutes before the recommended baking time, as ovens vary. For the flour, make sure you’re measuring correctly by spooning it into the cup and leveling off, not scooping directly from the bag. Also, resist the urge to overmix once you add the flour – mix just until combined. Finally, make sure your oven temperature is accurate by using an oven thermometer.
How can I adjust the sweetness or tartness? The beauty of this recipe is its flexibility! For a less sweet cake, reduce the sugar in the cake by 1/4 to 1/2 cup – it’ll still work beautifully. For more tartness, increase the lemon juice to 1/3 cup or add an extra tablespoon of lemon zest. For the glaze, you have total control – add more lemon juice for a tangy glaze, or more powdered sugar for a sweeter one. Taste as you go and adjust to your preference!
Can I make this in a different size pan? Definitely! This recipe works in a 10-inch bundt pan, two 9×5-inch loaf pans, or even a 9×13-inch rectangular pan. Just adjust the baking time accordingly – loaf pans take 50-60 minutes, a 9×13 pan takes about 40-45 minutes, and mini loaf pans take 25-30 minutes. Always use the toothpick test to check for doneness rather than relying solely on time.
Have You Tried Our Recipe?
Delicious and Instructions/Tips Are Excellent!
A friend brought me lemons from her yard today and I decided to try to make lemon pound cake. I looked at several recipes but found this one to be exceptionally well written with much appreciated tips for success.
This turns out beautifully and we love it! My husband raved about it.
Thanks for a keeper!!
Response from TastyDessertRecipes
Thank you for your wonderful feedback. I’m delighted the recipe worked so well and that you both enjoyed it