
The No-Bake Summer Cake That’s Ready in 10 Minutes (No Oven, No Stress)
Most summer cake recipes demand an oven, a cooling rack, and at least an hour of your time. This version skips the bake entirely and sets in the refrigerator instead — layers of cream, fruit, and a buttery biscuit base that firm up into something sliceable without a single minute of heat.
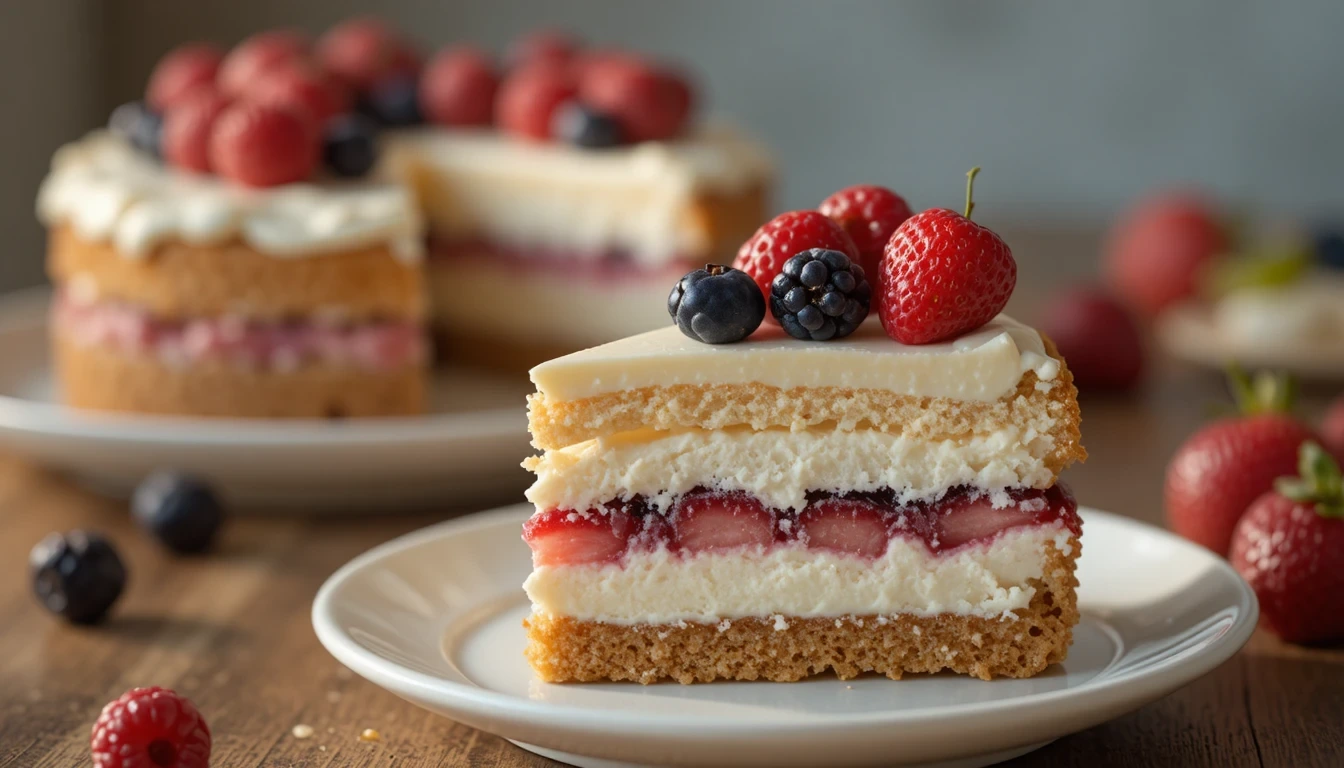
The technique relies on cold-setting whipped cream rather than a baked crumb structure, which means the texture stays light and cool — exactly what you want when it’s 90°F outside. This summer cake works for anyone who wants a dessert that looks assembled rather than baked, with no special equipment and no oven required.
One thing worth noting: the cream layer looks too loose when you spread it — almost liquid. Don’t adjust the recipe. Once it chills for the time specified, it holds a clean slice. Pull it before it’s fully firm and it will collapse on the plate.
Table of Contents
- Prep Time: 10 minutes
- Cook Time: 0 minutes
- Total Time: 10 minutes + 2 hours chilling
- Servings: 8 slices
- Difficulty: Beginner
- Calories: ~310 per serving
Ingredients for Summer Cake
Base Layer
- 200g (7 oz) digestive biscuits or graham crackers, crushed
- 85g (6 tbsp) unsalted butter, melted
- 1 tbsp granulated sugar
Cream Layer
- 480ml (2 cups) heavy whipping cream, cold
- 3 tbsp powdered sugar
- 1 tsp vanilla extract
- 200g (7 oz) cream cheese, softened to room temperature
Fruit Topping
- 300g (about 2 cups) mixed fresh berries — strawberries, blueberries, raspberries
- 1 tbsp honey or maple syrup
- 1 tsp lemon juice
This no bake summer cake comes together with ingredients you likely already have. The cream cheese is what separates the filling from a standard whipped cream layer — it adds enough structure to hold a slice without gelatin.
How to Make This No Bake Summer Cake
1. Crush the biscuits — uniform crumbs set into a firmer base. Use a food processor or a zip-lock bag and rolling pin. You want fine crumbs, not chunks. Chunks create air pockets that cause the base to crumble when sliced.
2. Mix crumbs with melted butter and sugar — the butter ratio determines how well the base holds. Stir until every crumb is coated. The mixture should clump when you press it between your fingers. If it doesn’t clump, add one more tablespoon of melted butter.
3. Press the base into an 8-inch (20cm) springform pan — even pressure prevents cracking. Use the flat bottom of a measuring cup to pack it down firmly. Press slightly up the sides to create a shallow wall. Refrigerate for 15 minutes while you prepare the filling.
4. Beat cream cheese until completely smooth — any lumps here stay in the final texture. Use a hand mixer or stand mixer on medium speed for about 90 seconds. Scrape down the bowl. The cream cheese must be at room temperature or it will not incorporate smoothly into the whipped cream.
5. In a separate bowl, whip the cold heavy cream with powdered sugar and vanilla to stiff peaks — cold cream whips faster and holds longer. This takes 3–4 minutes with a hand mixer. Stop when the cream holds a firm shape and the beaters leave defined tracks. Over-whipped cream turns grainy — pull it at stiff, not beyond.
6. Fold the whipped cream into the cream cheese in three additions — gentle folding preserves the air. Use a spatula, not the mixer. The mixture will look streaky after the first addition — that’s correct. By the third fold it should be uniform and thick.
7. Pour the filling over the chilled base and smooth the top — the center should look slightly domed, not flat. A small dome accounts for settling. Flat at this stage often means slightly sunken at the center after chilling.
8. Toss berries with honey and lemon juice, then arrange on top — the lemon juice keeps cut strawberries from oxidizing. Add the fruit just before serving, not before chilling, if you want clean color. Fruit set overnight on the cream will bleed into it — still edible, but the top loses definition.
9. Refrigerate for a minimum of 2 hours, ideally 4 — the filling firms from the outside in. At 2 hours the edges are set and sliceable. At 4 hours the center is fully firm. If you slice at 2 hours, use a sharp knife wiped clean between cuts.

Pro Tips for a Better Summer Cake
Use cold heavy cream straight from the refrigerator — warm cream won’t reach stiff peaks and the filling will be too soft to hold its shape after slicing.
Don’t skip pressing the base firmly — a loosely packed crumb base is the most common reason a summer cake falls apart on the plate.
If your cream cheese isn’t room temperature, microwave it for 15 seconds — not until soft, just until it loses its refrigerator chill; this prevents lumps without overheating it.
Add the fruit topping within 2 hours of serving — berries release juice over time, and excess moisture softens the cream layer underneath.
Run a thin knife around the pan edge before releasing the springform — if the filling has adhered to the sides, forcing the latch will crack the top.
Serving Suggestions
Serve with a shot of cold espresso — the bitterness offsets the sweetness of the cream layer in a way that water or juice doesn’t.
For a backyard gathering, cut slices in the pan and plate individually rather than transferring the whole cake — the filling is stable when cold but soft enough to shift on a warm day.
Pair with sliced peaches or mango in place of berries in late summer when stone fruits are at peak sweetness and berries begin to lose acidity.
Storage
Refrigerate covered with plastic wrap or a fitted lid for up to 3 days — the base softens slightly by day 2 but the flavor holds.
This summer cake freezes well — wrap individual slices tightly in plastic, then foil, and freeze for up to 4 weeks. Thaw overnight in the refrigerator, not at room temperature; thawing too quickly causes the cream layer to weep.
Do not store with the fruit topping already applied — the moisture from the berries accelerates softening of the cream layer.

Health & Nutrition
Approximate per serving (1 of 8): 310 calories, 24g fat, 22g carbohydrates, 4g protein
Swap heavy cream for full-fat coconut cream — the flavor shifts slightly tropical and the texture is marginally softer; works well with mango or pineapple topping
Replace cream cheese with whipped ricotta — reduces fat by roughly 30%, produces a slightly grainier texture that some people prefer for its lighter feel
Cut powdered sugar from 3 tbsp to 1.5 tbsp — works without structural change if the fruit topping is naturally sweet; if using tart berries like raspberries, the filling will taste noticeably less sweet
Use oat-based biscuits for the base — adds a small amount of fiber and produces a slightly chewier crust compared to standard graham crackers
Make This Summer Cake Tonight
You now have a no-oven summer cake that sets in the refrigerator and slices cleanly when cold — no baking, no cooling racks, no timing around a hot kitchen.
Try it this weekend and leave a rating below — it helps other readers find the recipe.
Related: If you want something with a baked base but similarly light filling, the Lemon Icebox Pie uses a comparable technique with a citrus curd layer that sets firm overnight — same logic, different flavor direction.
Frequently Asked Questions
Q: Can I freeze this summer cake? A: Yes, this summer cake freezes well for up to 4 weeks. Wrap individual slices in plastic wrap followed by aluminum foil. Thaw in the refrigerator overnight — avoid room-temperature thawing, which causes the cream layer to separate.
Q: What if I don’t have a springform pan? A: Use an 8×8 inch square baking dish lined with parchment paper with overhang on two sides. The overhang acts as handles to lift the cake out cleanly. Slices will be square rather than wedge-shaped.
Q: Can I make this ahead? A: Yes — make it up to 24 hours ahead without the fruit topping. Store covered in the refrigerator and add the berries within 2 hours of serving. Beyond 24 hours the base begins to soften noticeably.
Q: How do I adjust sweetness? A: Reduce powdered sugar in the cream layer to 1 tablespoon for a noticeably less sweet result. Increasing beyond 3 tablespoons does not add structure — it just makes the filling sweeter without changing texture.
Q: Can I use frozen berries instead of fresh? A: Frozen berries work only if fully thawed and patted dry before using — excess water from frozen fruit will pool on top of the cream layer within an hour. This summer cake holds up best with fresh fruit; if using frozen, serve immediately after adding the topping rather than letting it sit.
Have You Tried Our Recipe?
There are no reviews yet. Be the first one to write one.