
3 Ingredient No Bake Cheesecake (Simple Filling + Easy Crust)
Welcome to my kitchen! Today, I’m sharing my perfected 3 ingredient no bake cheesecake, a dessert that’s always the star of every gathering. I first discovered this recipe during a particularly hectic summer when I volunteered to bring dessert to a family barbecue but completely forgot until the morning of the event. With no time to bake and guests arriving in hours, I threw together cream cheese, sweetened condensed milk, and a graham cracker crust. The first attempt was good, but honestly a bit too soft.
After some experimenting, I discovered the secret to making it perfectly firm and sliceable – adding whipped cream for stability and giving it proper chilling time. Now it turns out better than any complicated cheesecake I’d ever made, and everyone thinks I spent hours on it!
This recipe is perfect for anyone who loves a simple cheesecake recipe and wants something incredibly easy, delicious, and impressive without turning on the oven. Whether you’re a complete beginner or an experienced baker looking for a shortcut, this easy no bake cheesecake delivers restaurant-quality results with minimal effort. The creamy, smooth texture combined with the buttery graham cracker crust creates pure magic in every bite.
What makes this quick cheesecake dessert so special is its versatility and reliability. You can dress it up with fresh berries and chocolate drizzle for an elegant dinner party, or keep it simple for a weeknight treat. The minimal ingredients cheesecake approach means you probably have everything you need in your kitchen right now. No fancy equipment, no complicated techniques, just a few main ingredients that come together to create something truly spectacular. I’ve also included optional gelatin instructions for those who want an extra-firm, perfectly sliceable cheesecake. Let’s dive in and see why this 3 ingredient no bake cheesecake will become your go-to dessert for every occasion!
Table of Contents
Quick Recipe Facts
Prep Time: 20 minutes
Cook Time: 0 minutes (no baking!)
Chill Time: 8 hours minimum (overnight is best)
Total Time: 8 hours 20 minutes
Servings: 8-10 slices
Difficulty: Beginner-friendly
Calories: ~380 per slice (approximate)
Friendly touch: This recipe is surprisingly quick and easy – perfect for busy afternoons when you need an impressive dessert without the stress! The hardest part is waiting for it to chill, but trust me, it’s worth every minute. Prep your ingredients for a smooth simple cheesecake recipe experience, and you’ll have this beauty assembled in under 25 minutes.
Ingredients
For this no bake cheesecake, you’ll need the following ingredients. The beauty of this recipe is its simplicity – just a few main components that work together perfectly. I’ve refined this recipe after many attempts to solve the “too soft” problem that many readers experience. The secret? Adding whipped cream for stability and structure. You can swap regular graham crackers with chocolate ones for a richer easy no bake cheesecake version, or use gluten-free crackers if needed. The full-fat cream cheese is essential here; it adds that rich, tangy flavor that makes your cheesecake taste absolutely decadent and luxurious.
For the Crust:
- 180 grams (2 cups) graham cracker crumbs – about 14 square graham crackers, finely crushed
- 60 grams (½ cup) white granulated sugar – adds sweetness to balance the buttery crust
- 85 grams (½ cup) unsalted butter, melted – brings everything together for that perfect crumbly texture
For the Filling (Base Recipe):
- 400 grams (16 oz or 2 packages) cream cheese, softened – must be full-fat and at true room temperature
- 300 grams (10.5 oz or ¾ can) sweetened condensed milk – this is your sweetener (Note: reduced amount for better texture)
- 240 ml (1 cup) heavy whipping cream, cold – THIS is the secret to perfect texture!
- 1 teaspoon vanilla extract – enhances the overall flavor beautifully
Optional Add-In for Extra-Firm Texture:
- 1 tablespoon (7g) unflavored gelatin powder – for those who want perfectly sliceable, firm cheesecake
- 3 tablespoons cold water – to bloom the gelatin
Ingredient Notes:
The updated ratio is key to success! I’ve reduced the sweetened condensed milk slightly (from a full can to ¾ can) and added whipped cream, which creates a lighter, more stable texture that sets beautifully. The whipped cream acts as a stabilizer and prevents that watery, too-soft texture many people experience with the basic 2-ingredient filling.
If you want an even firmer cheesecake that slices like a traditional baked version, use the gelatin option. It’s completely optional, but it guarantees perfect slices every time. Some people like to add a splash of lemon juice for extra brightness, but I find the classic version absolutely perfect. This minimal ingredients cheesecake technique has been tested dozens of times to ensure foolproof results!
Kitchen Tools You’ll Need
To make this delicious quick cheesecake dessert, you’ll need some basic kitchen tools that make the process smooth and enjoyable. The right equipment ensures your cheesecake turns out perfectly every time. Don’t worry if you don’t have everything on this list – you can definitely improvise with what you have!
Essential Tools:
- 9-inch springform pan – the removable bottom makes serving so much easier
- Large mixing bowl – for whipping the cream cheese filling
- Medium mixing bowl – for whipping the heavy cream separately
- Electric hand mixer or stand mixer – creates that perfectly smooth, fluffy texture
- Small bowl – for preparing the crust (and gelatin if using)
- Food processor or rolling pin – to crush graham crackers into fine crumbs
- Rubber spatula – for scraping down the bowl and folding gently
- Plastic wrap or aluminum foil – to cover while chilling
- Measuring cups and spoons – accuracy matters for the perfect texture
Nice to Have:
- Offset spatula – makes smoothing the top beautifully easy
- Parchment paper – line the bottom of your pan for extra insurance
- Small saucepan – if using gelatin option
Having the right kitchen tools lets you follow this simple cheesecake recipe without any frustration. Whether you’re making it for a special celebration or just because you’re craving something sweet, these tools make the process absolutely foolproof. I’ve made this easy no bake cheesecake dozens of times, and good prep makes all the difference!
Instructions
Making this cheesecake is incredibly straightforward when you follow the proper technique. These steps have been refined to prevent the soft, watery texture issue. The key is preparing components separately, then gently folding them together – this creates the perfect stability and texture.
Step 1: Prepare Your Pan and Crust First
Start by preparing your 9-inch springform pan. Line the bottom with parchment paper cut to fit perfectly – this helps your easy no bake cheesecake release cleanly when it’s time to serve. I also like to lightly grease the sides with a bit of butter or cooking spray.
In a medium bowl, combine your graham cracker crumbs and sugar, mixing them together evenly. If you’re crushing whole graham crackers, use a food processor for the finest crumbs, or place them in a sealed plastic bag and crush them with a rolling pin. Pour in the melted butter and stir with a fork until the mixture resembles wet sand. Every crumb should be coated with butter.
Press this mixture firmly into the bottom of your prepared springform pan. Use the bottom of a measuring cup or glass to pack it down really well – you want it compact and even. Bring the crust slightly up the sides, about half an inch, for that classic cheesecake look. Pop this into the refrigerator while you prepare the filling. Chilling the crust for at least 15-20 minutes helps it set properly and creates a sturdy base for your simple cheesecake recipe.
Step 2: Prepare Gelatin (Optional but Recommended for Firm Texture)
If using gelatin: In a small bowl, sprinkle the gelatin powder over 3 tablespoons of cold water. Let it sit for 5 minutes to bloom – it will look spongy and thick. After blooming, gently heat it in the microwave for 10-15 seconds (or over a double boiler) just until the gelatin dissolves into a clear liquid. Do not overheat. Set aside to cool to lukewarm, not hot. This step ensures your cheesecake will slice perfectly without being rubbery.
If not using gelatin: Skip to Step 3. Your cheesecake will still set nicely thanks to the whipped cream, but will be slightly softer (still delicious!).
Step 3: Beat the Cream Cheese Until Perfectly Smooth
Take your softened cream cheese (it should be genuinely soft – you should be able to easily press your finger into it) and place it in a large mixing bowl. Important: Cold cream cheese is the #1 cause of lumpy filling, so don’t rush this step.
Using an electric hand mixer on medium-high speed, beat the cream cheese for about 3 to 5 minutes until it’s completely smooth, fluffy, and lighter in color. Scrape down the sides of the bowl at least twice during this process to ensure everything gets incorporated. The cream cheese should look almost whipped and have increased in volume. No lumps allowed!
Step 4: Add Sweetened Condensed Milk and Vanilla
With the mixer on low speed, slowly pour in the sweetened condensed milk and vanilla extract. Once it’s all added, increase the speed to medium and beat for another 1-2 minutes until the mixture is silky smooth and completely combined. Stop mixing as soon as it’s smooth – don’t overbeat at this stage.
If using gelatin: Make sure your gelatin mixture is lukewarm (not hot!). With the mixer on low speed, drizzle in the dissolved gelatin and mix for just 30 seconds until incorporated. Set this bowl aside.
Step 5: Whip the Heavy Cream Separately
In a separate clean, cold mixing bowl, pour the cold heavy whipping cream. Using clean beaters, whip the cream on medium-high speed until stiff peaks form – this takes about 3-4 minutes. You’ll know it’s ready when you lift the beaters and the cream holds its shape in firm peaks. Don’t overwhip or it will become grainy.
This whipped cream is your secret weapon for a stable, perfectly textured quick cheesecake dessert that doesn’t turn out watery!
Step 6: Gently Fold Everything Together
Now comes the crucial step: Take about one-third of the whipped cream and add it to your cream cheese mixture. Using a rubber spatula, gently fold it in with smooth, sweeping motions from the bottom of the bowl up and over. This lightens the cream cheese mixture.
Add the remaining whipped cream and continue folding gently until just combined and no white streaks remain. Do not stir vigorously or use the mixer – gentle folding preserves the air in the whipped cream, which helps the cheesecake set properly. The mixture should be light, fluffy, and thick.
Step 7: Assemble Your Cheesecake
Remove your chilled crust from the refrigerator. Pour the cream cheese filling over the crust, using your rubber spatula to spread it evenly across the entire surface. Smooth the top gently – an offset spatula works beautifully for this, but the back of a spoon works great too. Don’t tap the pan (this can deflate the whipped cream).
Step 8: Chill and Set Properly
Cover your easy no bake cheesecake with plastic wrap, making sure it doesn’t touch the surface of the filling. Place it in the refrigerator and let it chill for at least 8 hours minimum, but overnight (12+ hours) is truly best.
This is critical: 4-6 hours is NOT enough for the filling to set properly, which is why many people experience soft, watery results. The cheesecake needs this full time to firm up and develop its perfect, sliceable consistency. Resist checking on it constantly – every time you open the fridge, you let in warm air that extends setting time.
Step 9: Serve Perfectly
When you’re ready to serve, run a thin knife dipped in hot water around the edges of the pan before releasing the springform. This prevents any sticking. Remove the outer ring carefully, and voila! You have a gorgeous cheesecake ready to impress. Slice with a sharp knife dipped in hot water and wiped clean between cuts for the prettiest slices.

Pro Tips
Tip 1: Room Temperature Cream Cheese is NON-NEGOTIABLE
This is the most important tip! Don’t skip bringing your cream cheese to true room temperature before mixing – it should be soft enough that you can easily press your finger into it and leave an indentation. Cold or semi-cold cream cheese creates lumps that are nearly impossible to smooth out, even with extensive mixing. I usually take mine out about 60-90 minutes before I plan to start. This simple step ensures your simple cheesecake recipe turns out silky smooth every single time. If you’re in a hurry, cut the cream cheese into small cubes and let it sit at room temperature – it’ll soften faster.
Tip 2: Don’t Skip the Whipped Cream
Many “3 ingredient” recipes skip this step, which is why they turn out too soft and watery. The whipped cream adds structure, lightness, and stability to your minimal ingredients cheesecake. It’s the difference between a cheesecake that disappoints and one that impresses. Trust me on this one!
Tip 3: Use the Gelatin Option for Guaranteed Perfect Slices
If you’ve had issues with soft filling in the past, or if you’re making this cheesecake for a special occasion where presentation matters, use the gelatin. It’s foolproof and ensures your cheesecake will slice cleanly every time. Just make sure the gelatin is cooled to lukewarm before adding it to the cream cheese mixture – hot gelatin can deflate your filling.
Tip 4: Quality Ingredients Make a Difference
Use full-fat, high-quality cream cheese like Philadelphia brand. Reduced-fat or store brands often have stabilizers and gums that can affect the texture of your quick cheesecake dessert. Since there are only a few main ingredients, each one needs to be the best quality you can find. The difference is absolutely noticeable in the final result, especially the creaminess.
Tip 5: Pack That Crust Firmly
When pressing your graham cracker crust into the pan, really pack it down hard. Use the bottom of a flat measuring cup or glass and press with some muscle. A loosely packed crust will crumble and fall apart when you slice the cheesecake. A firmly packed crust stays together beautifully and provides the perfect textural contrast to the creamy filling.
Tip 6: Fold, Don’t Stir
Once you add the whipped cream to the cream cheese mixture, use gentle folding motions with a rubber spatula. Never use the mixer at this stage! Aggressive stirring or mixing will deflate the whipped cream and remove all the air that helps stabilize your simple cheesecake recipe. Think of it like folding egg whites into a soufflé – gentle is key.
Tip 7: Give It the Full Chilling Time
This is where most people go wrong! Resist the temptation to cut into your cheesecake after just 4-5 hours. It needs a full 8 hours minimum, but 12+ hours (overnight) is ideal for the best texture and easiest slicing. The filling continues to firm up throughout the chilling process. Every time you open the refrigerator to check on it, you let warm air in, which extends the setting time. Trust the process and let it chill undisturbed.
Tip 8: Clean Knife for Clean Slices
When it’s time to slice your easy no bake cheesecake, use a sharp knife and wipe it completely clean with a damp cloth between each cut. This gives you those beautiful, professional-looking slices with clean edges. Dip the knife in hot water, dry it off thoroughly, then slice – absolute game changer for presentation!
Serving Suggestions
Your no bake cheesecake is incredibly versatile when it comes to serving options. I love serving it chilled, straight from the refrigerator, when it’s at its firmest and most refreshing. The cool, creamy texture is absolutely divine, especially on warm days.
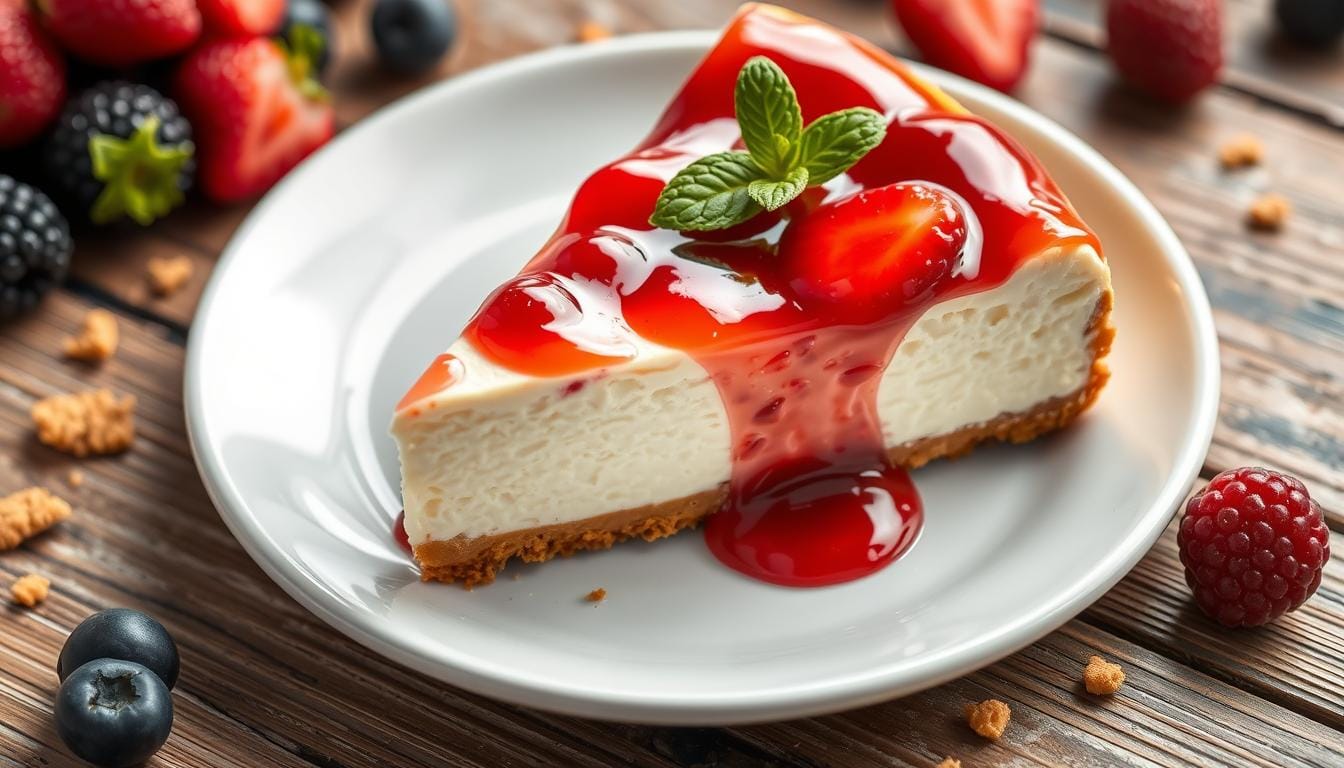
For a classic presentation, top each slice with fresh strawberries, blueberries, or a mixed berry compote. The tartness of fresh berries cuts through the richness of the quick cheesecake dessert perfectly. You can also drizzle some chocolate ganache, caramel sauce, or even a simple raspberry coulis over the top for an elegant touch that makes this simple cheesecake recipe look like it came from a fancy bakery.
If you’re serving this for a special occasion, consider pairing it with a dollop of freshly whipped cream on the side and a sprig of fresh mint for color. A cup of strong coffee or espresso alongside brings out the sweetness beautifully. For a more indulgent experience, add a scoop of vanilla ice cream next to your slice – the contrast between cold ice cream and creamy cheesecake is absolutely heavenly.
During the holidays, I like to top this minimal ingredients cheesecake with seasonal fruits like pomegranate seeds for Christmas or fresh peaches in summer. Lemon curd also makes a beautiful topping. These serving ideas elevate your dessert experience and make even a simple weeknight dinner feel special. The beauty of this recipe is that it’s equally at home at an elegant dinner party or a casual family gathering.
Storage & Reheating
Leftover 3 ingredient no bake cheesecake stays incredibly fresh when stored properly, though I’ll be honest – there usually aren’t many leftovers! Once your cheesecake has been sliced, cover the remaining portion tightly with plastic wrap or transfer individual slices to an airtight container. Store in the refrigerator for up to 5 days, though it truly tastes best within the first 3 days.
The refrigerator is the best place to keep this easy no bake cheesecake. Unlike some desserts, you don’t want to leave it at room temperature for more than 15-20 minutes before serving, as the filling can become too soft. The cool temperature maintains that perfect, sliceable texture that makes each bite so satisfying.
If you want to freeze your cheesecake for longer storage, it absolutely can be done! Wrap it tightly in several layers of plastic wrap, then cover with aluminum foil to prevent freezer burn. Properly wrapped, your simple cheesecake recipe will last in the freezer for up to 2 months. When you’re ready to enjoy it, transfer it to the refrigerator and let it thaw slowly overnight. Never thaw it at room temperature or in the microwave, as this can cause the texture to become watery or grainy.
One pro tip: freeze individual slices on a parchment-lined baking sheet first, then wrap each slice separately once frozen. This way, you can grab just one piece whenever a craving hits without having to defrost the entire cheesecake. It’s the perfect make-ahead dessert strategy for busy households!

Health & Nutrition Info
While this cheesecake is definitely an indulgent treat, there are ways to make it slightly lighter if you’re watching your intake. Each standard slice contains approximately 380 calories, depending on how you cut it and what toppings you add. The main sources of calories come from the cream cheese, sweetened condensed milk, and whipped cream, all of which provide that rich, satisfying taste we all love.
If you want to create a healthier version of this minimal ingredients cheesecake, you can use reduced-fat cream cheese (though I recommend using at least one package of full-fat for texture), or experiment with Greek yogurt mixed with cream cheese for a protein boost. Some people also use sugar-free sweetened condensed milk, though I find it affects the final texture slightly. Keep in mind that using reduced-fat ingredients may require you to use the gelatin option for proper setting.
For those with dietary restrictions, this recipe can be adapted! Use gluten-free graham crackers for the crust to make it celiac-friendly. For a dairy-free version, you can try dairy-free cream cheese alternatives and coconut whipped cream, though the texture will be different from the traditional recipe. Vegan sweetened condensed coconut milk works surprisingly well as a substitute.
The graham cracker crust can be modified too – try using crushed nuts like almonds or pecans mixed with coconut oil and a touch of honey for a grain-free, lower-sugar option. You can also reduce the sugar in the crust by half without significantly affecting the taste. This healthier quick cheesecake dessert option is perfect for weekend treats when you want to indulge but keep things a bit more balanced.
One serving provides calcium from the cream cheese, and while it’s certainly a dessert rather than health food, enjoying it in moderation as part of a balanced diet is absolutely fine. Life is all about balance, and sometimes a slice of creamy, delicious cheesecake is exactly what the soul needs!
Conclusion
There you have it – the ultimate 3 ingredient no bake cheesecake with all the secrets to making it perfectly firm and sliceable every time! This easy no bake cheesecake has saved me countless times when I needed something impressive but didn’t have hours to spend in the kitchen. The beauty of this simple cheesecake recipe lies in its simplicity and foolproof nature – even if you’ve never made a dessert from scratch before, you can absolutely nail this one.
After hearing from so many readers about soft, watery results, I tested and refined this recipe until it was absolutely perfect. The addition of whipped cream and the proper chilling time make all the difference between a disappointing dessert and one that gets rave reviews every single time. Whether you’re making it for a birthday celebration, a holiday gathering, a potluck dinner, or just because it’s Tuesday and you deserve something sweet, this quick cheesecake dessert delivers every single time.
The creamy texture, the buttery crust, and the endless topping possibilities make it a dessert that never gets boring. I’ve made this minimal ingredients cheesecake dozens of times over the years, and I still get excited every time I pull it out of the refrigerator. The gelatin option ensures you’ll get perfect slices, while the whipped cream version stays delightfully creamy yet stable.
I’d love to hear how your cheesecake turns out! Try this no bake cheesecake and let me know in the comments below. Did you use the gelatin option? What toppings did you choose? Did you try any of the flavor variations?
FAQ
Can I freeze this 3 ingredient no bake cheesecake?
Yes, absolutely! Your cheesecake can be frozen for up to 2 months when properly wrapped. Wrap it tightly in several layers of plastic wrap, then cover with aluminum foil to prevent freezer burn. Thaw it slowly in the refrigerator overnight for the best results. The texture stays remarkably creamy when you follow proper freezing procedures. If you used the gelatin option, it freezes even better!
What if I don’t have a springform pan?
No worries! You can use a regular 9-inch pie dish or even a square baking pan for this easy no bake cheesecake. Line it with parchment paper with some overhang on the sides so you can lift the entire cheesecake out when it’s set. While it won’t look quite as tall and elegant, it’ll taste just as amazing. I’ve even made individual servings in small mason jars – they’re adorable and perfect for portion control!
Can I make this ahead of time?
This simple cheesecake recipe is actually better when made ahead! Make it 1-2 days before you need it and keep it covered in the refrigerator. The flavors develop and the texture becomes even more perfect as it sits. It’s an ideal make-ahead dessert for parties and gatherings, which means less stress on the day of your event. Just remember to give it the full 8+ hours to set properly.
How can I adjust the sweetness?
The sweetened condensed milk provides most of the sweetness in this minimal ingredients cheesecake. I’ve already reduced it from the full can to ¾ can for better texture and less intense sweetness. If you want it even less sweet, you can reduce it to ⅔ can (about 9 oz), but be aware this may require the gelatin option for proper setting. You can also balance the sweetness by serving it with tart berries, a squeeze of fresh lemon juice on top, or unsweetened whipped cream. The graham cracker crust sugar can be reduced by half without significantly impacting the final dessert.
Why is my filling too soft or watery?
This is the most common issue! Here are the main causes:
- Not enough chilling time – You need a full 8 hours minimum, preferably overnight. 4-6 hours is not enough!
- Skipped the whipped cream – This is essential for proper texture and stability
- Cold cream cheese – Room temperature cream cheese is crucial for smooth, even texture
- Didn’t fold gently – Overmixing deflates the whipped cream and removes stability
- Wrong ratio – Make sure you’re using ¾ can of condensed milk (300g), not the full can
If you follow this updated recipe exactly, especially using the whipped cream and proper chilling time, your quick cheesecake dessert will set perfectly!
Do I have to use gelatin?
No, the gelatin is completely optional! The whipped cream version will set nicely on its own with proper chilling time (8+ hours). Use gelatin if you want an extra-firm, perfectly sliceable cheesecake that holds up at room temperature a bit longer, or if you’re serving it for a special occasion where presentation is key. Both versions are delicious – it just depends on your preference!
Can I use a different type of crust?
Definitely! While graham crackers are traditional, you can use chocolate graham crackers, vanilla wafers, Oreos (scrape out the filling first), or even shortbread cookies. For a gluten-free version, use gluten-free graham crackers or make a nut-based crust with ground almonds or pecans mixed with melted butter. The possibilities are endless for your simple cheesecake recipe!
How do I get clean slices?
The secret to beautiful slices is using a sharp knife dipped in hot water and wiped completely clean between each cut. This prevents the filling from sticking to the knife and dragging. Run a thin knife around the edges before releasing the springform pan, too. Make sure your cheesecake is fully chilled (8+ hours) before slicing – this makes a huge difference. These simple tricks make your easy no bake cheesecake look professionally done.
Can I add eggs to this recipe?
This no bake cheesecake is designed specifically without eggs, which is why it doesn’t need baking! Adding eggs would fundamentally change the recipe and require baking to cook them safely. The beauty of this recipe is its simplicity and the fact that no oven is needed. The whipped cream and optional gelatin provide all the structure you need without eggs. If you’re looking for a traditional baked cheesecake, that would be an entirely different recipe.
What’s the best way to prevent the filling from being too soft?
Follow these key steps:
- Use the whipped cream as directed (don’t skip this!)
- Fold gently – never use the mixer after adding whipped cream
- Chill for the full 8+ hours minimum
- Use room temperature cream cheese to avoid lumps
- Consider using gelatin if you want guaranteed firm results
- Don’t open the fridge constantly while it’s setting
This updated recipe was specifically developed to solve the soft filling problem. Follow it exactly and you’ll have perfect results!
How long does this cheesecake last?
Your 3 ingredient no bake cheesecake will stay fresh in the refrigerator for up to 5 days when properly covered. Always store it in an airtight container or wrapped tightly with plastic wrap. The texture actually improves slightly over the first day or two as the flavors meld together beautifully. After 5 days, the crust may start to soften from the moisture in the filling, so it’s best enjoyed within that timeframe.
Have You Tried Our Recipe?
There are no reviews yet. Be the first one to write one.